 English
- •
- lemmy.ca
- •
- 6d
- •

Previously:

https://en.wikipedia.org/wiki/Miraculous_Medal
- @Brutticus@lemm.ee
- •
- 11d
- •
Oh boy Fedi, do I have a weird one.
Ive posted here a few times regarding my basement build, and one of the handymen noted that if I am not going to cover up my ceiling, I have two exposed I beams. One runs through the kitchen, and one through a bedroom (mine). We were talking about mounting a spice rack, and he said I could mount a piece of wood on to an I beam trolly.
These things are cheap, and they are strong. What kind of fuckery can I get up to with them? Especially one in my bedroom? Is there anything ceiling mounted you just wish you could slide across the room, and back again? I'm envisioning something I can collapse against the wall.
Is this just insane?

This is clever. But in a way, it's also shifting the environmental impact from these bottle caps. I can't imagine under which conditions the birds' may be a problem (e.g. getting too much food). Maybe someone with better knowledge on these species can tell if there could be a downside (no matter how improbable, just the risk of X). Such risk may include the interaction through second or third organisms (e.g. lack of seed spread, abundance of parasitic prokaryotr, etc.)
Biological question aside, anyway... This is so cool! I'd like to try building one myself ;)
 English
- •
- slrpnk.net
- •
- 1M
- •
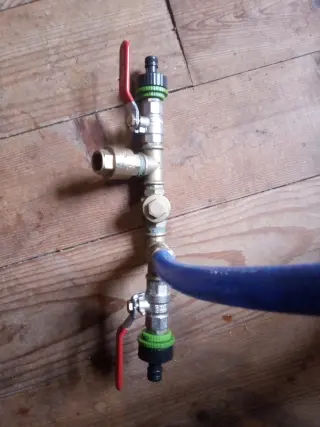
A couple of years ago I built two ram pumps and installed them in the stream near my house. They pumped water for the garden for a few months during spring and summer. I'm okay with the fact that the pumps are just useful during part of the year, but didn't really like damming up the entire stream for my installation, seemed rude towards wildlife.
So this year I returned with a longer tube and just took the water from further upstream. I have only about 70cm head. I haven't really measured the height I'm getting, but it's more than the first year and enough for what I want to do.
My installation in the stream is very simple: fence post hammered/wedged into the stream bed, pump tied to it with wire. Everything wobbles a tiny bit. Might return and solidify that later, but I love it when stuff is so simple that I can just throw it into the stream and it works. After a while of pumping by hand it just runs. Variations in water height might stop it as it sits low in the water. Will report back tomorrow.
This is for a reservoir IBC and washing tank outside the kitchen. I'm thinking about adding a solar heating panel in there as well.
The image is of a smaller kid-sized pump that I want to turn into a demonstration model to take to markets and fairs.

It was even the same brand. I love when hoarding materials pays back.


Something neat I've discovered - you can repost the content of your [movim blog](https://movim.slrpnk.net/blog/jacobcoffinwrites%40slrpnk.net) straight into a lemmy post and it's all compatible, uses the same markup. I'll repost all this to imgur as a backup at some point but for now this is awesome.

This was an earlier project on my make-everything-from-junk adventure. I've actually built two arcade cabinets - the first with the goal of using only secondhand stuff, sort of sequestering various junk into something that would be around for awhile, and eventually gave it away on our local Buy Nothing -type group. It was unfortunately very poorly documented, I don't have many pictures of it.
This second one was a gift/reason to hang around in the workshop building something with a friend. They'd seen the first one, and we got talking about building an arcade cabinet custom for them. I like projects that cross a few domains, woodworking, painting, electrical, etc, and I really like reusing materials. Ad I love having a reason to hang around working on projects with friends, so I was excited.
I really like the [archival efforts around old arcade cabs](https://arcadeblogger.com/category/restoration/), but I generally think of new custom-built arcade cabinets as being kinda wasteful. They use lots of new material, particle board, etc, and take up lots of space, often for a luxury item that doesn't end up getting used very much.
But playing retro games was actually already a big part of this friend's mental health routine so I knew they'd use it - and I was confident I could find most if not all the material secondhand, which would save them a lot of money. (In the end, we did use one panel of storebought particleboard for the front plate/door just to get it finished. Otherwise, aside from the buttons and raspberry pi, we still managed to make it all from old stuff.)
I started with what we already had: various 2"x4" and 1"x2" boards, some particleboard and plywood cut to the dimensions of the previous cabinet which could work as shelves, and most of the particleboard from a big upright storage cabinet which would be perfect for the sides.
A year or two earlier, I'd spotted it disassembled on trash day on my way to work. I hate to pass up good material so I quickly hauled it home before getting back into my routine. When a different friend really wanted to carve pumpkins during the COVID times, I took the sides of the cabinet, screwed on four table legs I got from metal recycling and set it up as a long table on our porch.
We used that table for quite awhile, as a simple workbench, and a side table at friendsgiving.
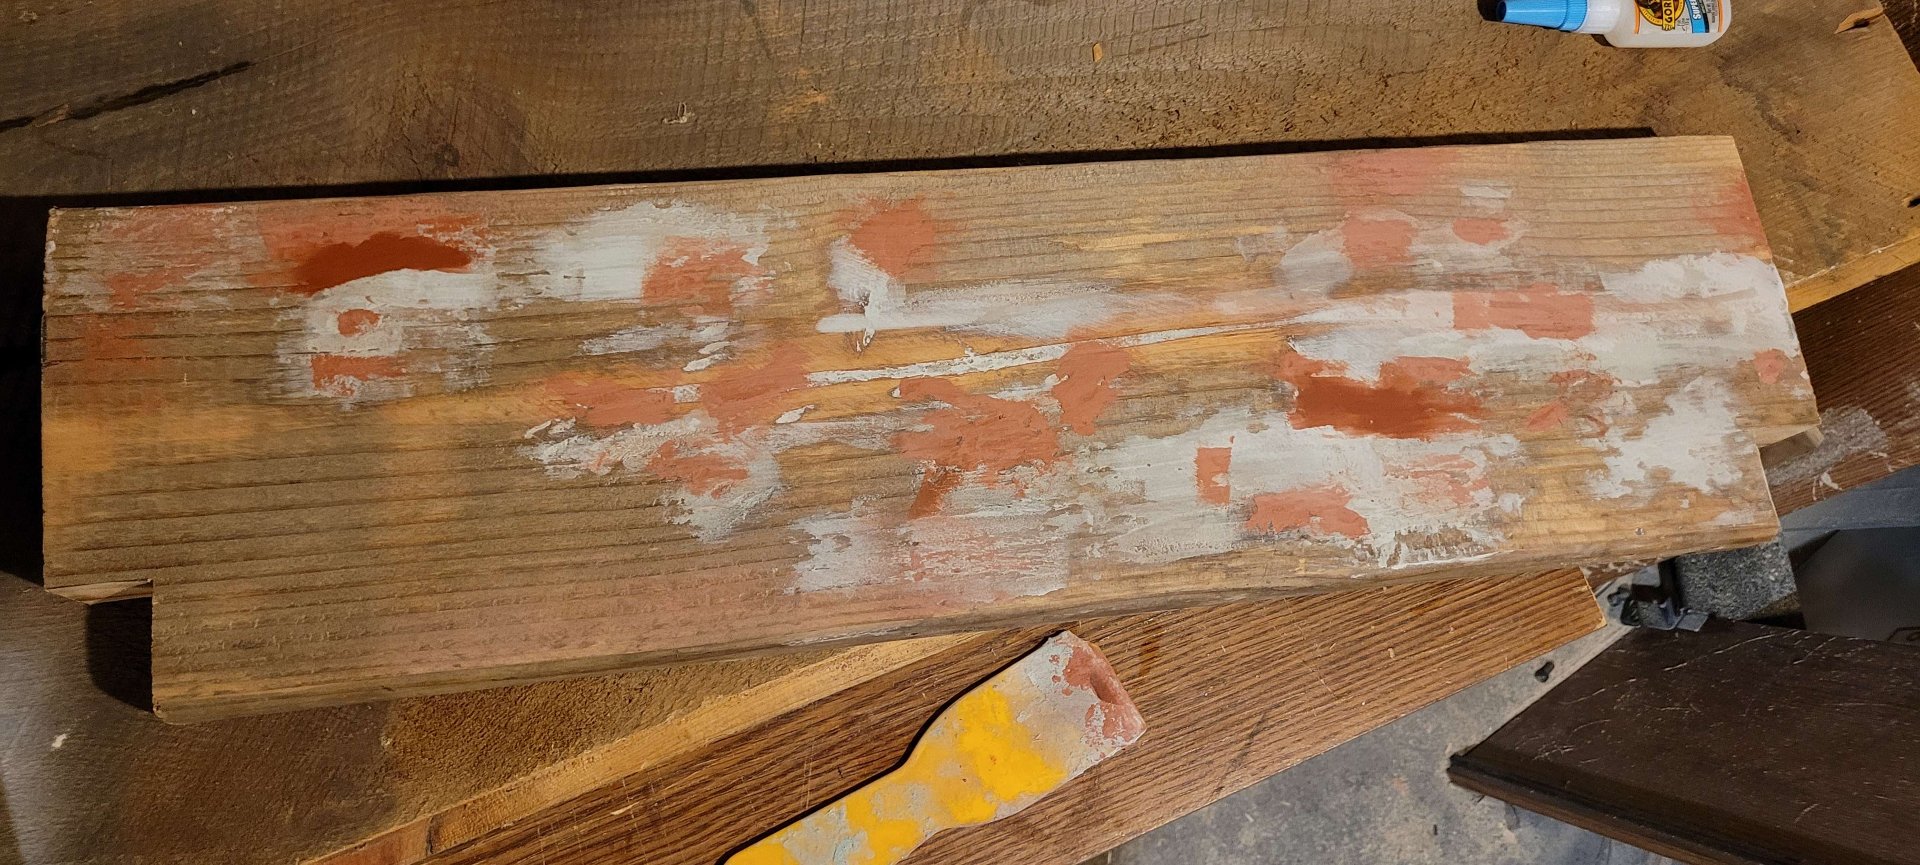
The pieces I'd used as a tabletop were just about perfect, a good height and depth, if you stood them on end. Unfortunately some fool had driven a bunch of screws into them, but that's what bondo is for.
Maybe it seems counterintuitive to start with materials rather than a design, but that's a big part of how I've always made things. I take an inventory of what I have, figure out how it can go together, figure out what kind of designs we can make with that, and work out a list of what else we'll need. I should note we also already had a TV - it belonged to my friend and it was important to them that we use it since it had no input lag (apparently the TV I got secondhand for the previous cabinet did, and that was a problem). So we knew the measurements there and it was compatible with what we had. Maybe it's just where I am, but I've found TVs of an appropriate size for an arcade cab screen to be absurdly easy to get, either from Buy Nothing or my local swap shop.
We now knew the upper limit on the height of the cabinet (as set by the cabinet/table pieces) and the width we'd probably use (based on the shelf pieces). Those were our constraints, so we started talking requirements. My friend is very tall, tall enough that on my more traditionally-shaped arcade cab, the marquee/roof blocks their view and they had to hunch forward to see the screen. The control panel was too low, making the posture problems worse. This would have to be taller in order for it to be comfortable. They wanted to be able to use it at parties, so the screen couldn't be recessed too far into the cabinet (either we'd have to cut the sides away like a traditional arcade cabinet (difficult to get that just right, likely we'd mess up the plastic cladding on the particleboard) or it'd have to be close to the front. They also wanted it to be sturdy. Really sturdy. I really enjoy overengineering things, so I was looking forward to that part.
My first suggestion was that we do something based on this [Gravitar 'cabaret' cabinet prototype](https://arcadeblogger.com/2022/04/17/atari-gravitar-cabaret-cocktail-cabinets/).
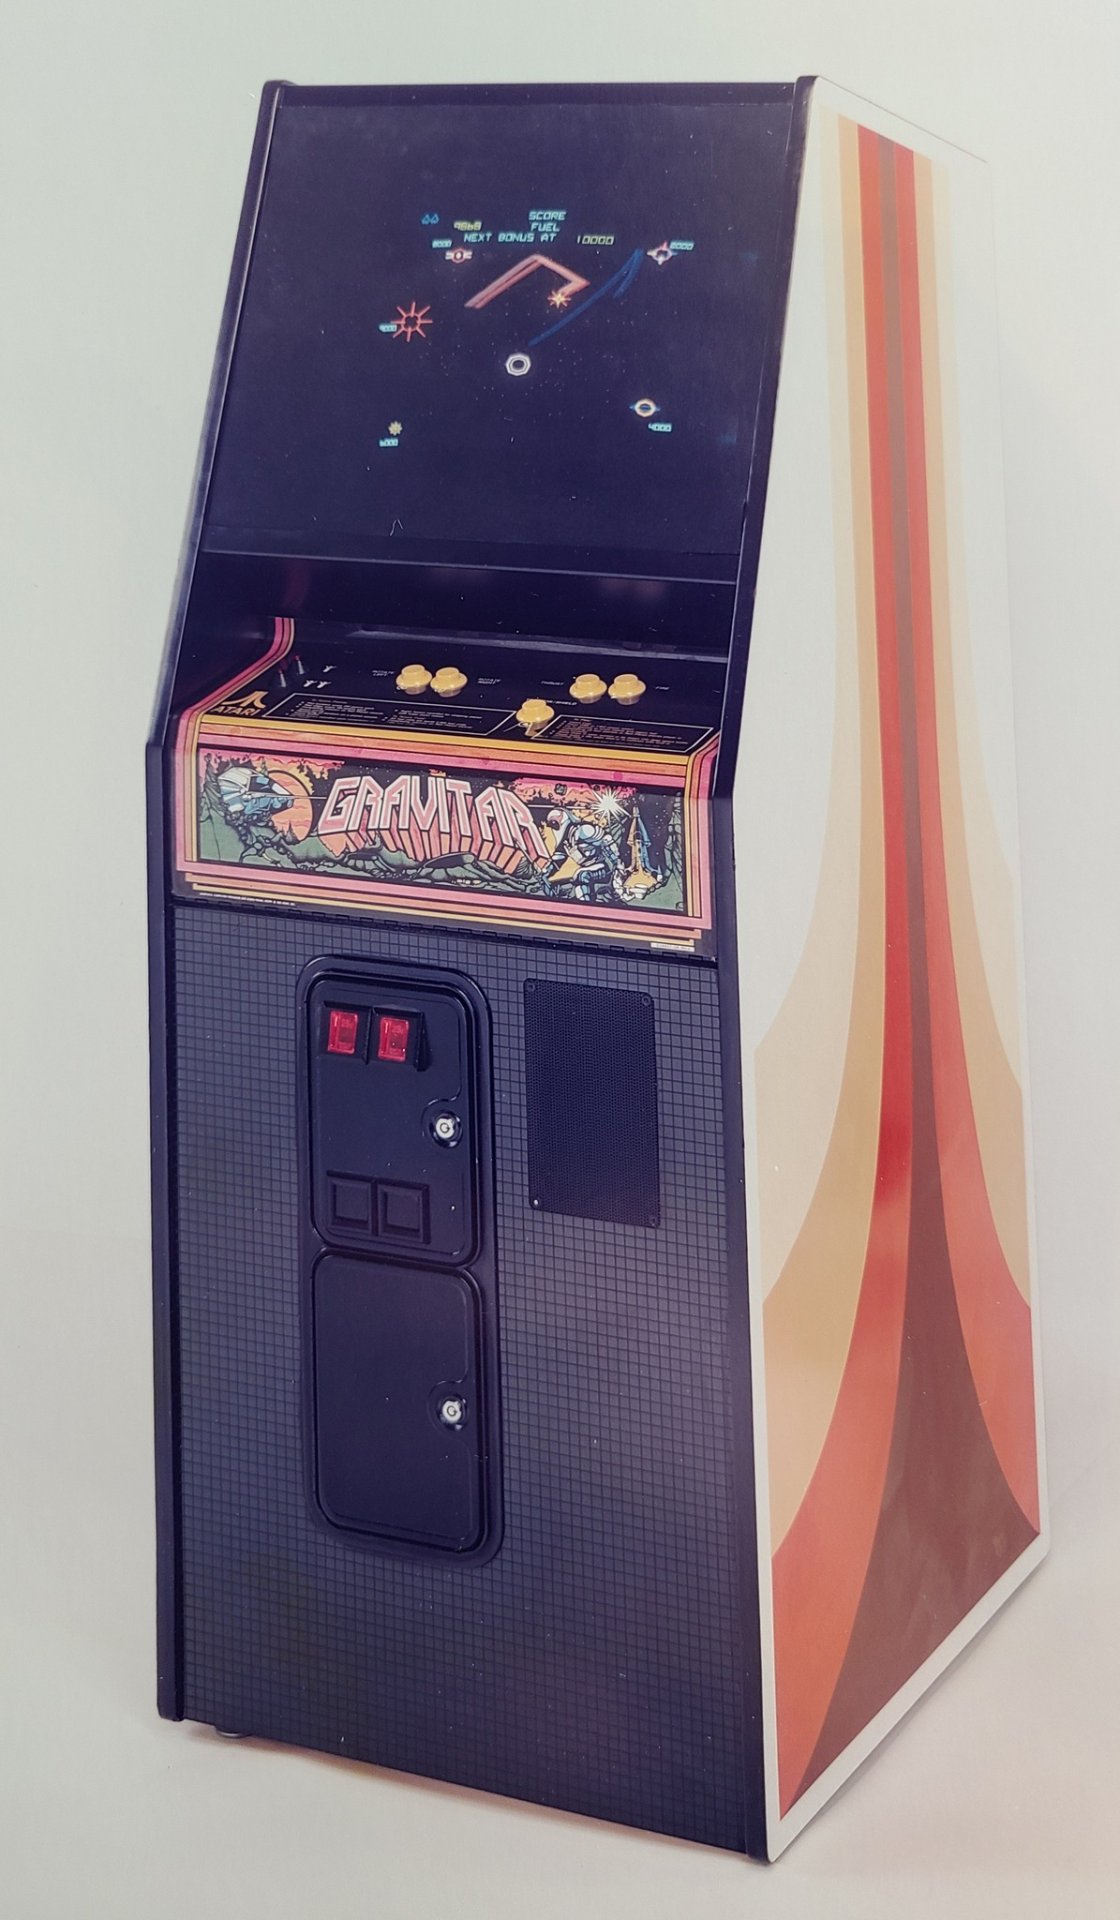
I had a few reasons for this: the marquee was below the screen, so the screen and controls could be as high as possible. The screen was closer to the front, so it would be easy for spectators or groups of players to see it from an angle, and the overall adjustments to our side panels would be aggressively simple. Two straight line cuts at a matching angle, that I could do.
We talked design ideas a bit, as now was the time. We could do a specific game, or something generic (although I've always found the mame and other generic all-videogames themes to be really uninteresting, personally). Perhaps because we were basing our design on an abandoned prototype, they decided to aim for "like we found some weird pirate arcade machine out of time" and they picked the theme 'goblin dive bar' based on our shared love of warhammer.
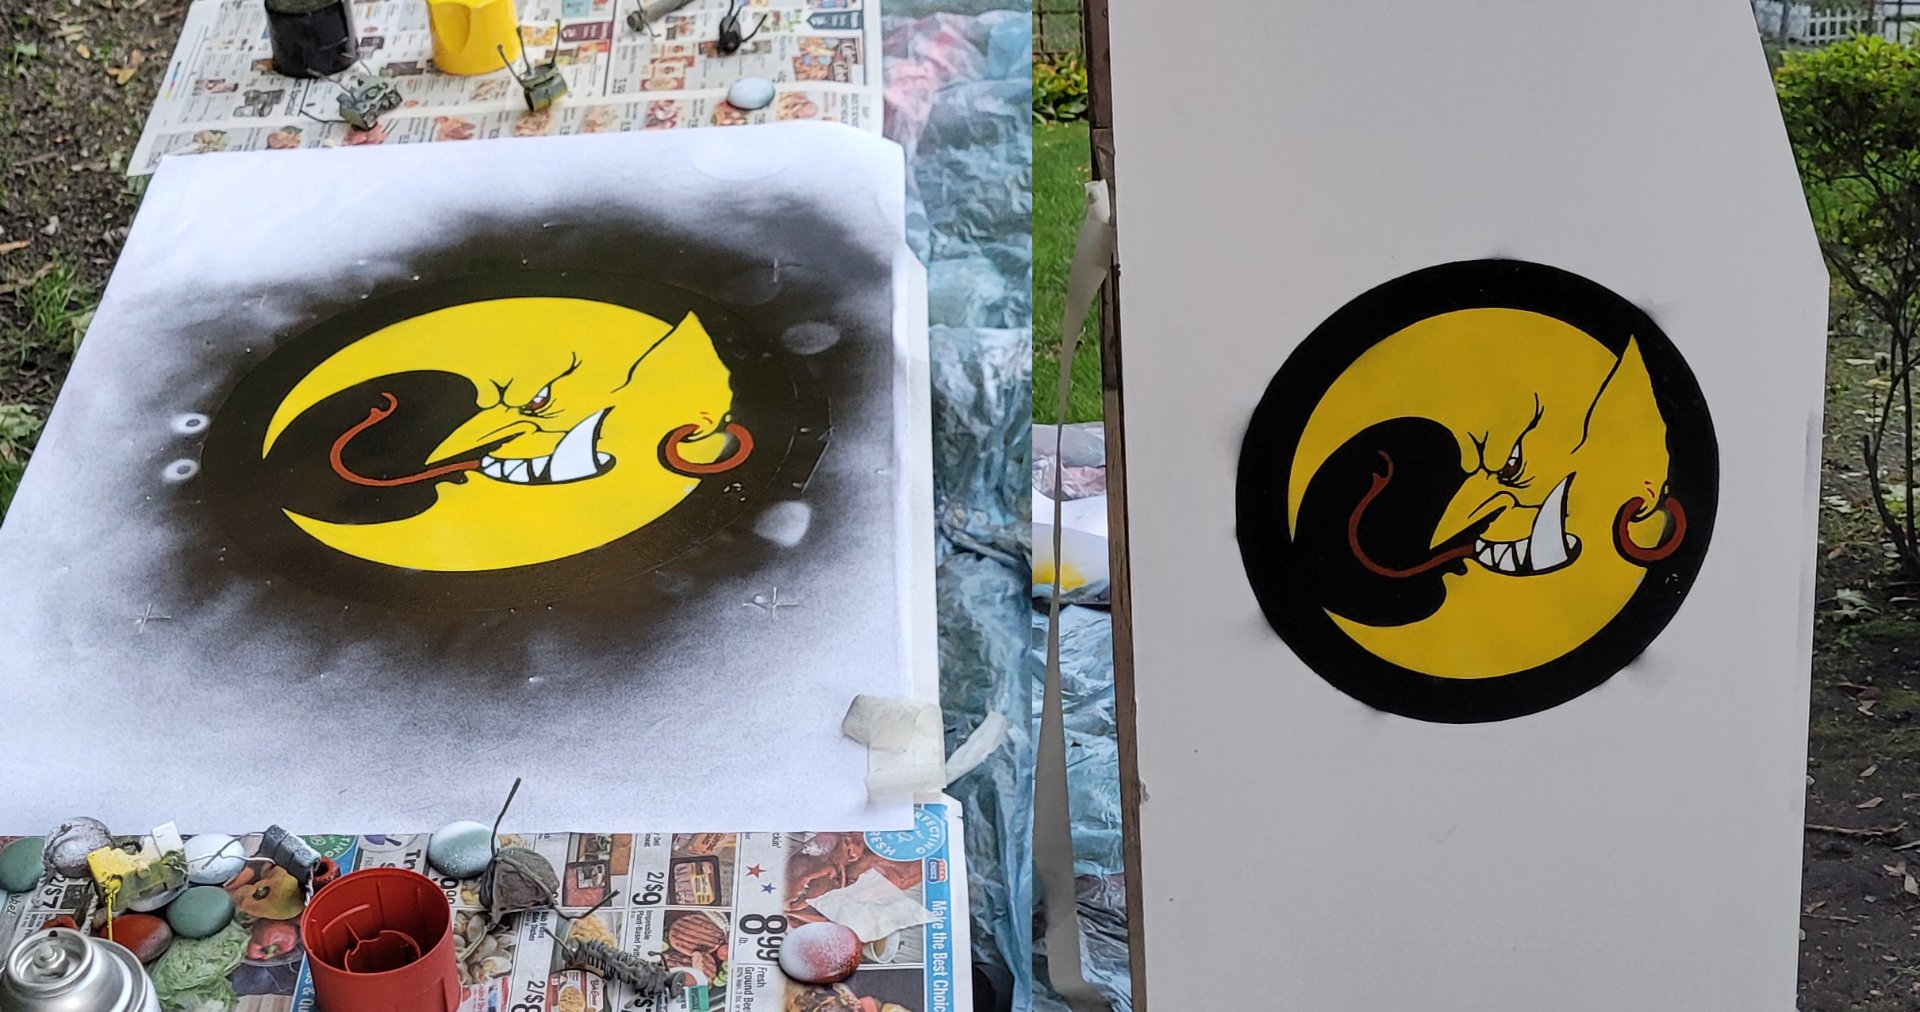
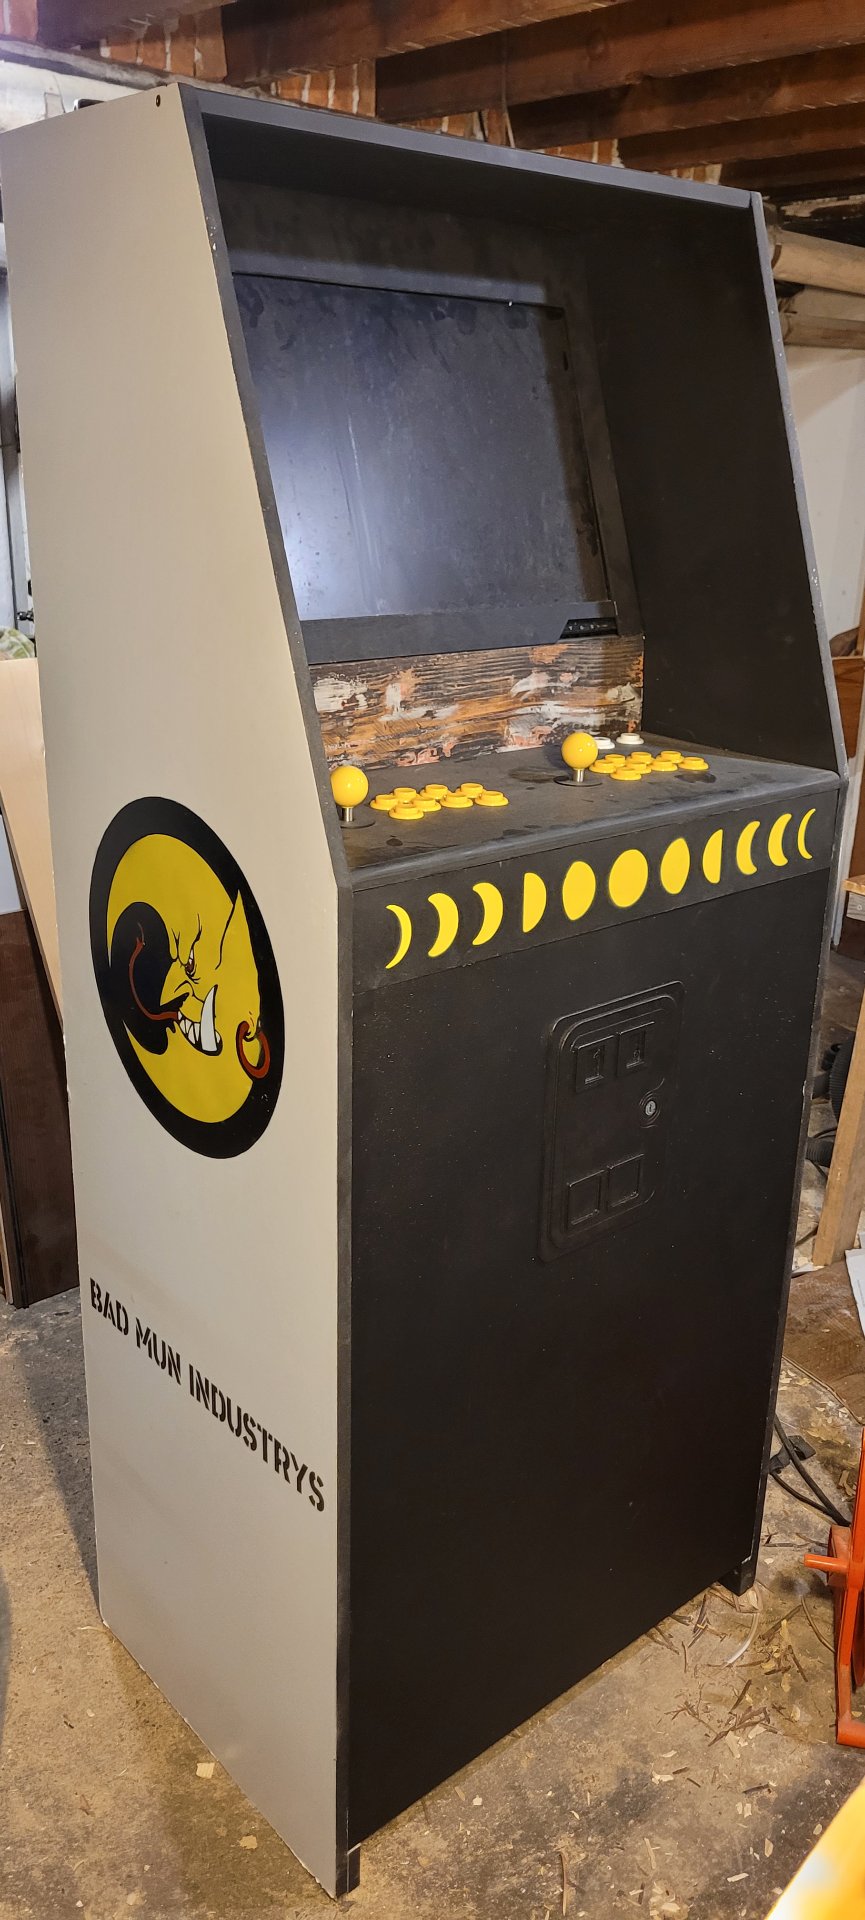
I started drawing up a cabinet design, we talked about a logo and I made this from an old warhammer orks and goblins design:

Many thanks to them for pushing me to make it simpler and simpler. I think that was a good call.
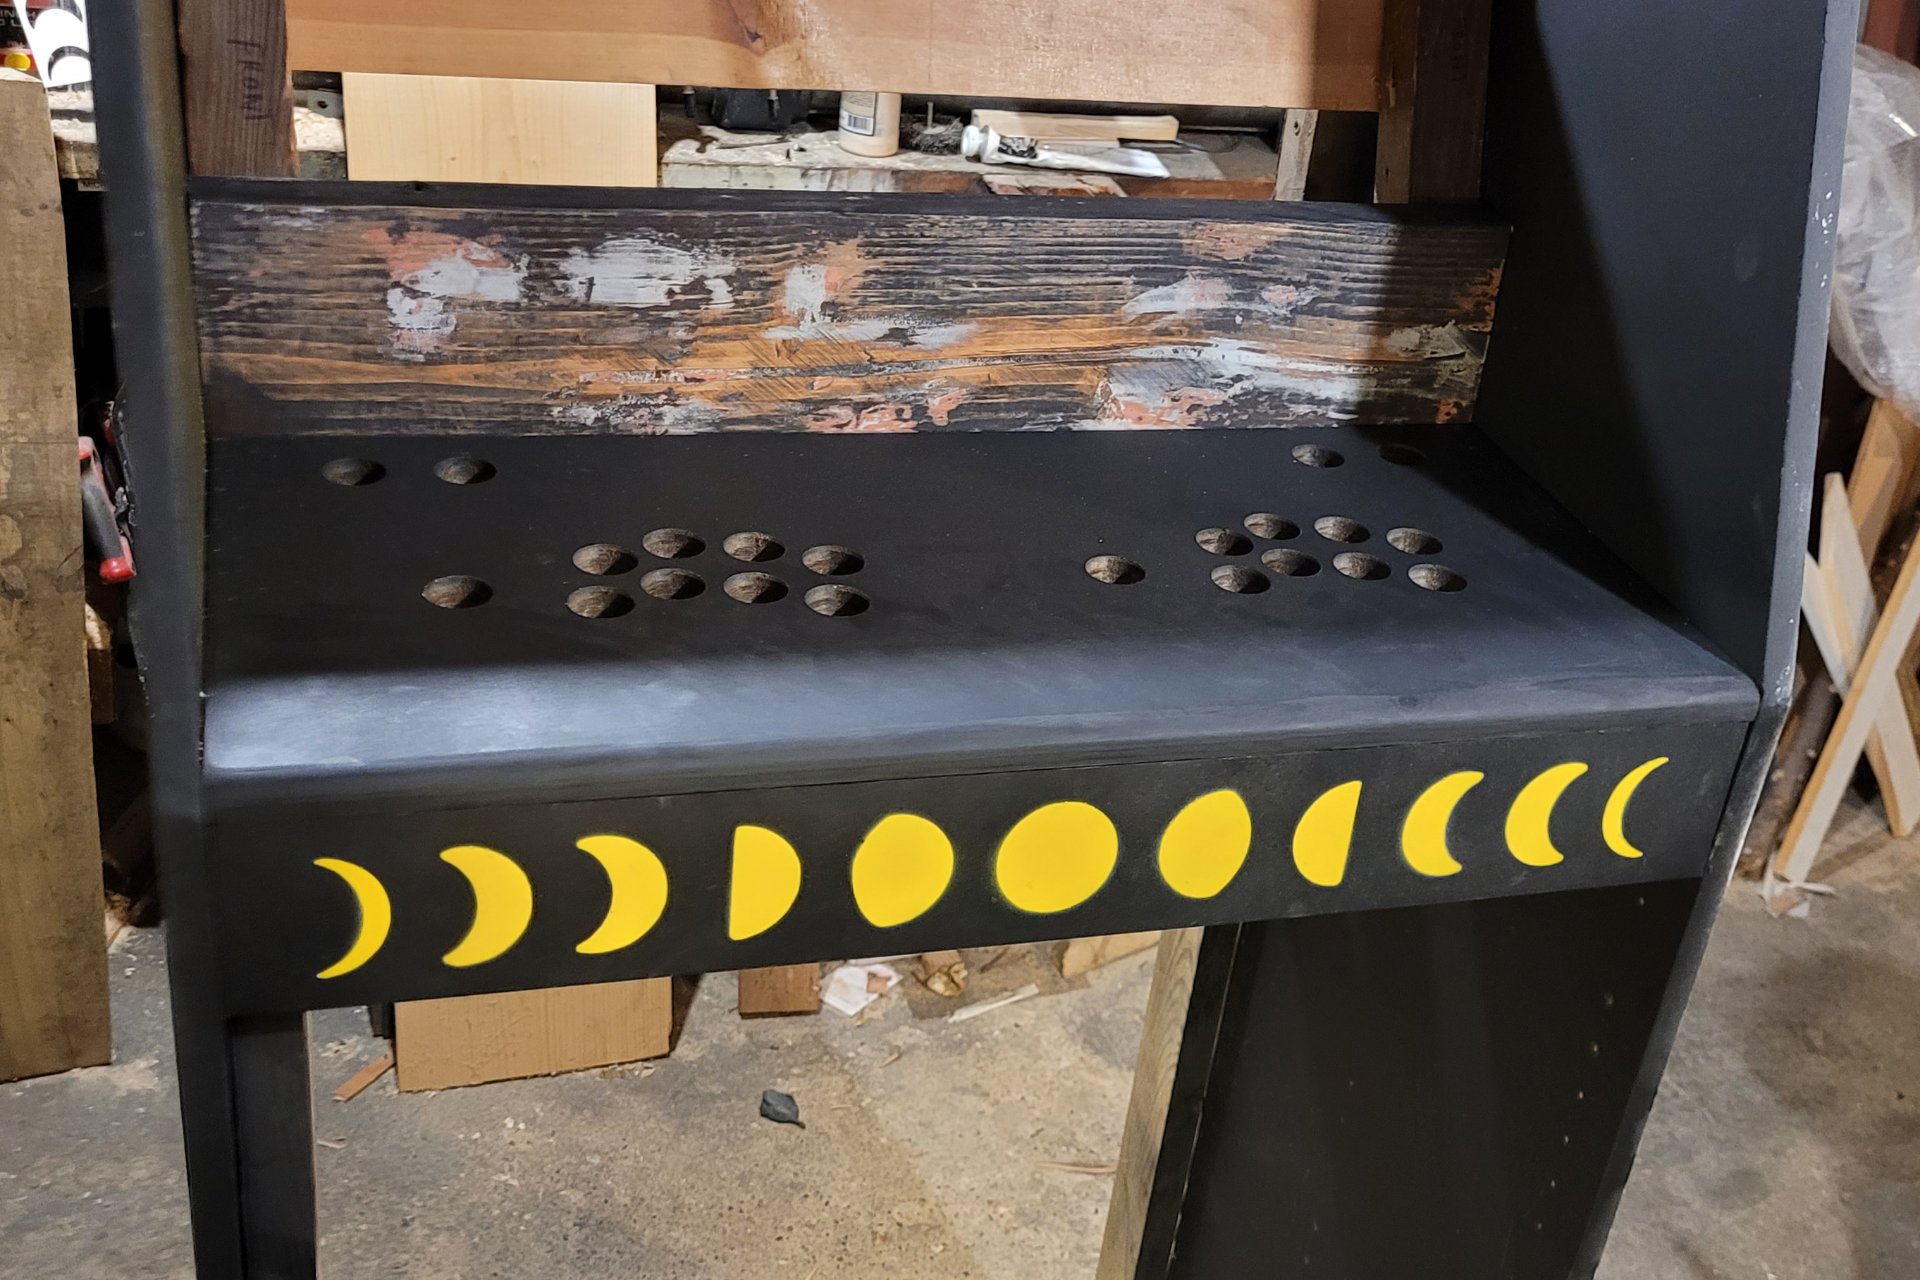
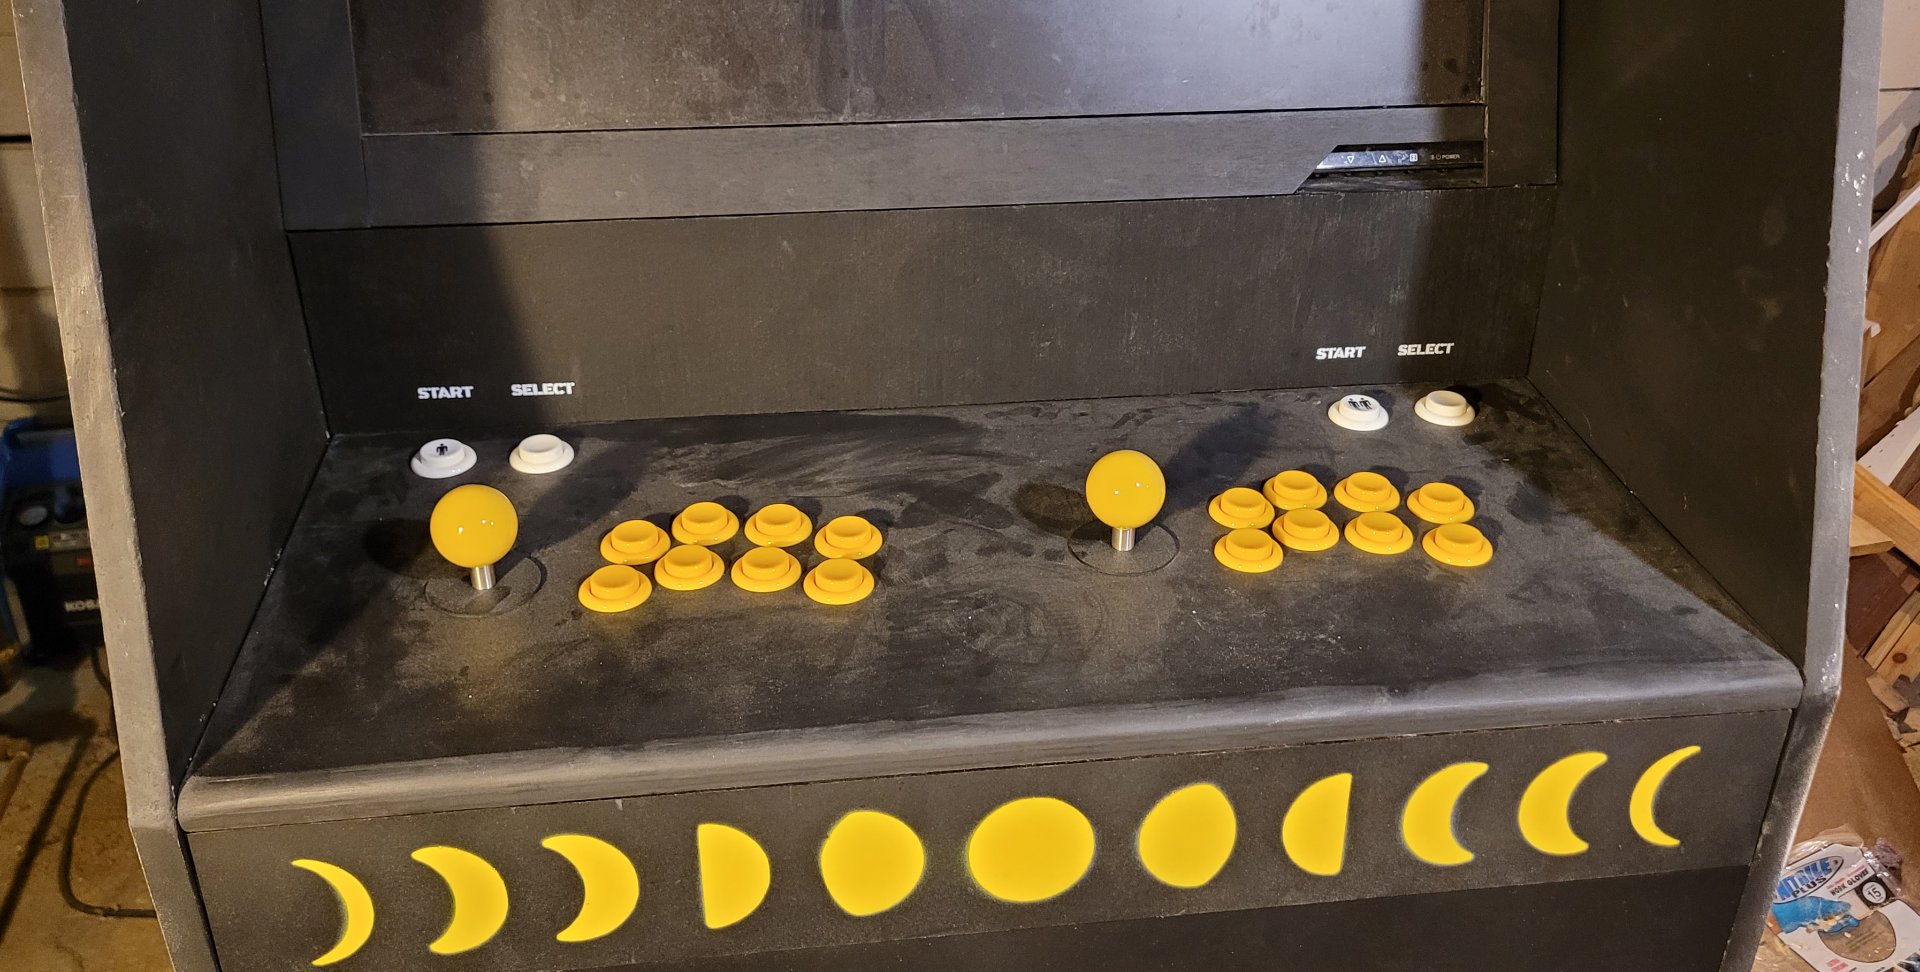
Arcade cabs are a great project because they take at least a little of everything - I really enjoyed the graphic design bit and went on to make stickers to cover it with later. With that figured out, I added a couple other flourishes, the moons on the marquee plate and the yellow buttons. My friend picked the name of the arcade company and we tried some stencil fonts and a layout for the side art.
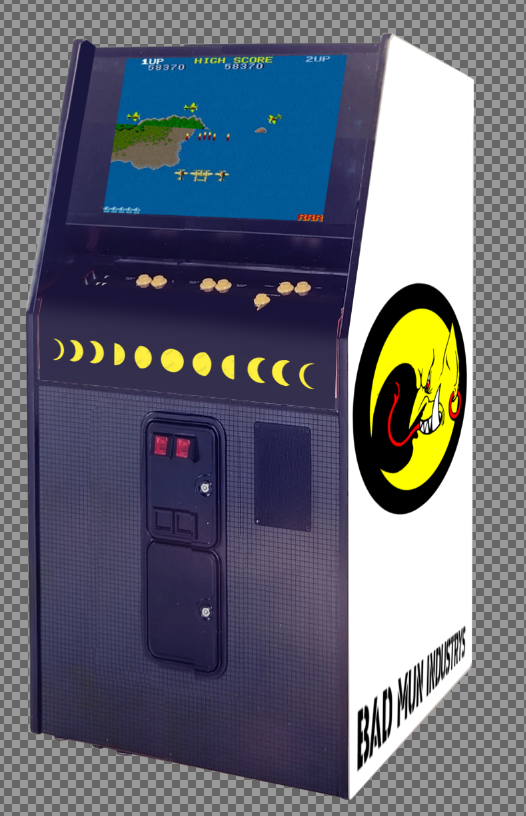
This is the mockup I gave them. It's pretty hacked together but I wanted to make sure we were working from the same plan.
Once that was done, it was time to start building. My original plan called for a frame of 2x4s forming a cube inside the structure, with 45 braces at every corner, with the sides attached like cladding. In the end that was mostly what we did, but we used some smaller boards for the frame and relied on the sides a little more for the structure.
I tried to find my original sketches, but wasn't able to. Either they were on wood I've since used in another project, or they're on some envelope or receipt mixed in with the rest of my detritus. Instead I drew this up from memory and the pictures I have:
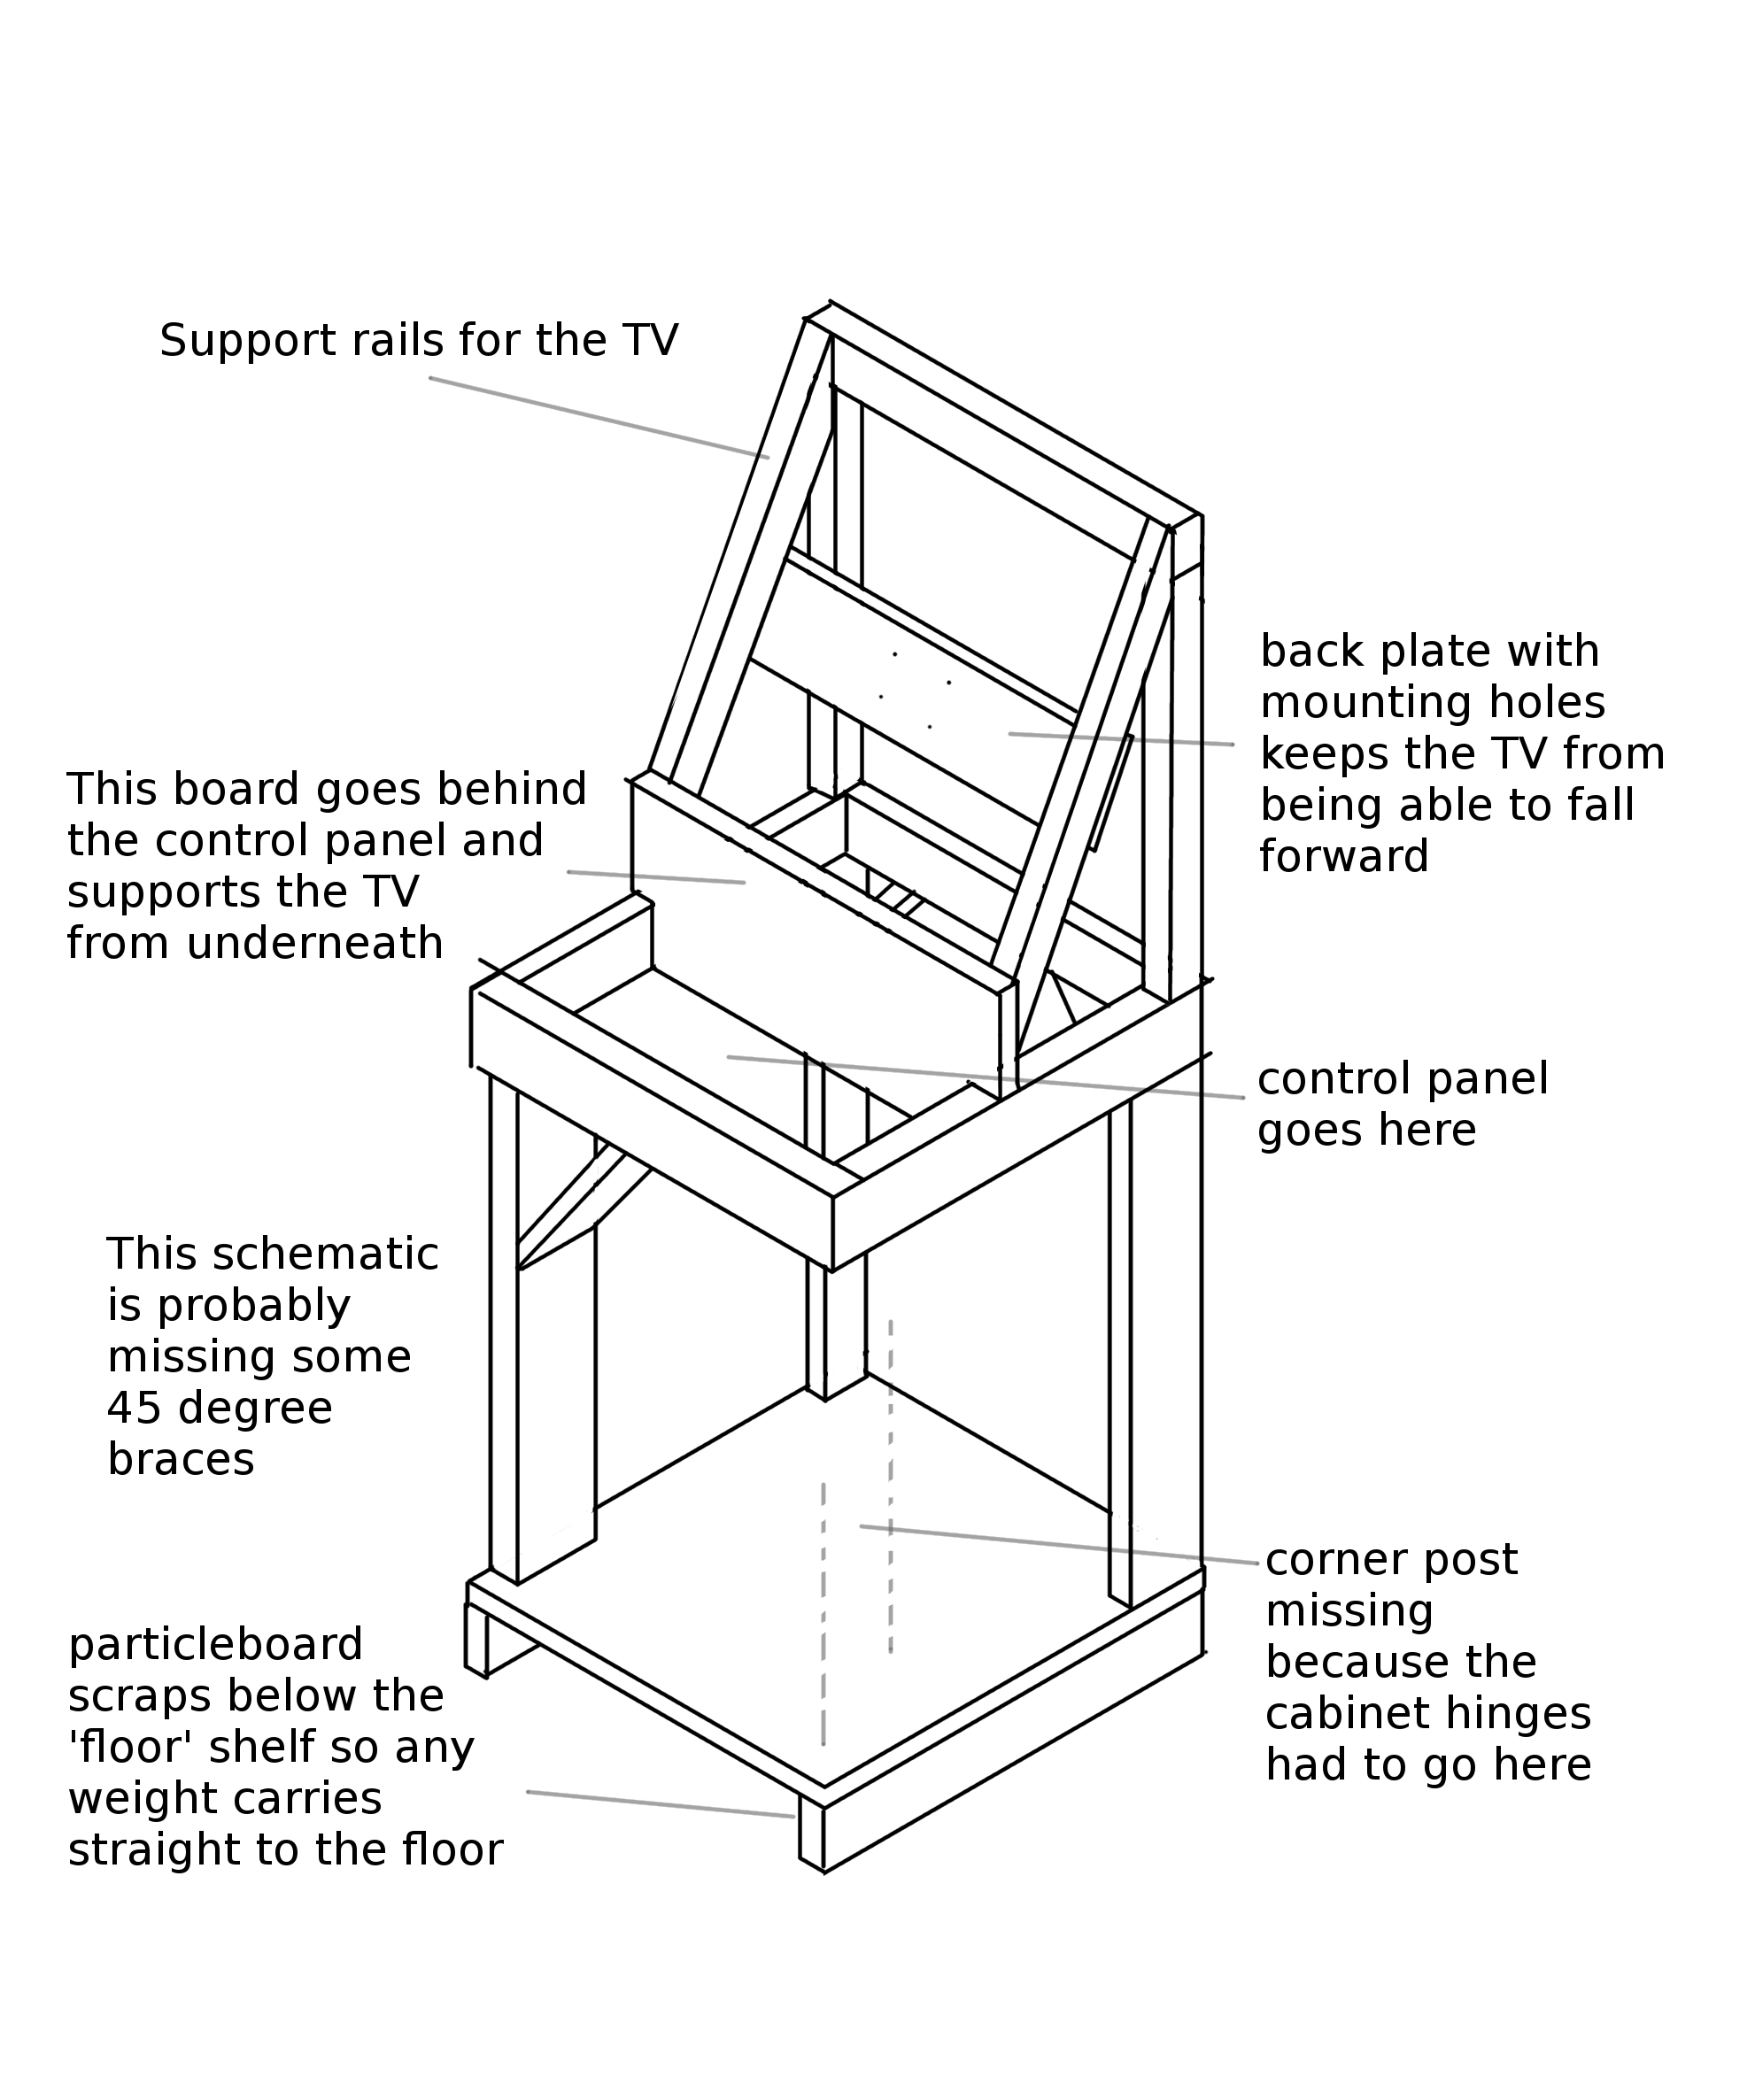
This sketch shows all the framing without the sides, front, or control panel. All of this was scrap lumber. The uprights were mostly a 6"x4" pressure treated post we ripped lengthwise on my neighbor's tablesaw (wear a dust mask if you're going to do that), the supports for the TV were scraps of house siding, and the big board supporting the TV was I think a scrap of 2"x12" which had been used as a concrete form and was pretty much garbage as far as materials go even after I scraped off most of the concrete.
We wanted it sturdy, so it had to have an internal frame so it wasn't relying on the particleboard sides for structure. I wanted the control panel in particular to bear its weight through the frame right to the floor. We also screwed everything to the inside of the sides of course, and that on its own was surprisingly sturdy. Lots of 45 degree braces helped to ensure it wouldn't sway or twist at all.
The TV frame was an improvement over my last design. On that one, the flatscreen sort of just rested in place on some rails. This time I wanted it to be fastened in place - after all, we were going to have to move this to my friend's place, and then they'd be moving it from apartment to apartment (and they since have, with no problems!).
I don't have a ton of pictures from early on (I never think to take any until it starts to look like something). Here's one from while we were trying to make that 2"x"12" look better with bondo. Even once it was sanded smooth it still looked bad enough painted that I eventually cut a piece of plywood as cladding to cover it.
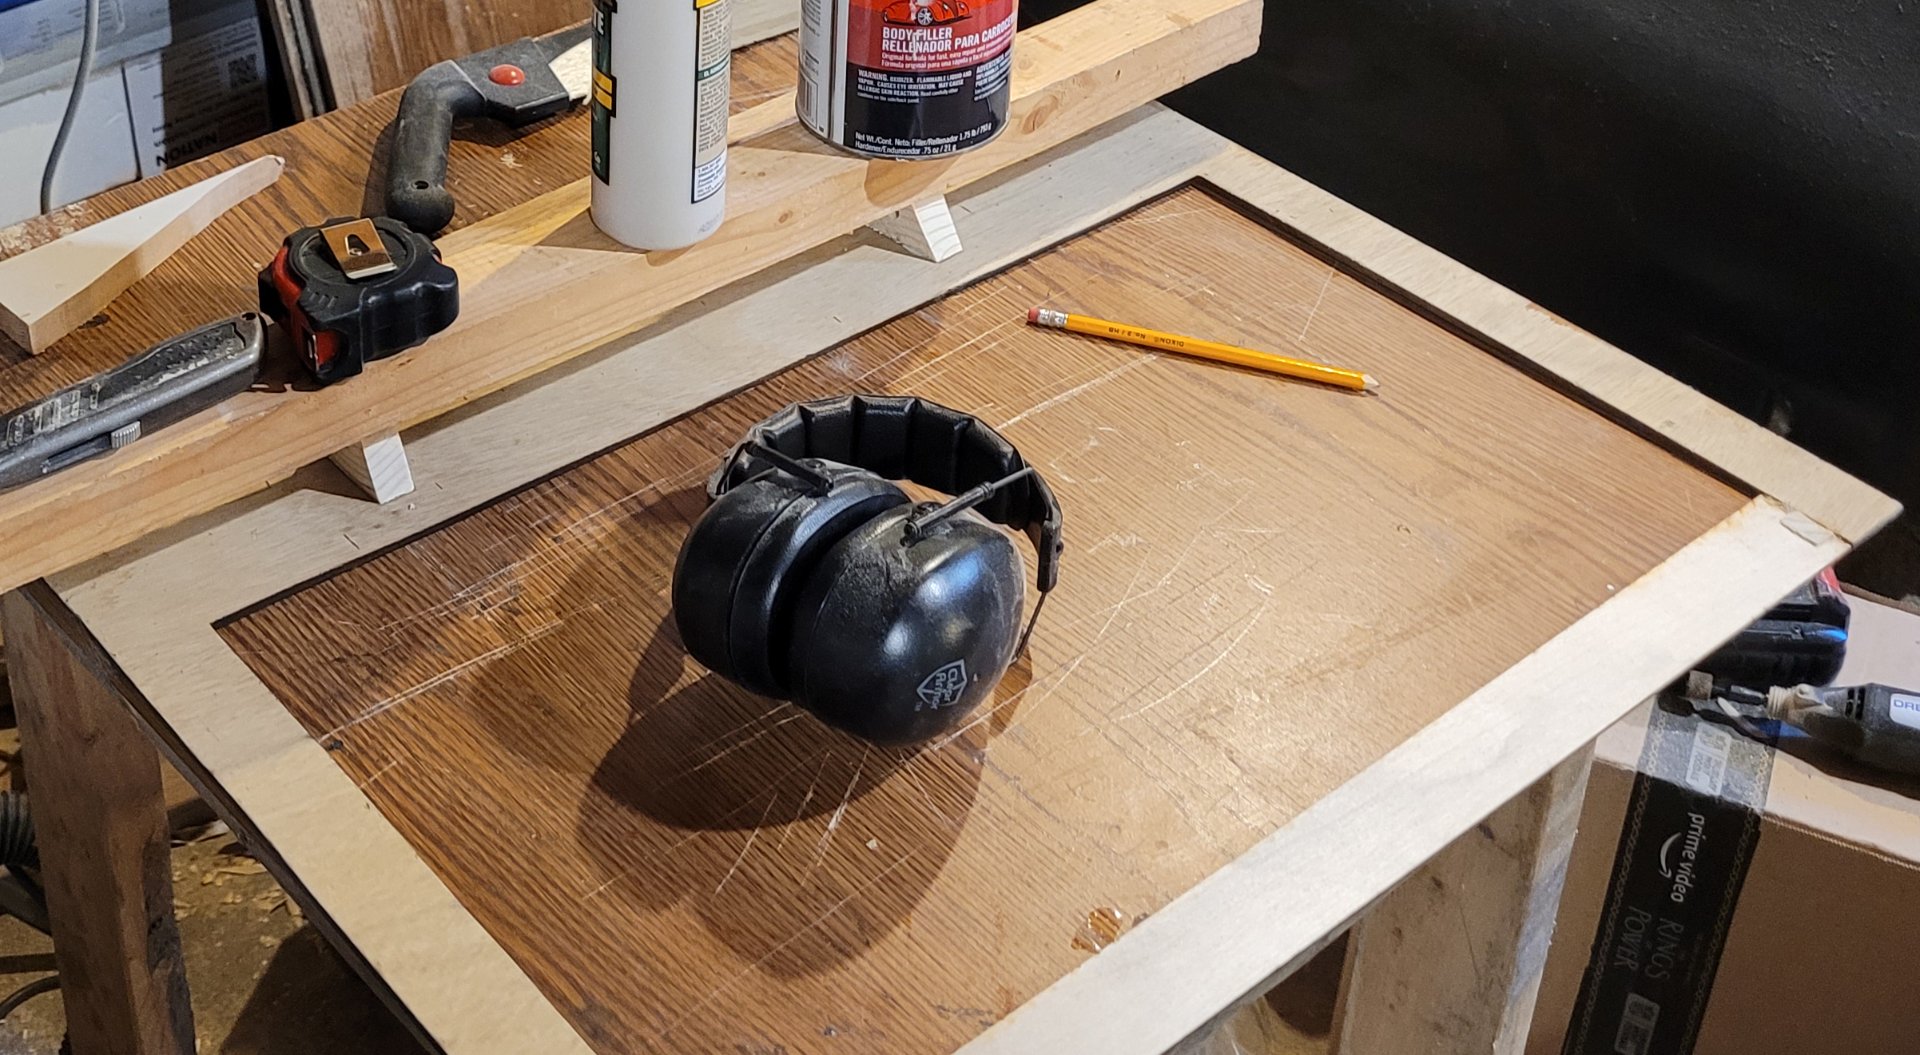
We made the control panel from a piece of 1"x14" composite pine I got from a disassembled ikea bookshelf I found on trash day. When I was working on the last arcade cab, I asked around on our Buy Nothing page and met a professional woodworker who had a large table router (this is before I got my little one). He helped me rout a round edge onto my control panel (plus a spare in case I messed up drilling the holes for the buttons) and to cut a slot I used for the marquee.
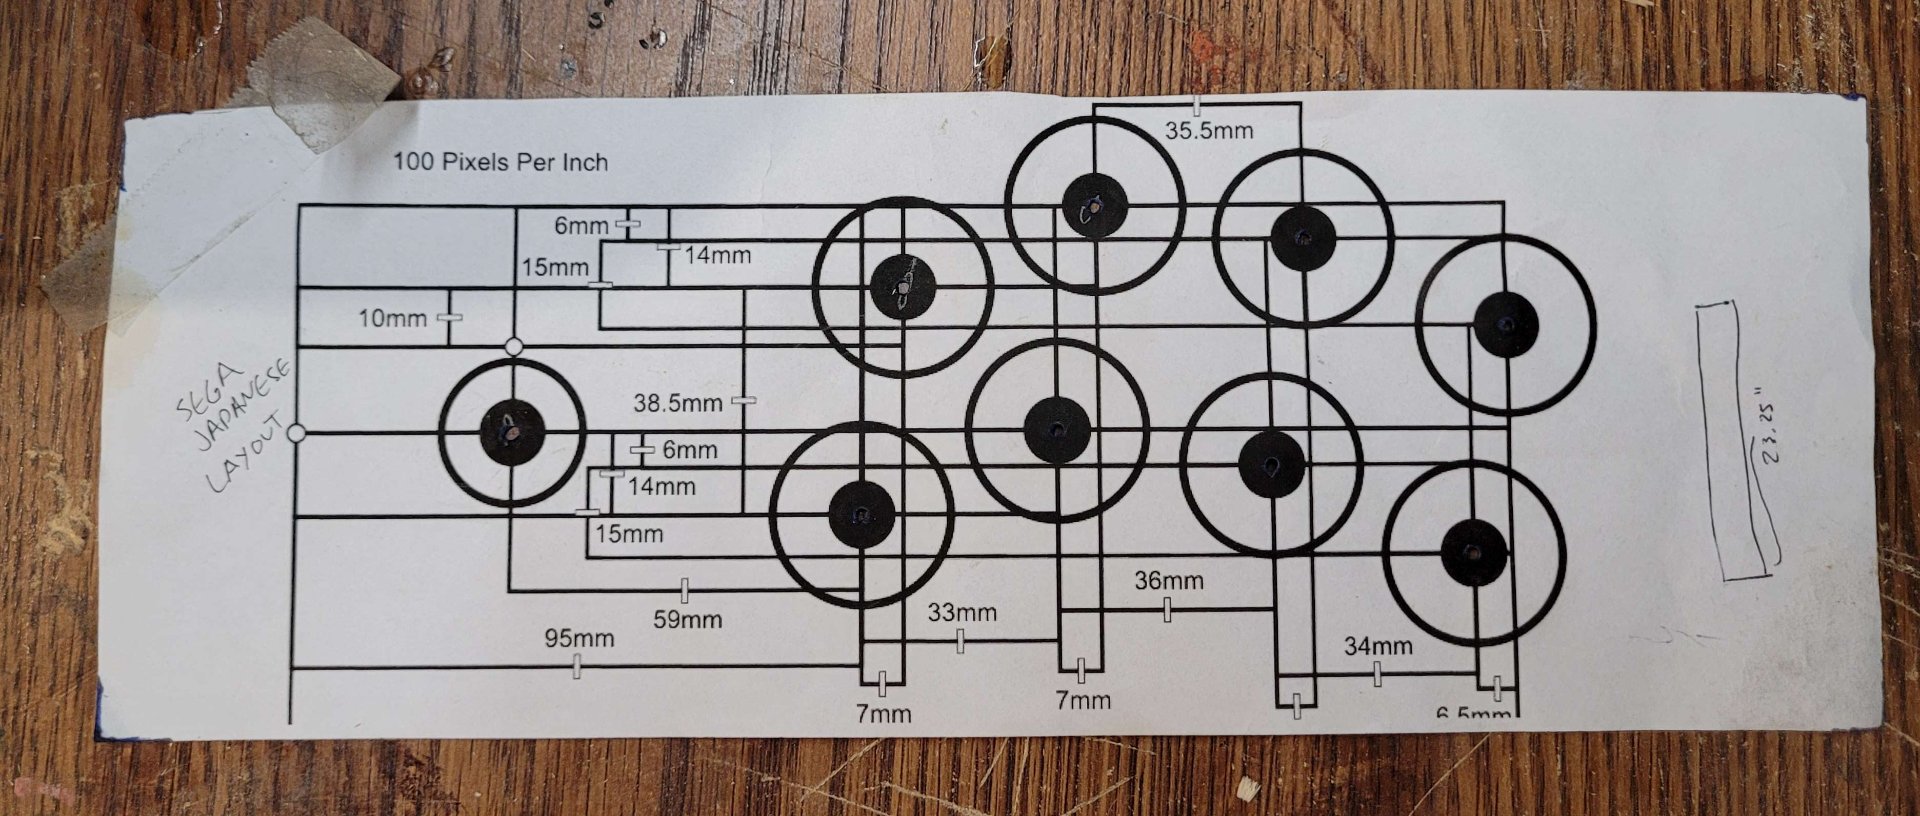
My friend and I used my spare to make their control panel. They picked the layout using some more lessons learned to improve on my first one, opted for the same sega layout I picked ([found here](https://www.slagcoin.com/joystick/layout.html)) and we drilled the holes. They opted for a nicer set of authentic mechanical buttons and joysticks than the cheap kit I'd used the first time around, and I think that was a great call. Those buttons are also useful in [other electronics projects](https://movim.slrpnk.net/blog/jacobcoffinwrites%40slrpnk.net/one-button-sound-recorder-made-from-spare-parts-4xV6Hn).
We also filled in the front cut edge of the particleboard sides with bondo and sanded it smooth.
Once we had the basic structure and made sure the TV could fit, it was time to paint it (while the weather was good).
For this I printed out a large stencil at the local makerspace and cut it out by hand.
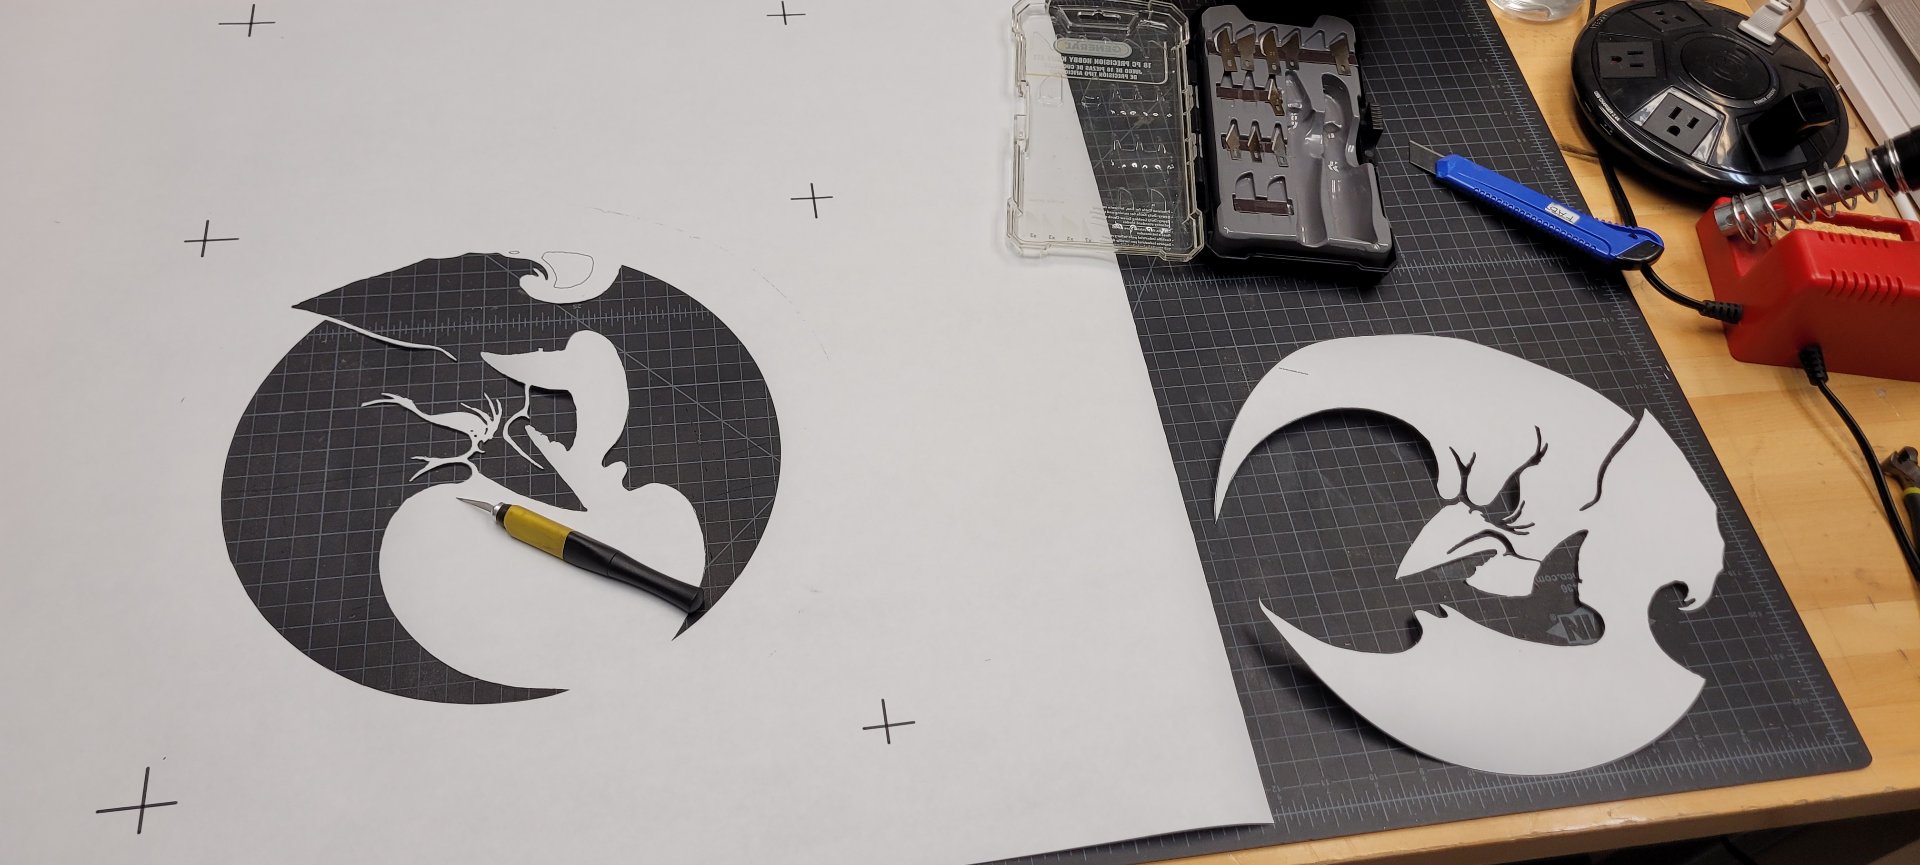
This was a large but simple four-layer stencil (black circle, yellow, red, white) so cutting it out took no time at all. Unfortunately, the only paper available for the plotter printer was super flimsy, and that would be a pain later on.
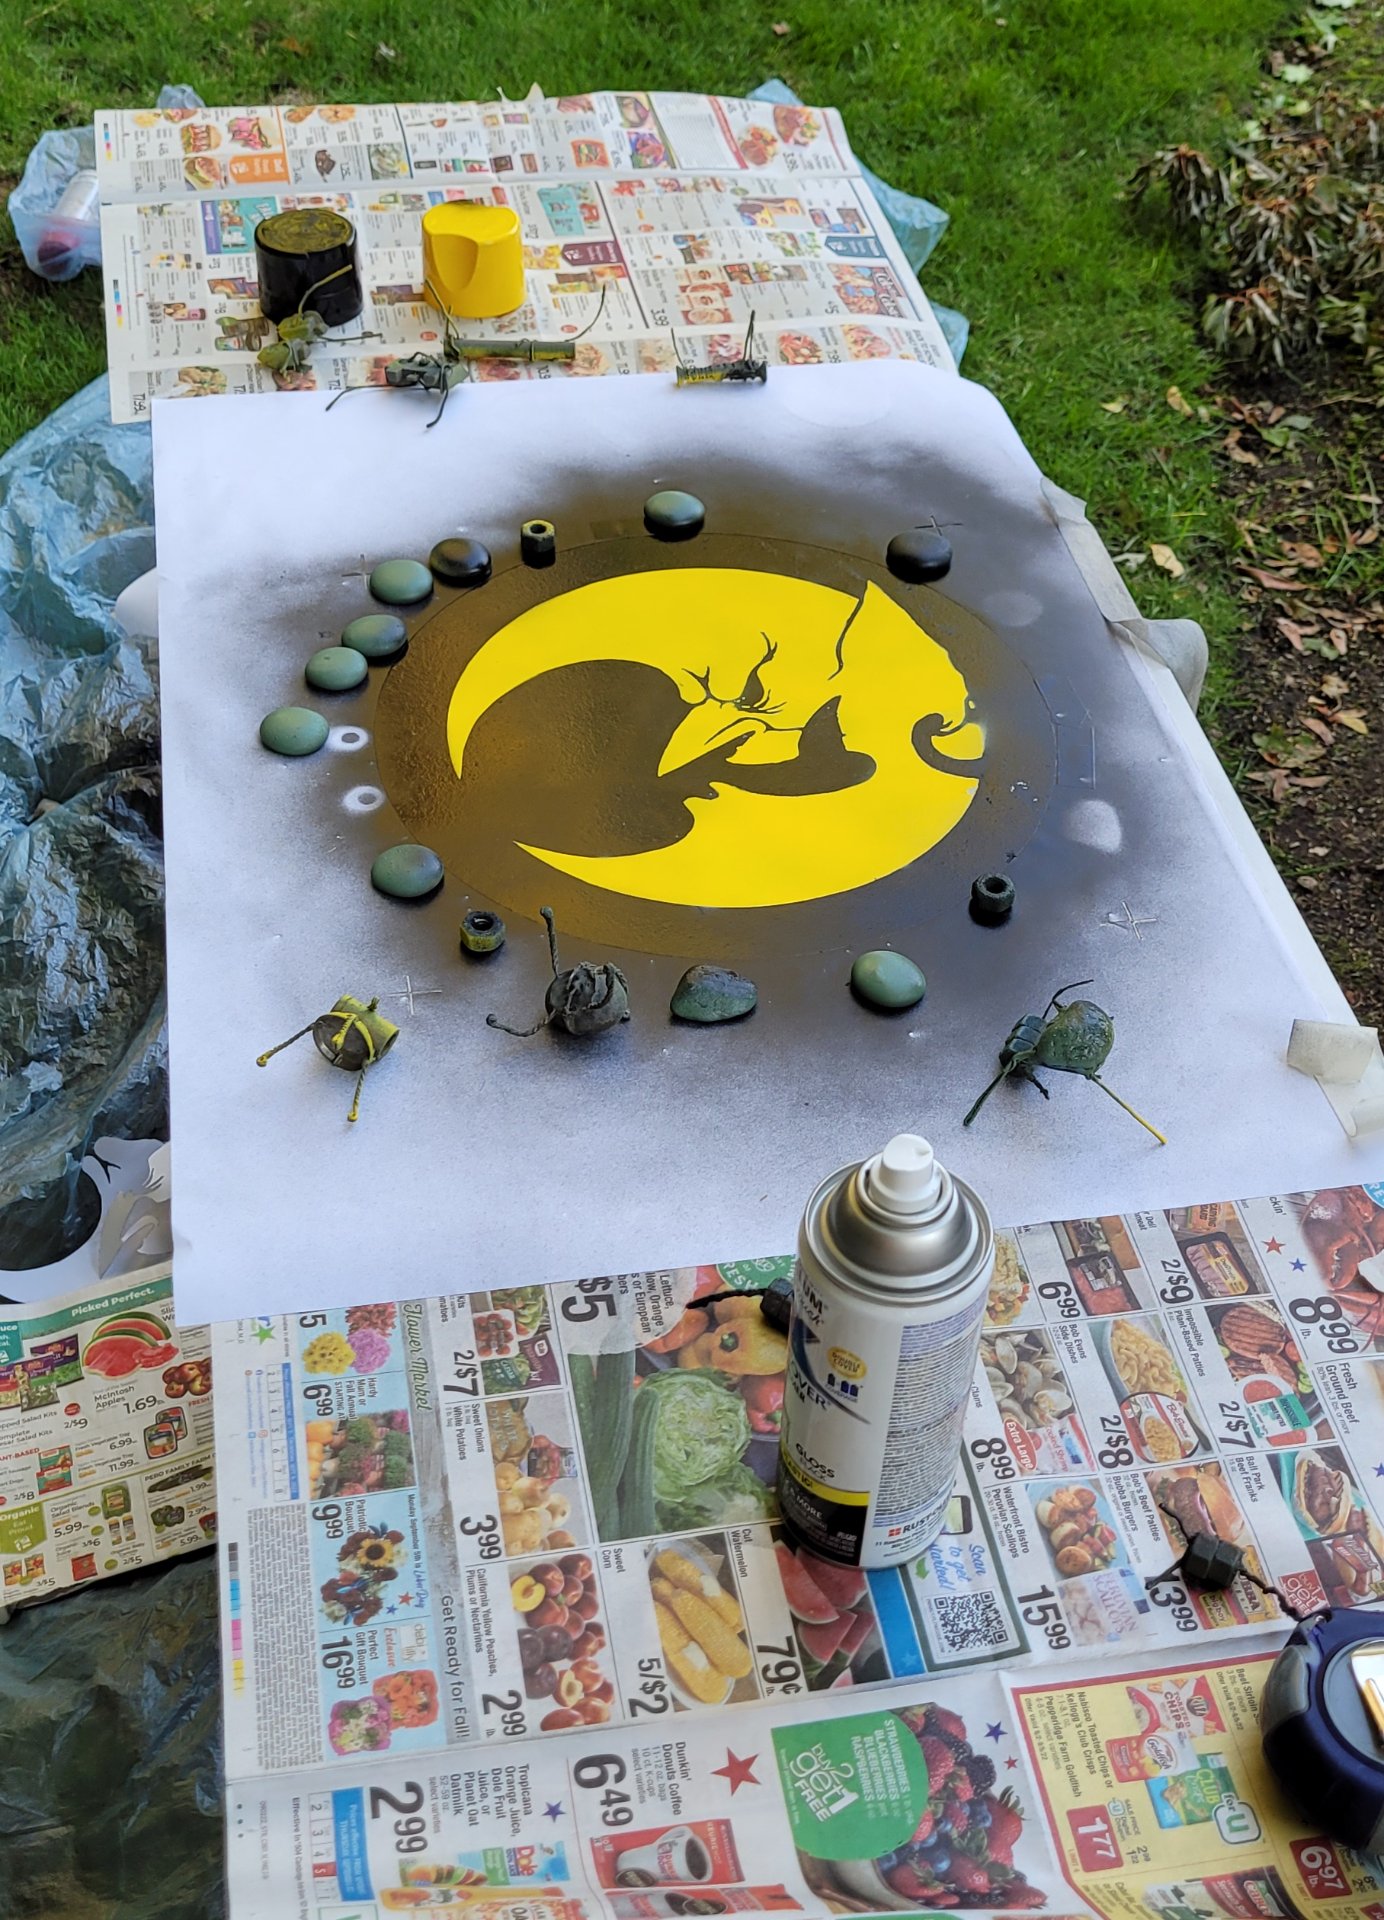
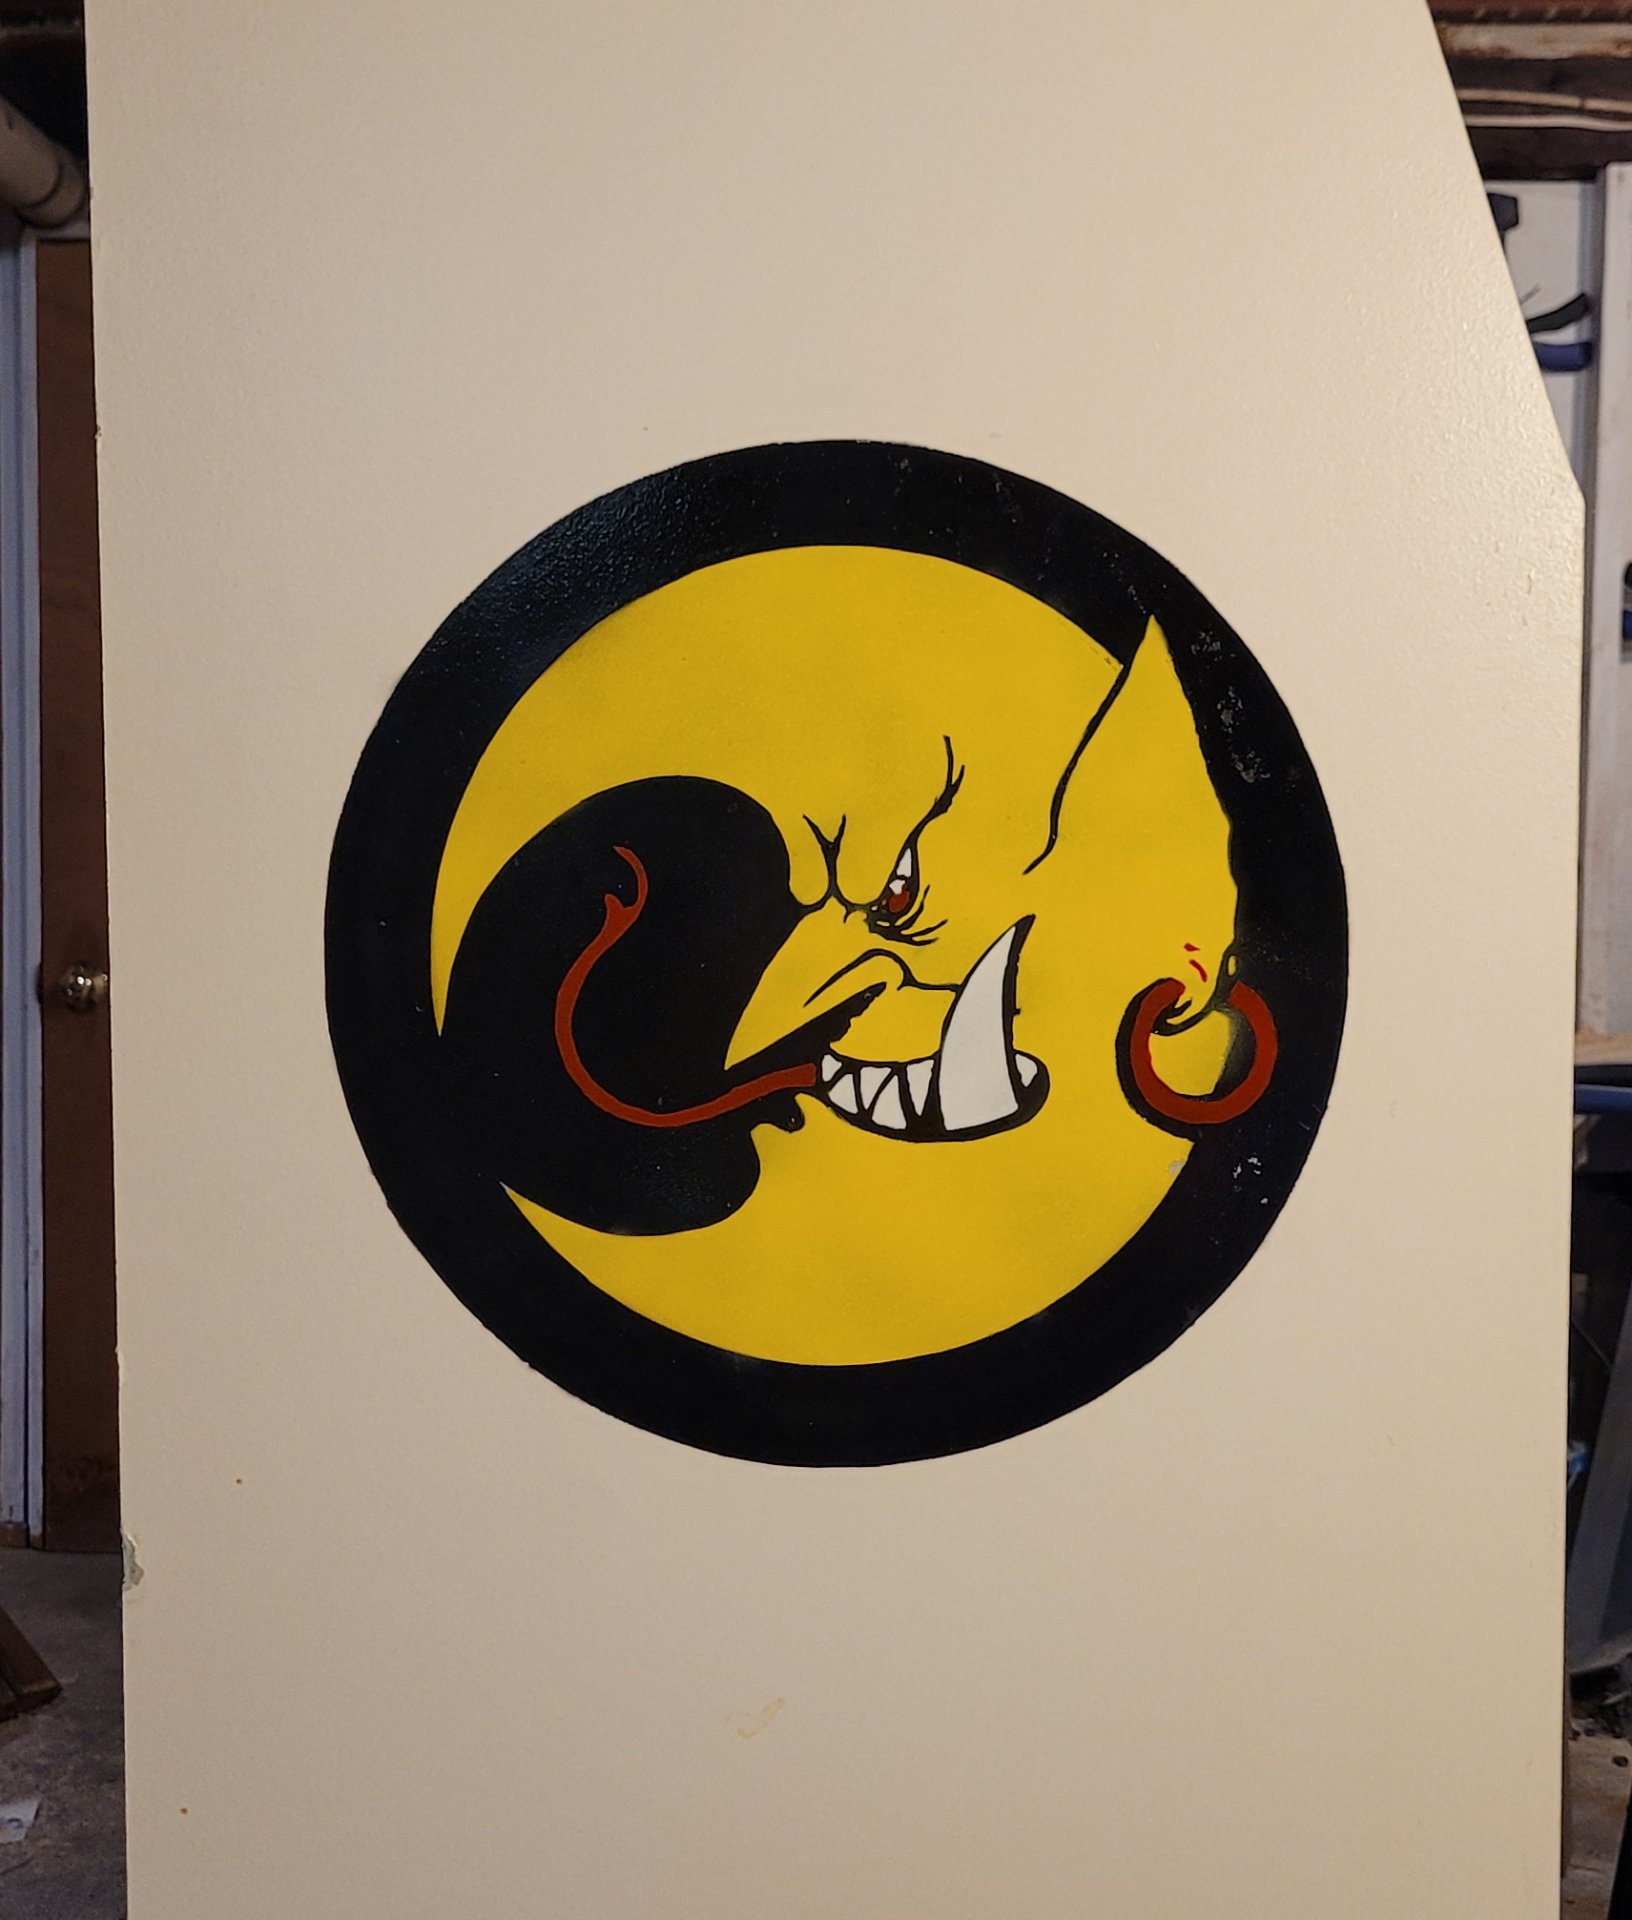
For the first paint session we only did the round logo. We weren't sure we'd be able to do both sides, so we started with the one which would face the room (this side also got the best particleboard). We had a bad combination of elements here - flimsy paper and because I couldn't find my good artist's yellow spray paint, we were stuck with some generic watery hardware-store-brand spray paint with the approximate thickness of kool-aid. We had to paint the black circle, paint the stencil of the moon with white, then use the yellow over that. By then the stencil had warped and in some places stuck, so the black layer was messed up with underspray and missing paint. Luckily we still had the 'negative' from the stencil, so I used that to protect the yellow while I fixed the black. Then we did the white and red.
All of that was a mess and I wouldn't recommend it as a strategy. It was one of the worst ways I've had a stencil project go, but the end result wasn't bad.
And in a second lucky break, because it was sprayed onto particleboard, it actually cleaned up pretty well with isopropyl alcohol.
The finishing touch for that side, the company name, was comparatively easy. dimensionally it just fit inside the laser cutter, so we used that to cut it out of cardstock.
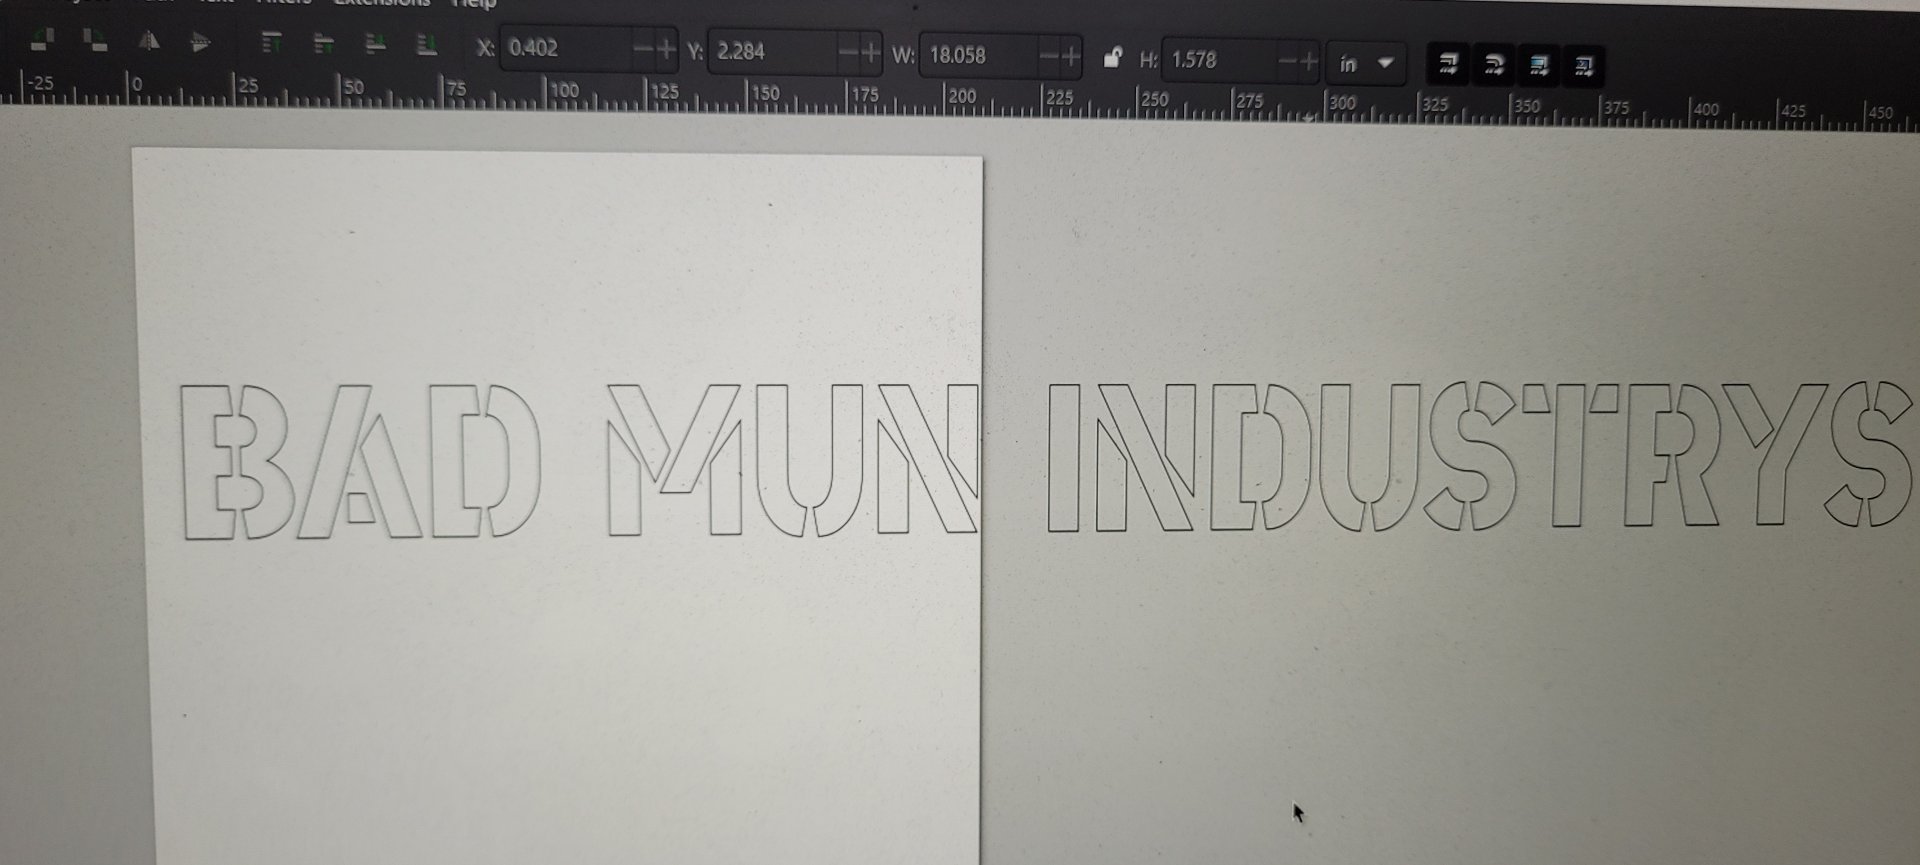
I think we even painted this one on indoors (another bad idea but the cab was heavy).
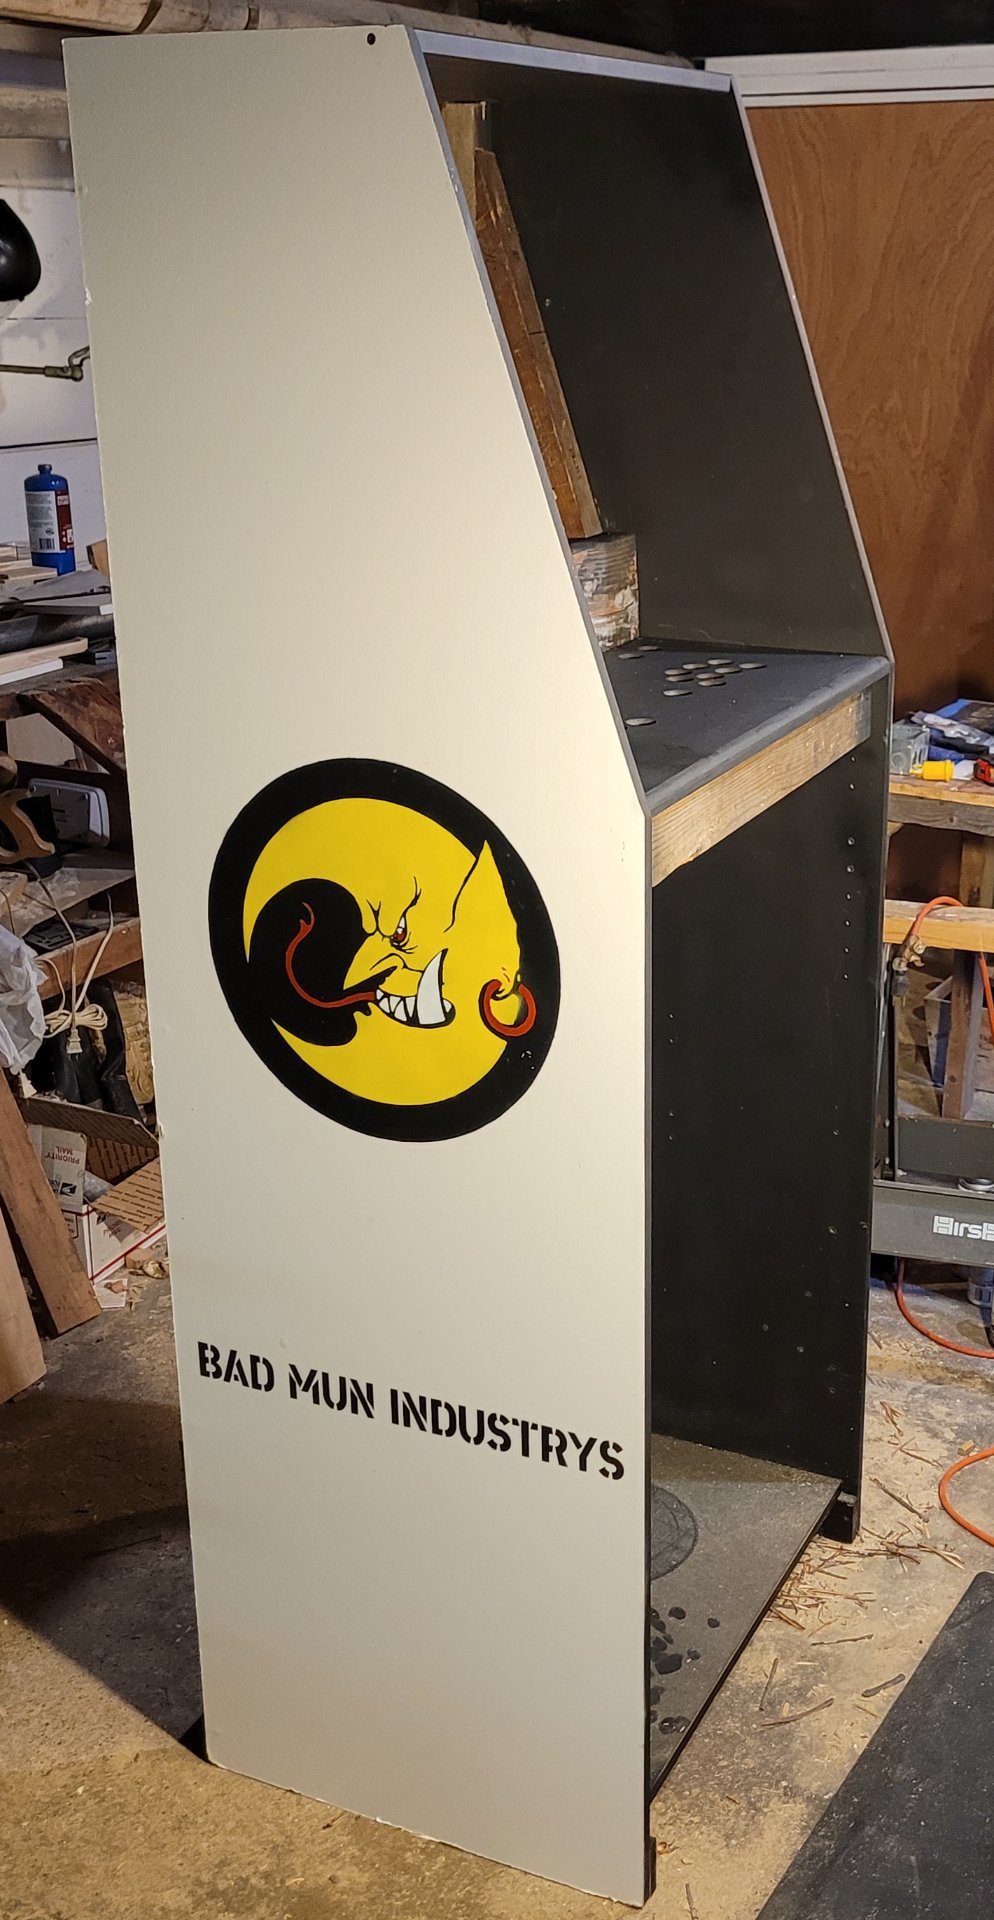
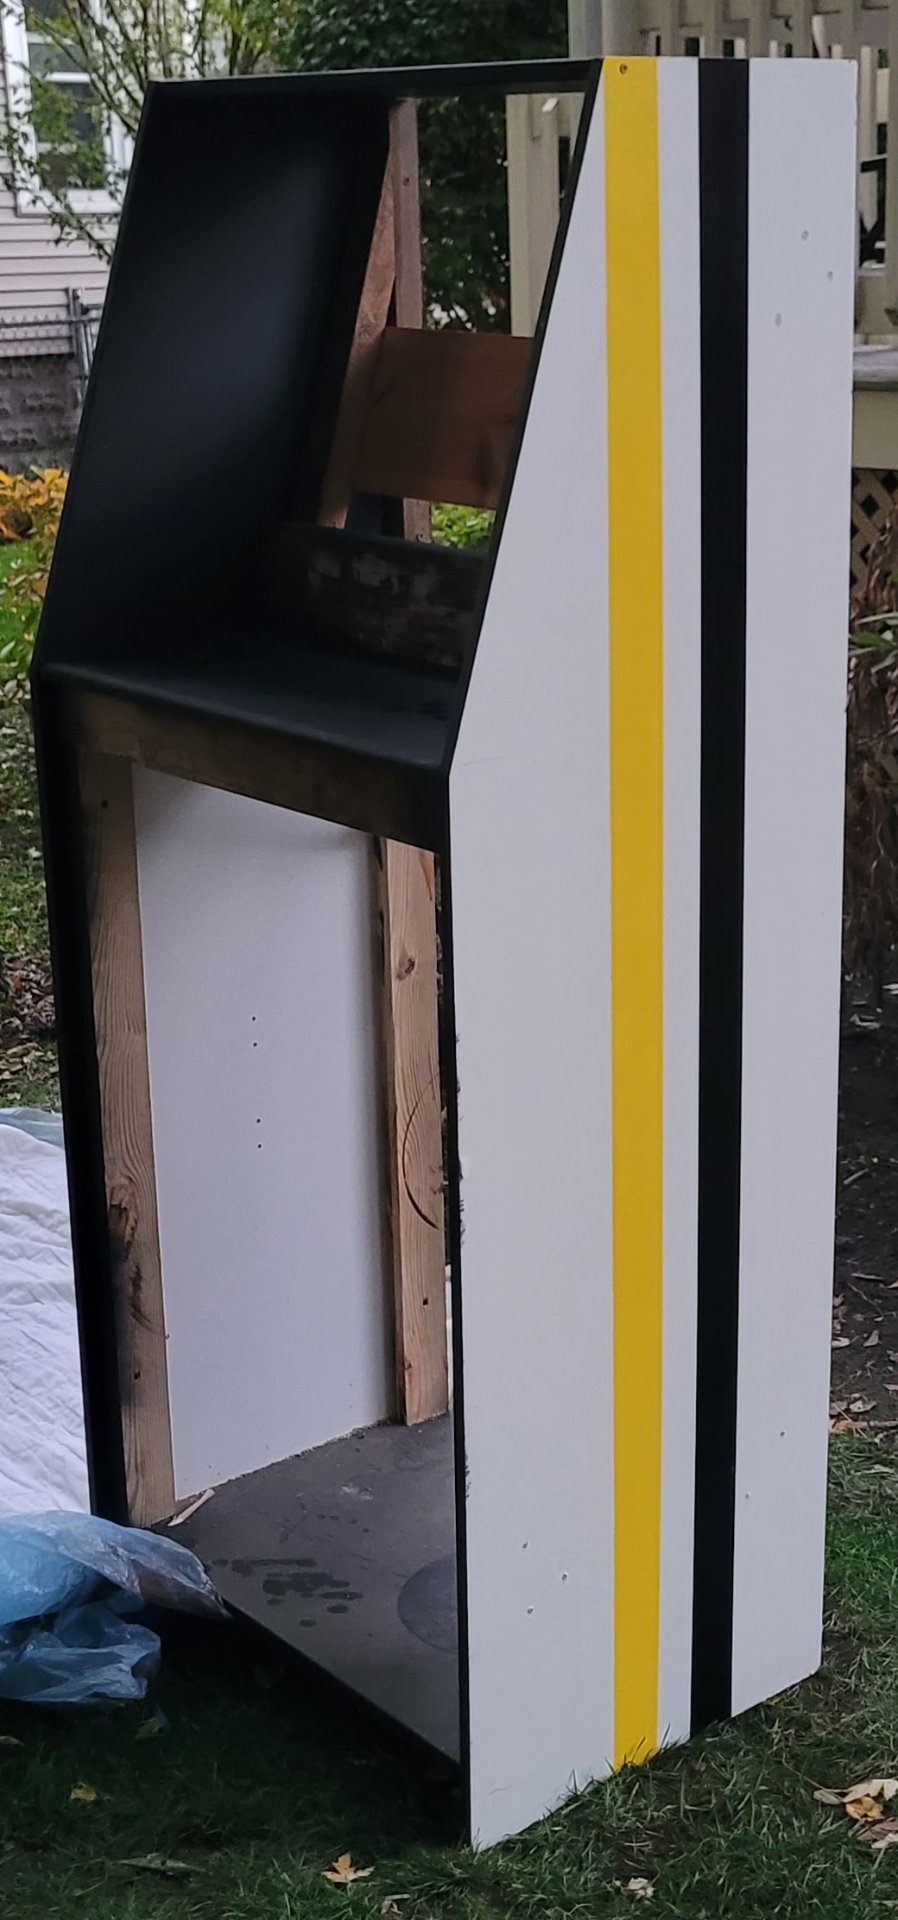
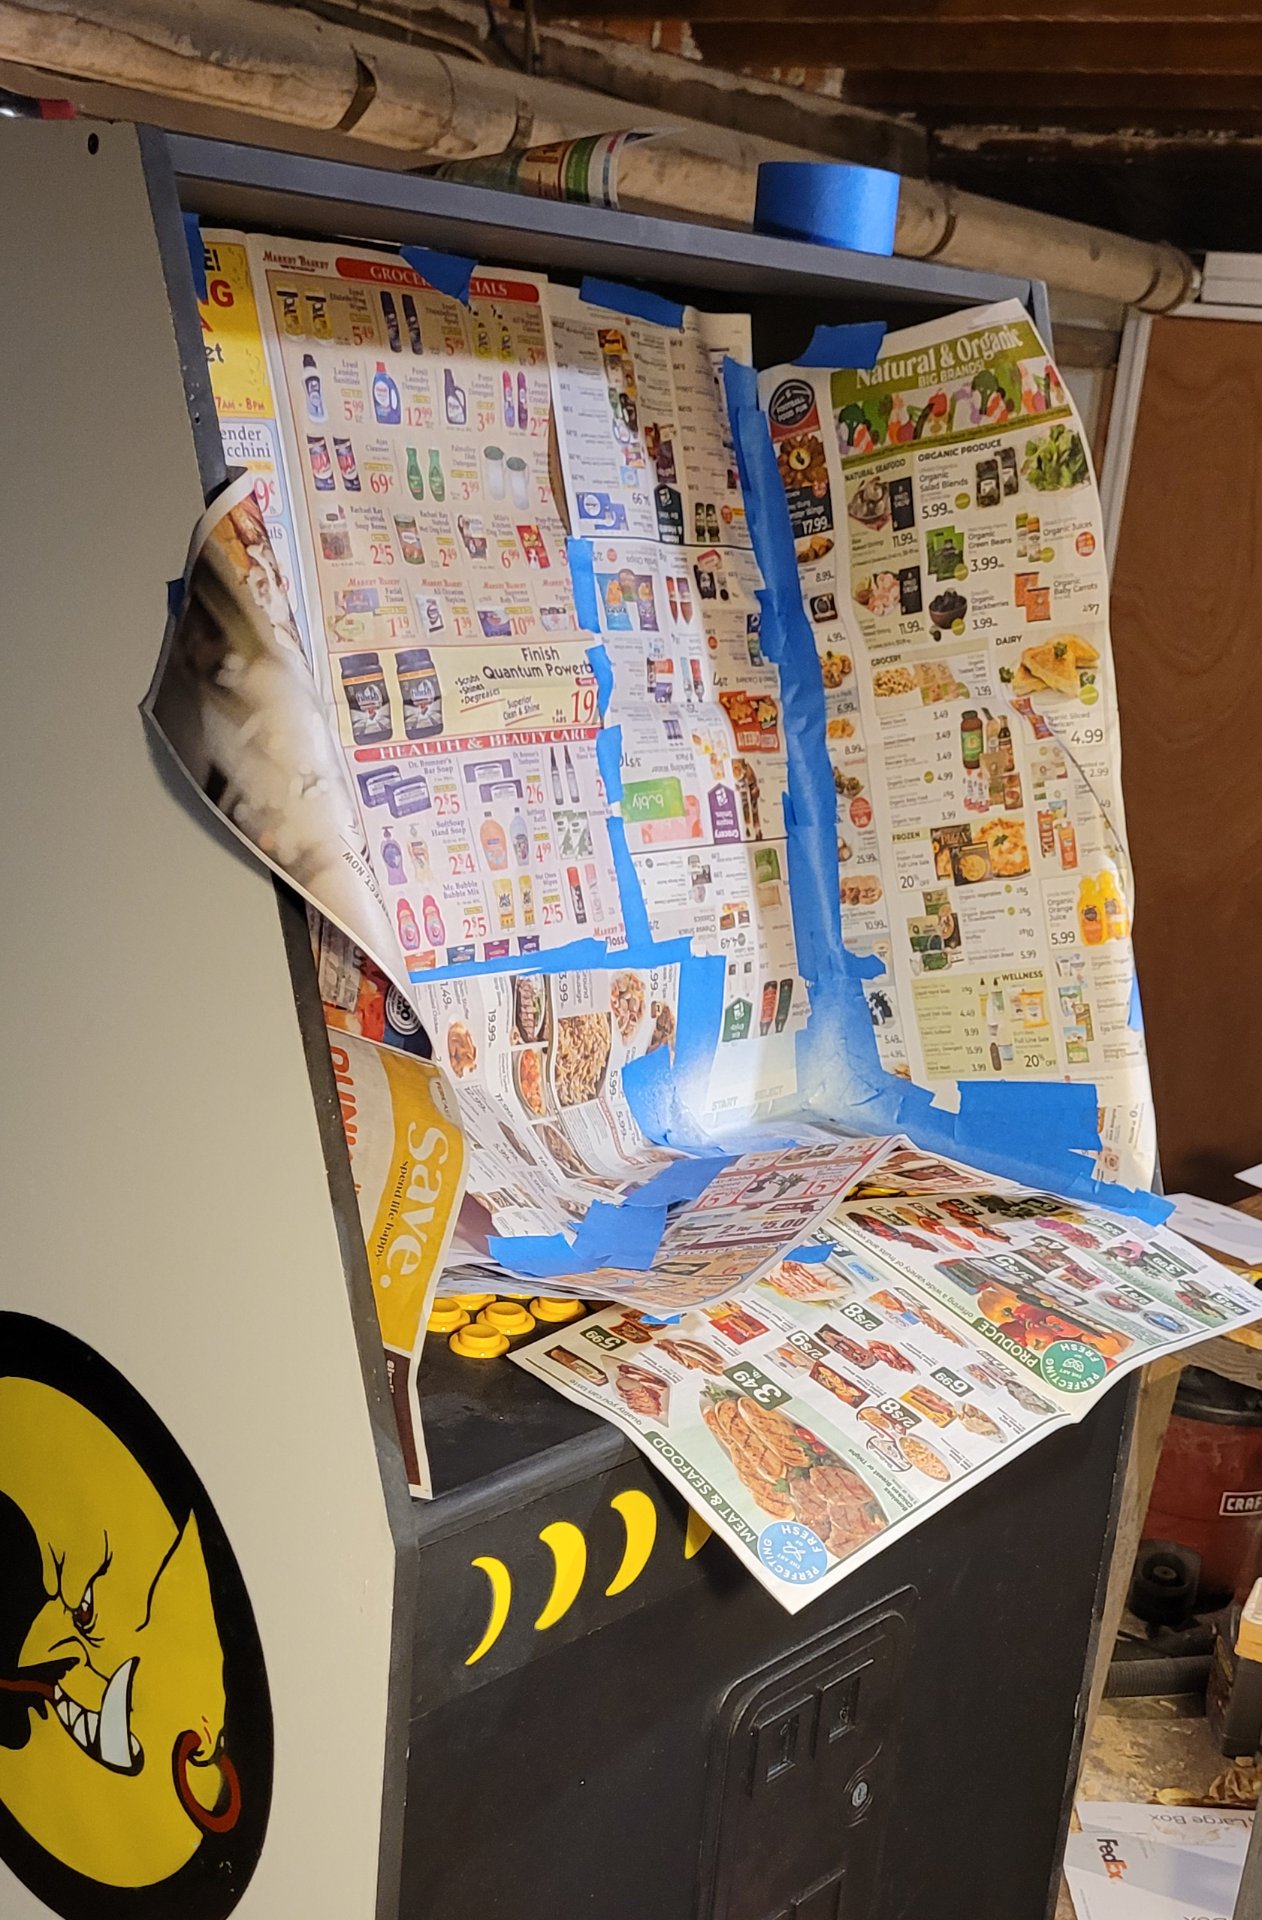
We definitely weren't going to repeat all that for the side facing a corner, so we did a simple two-color racing stripe instead.
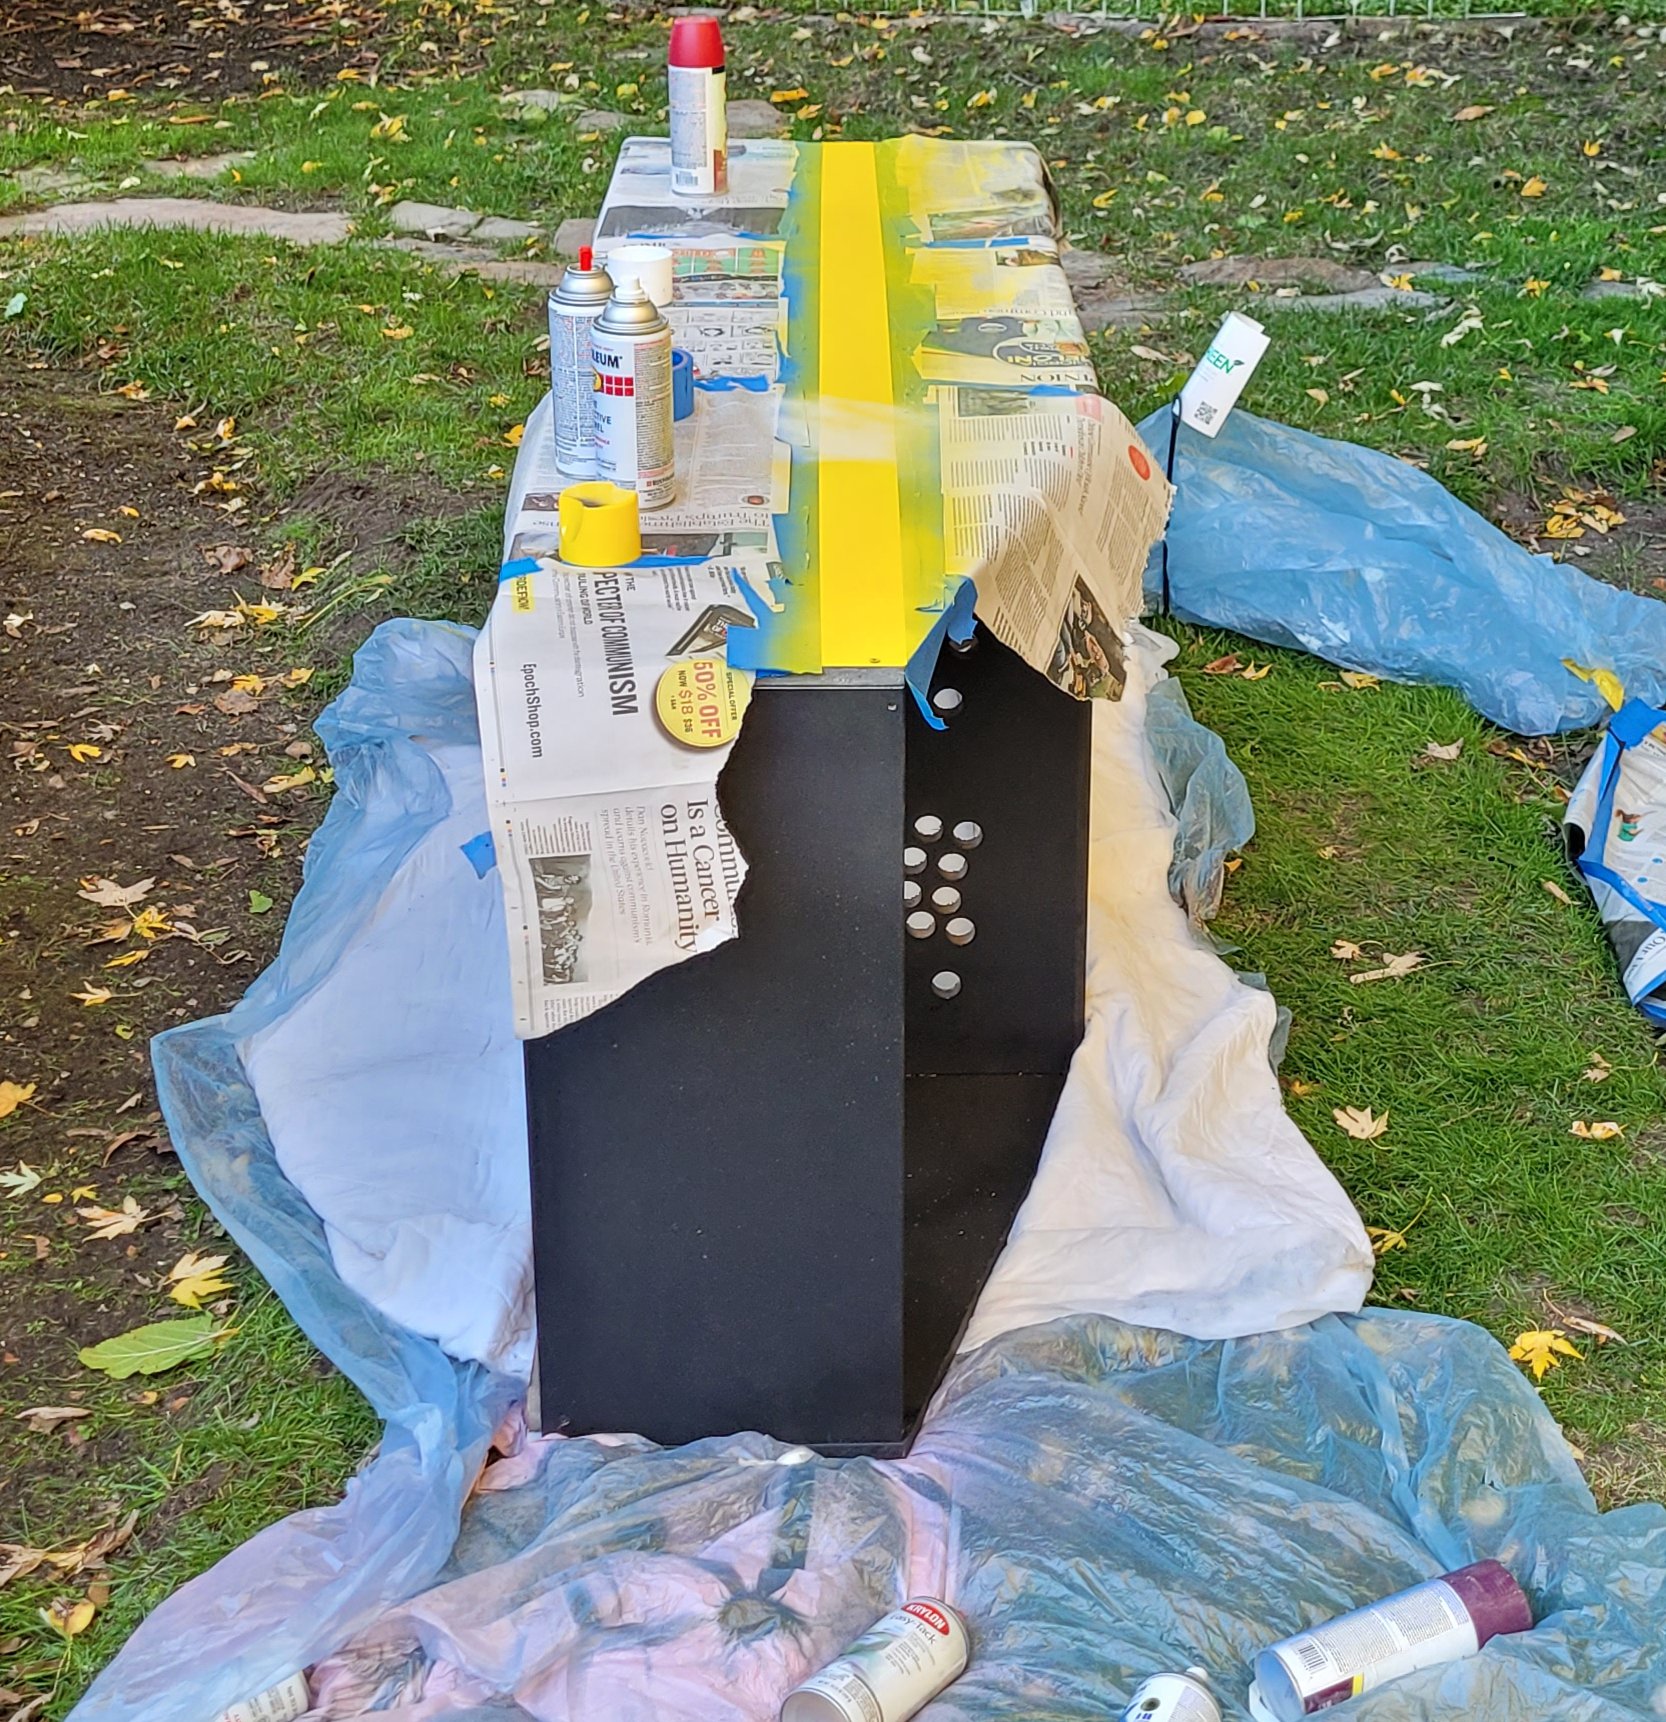
It's always nice when your stencil is just a length of painter's tape and some newspaper. Even that garbage yellow paint couldn't go too badly this time around.
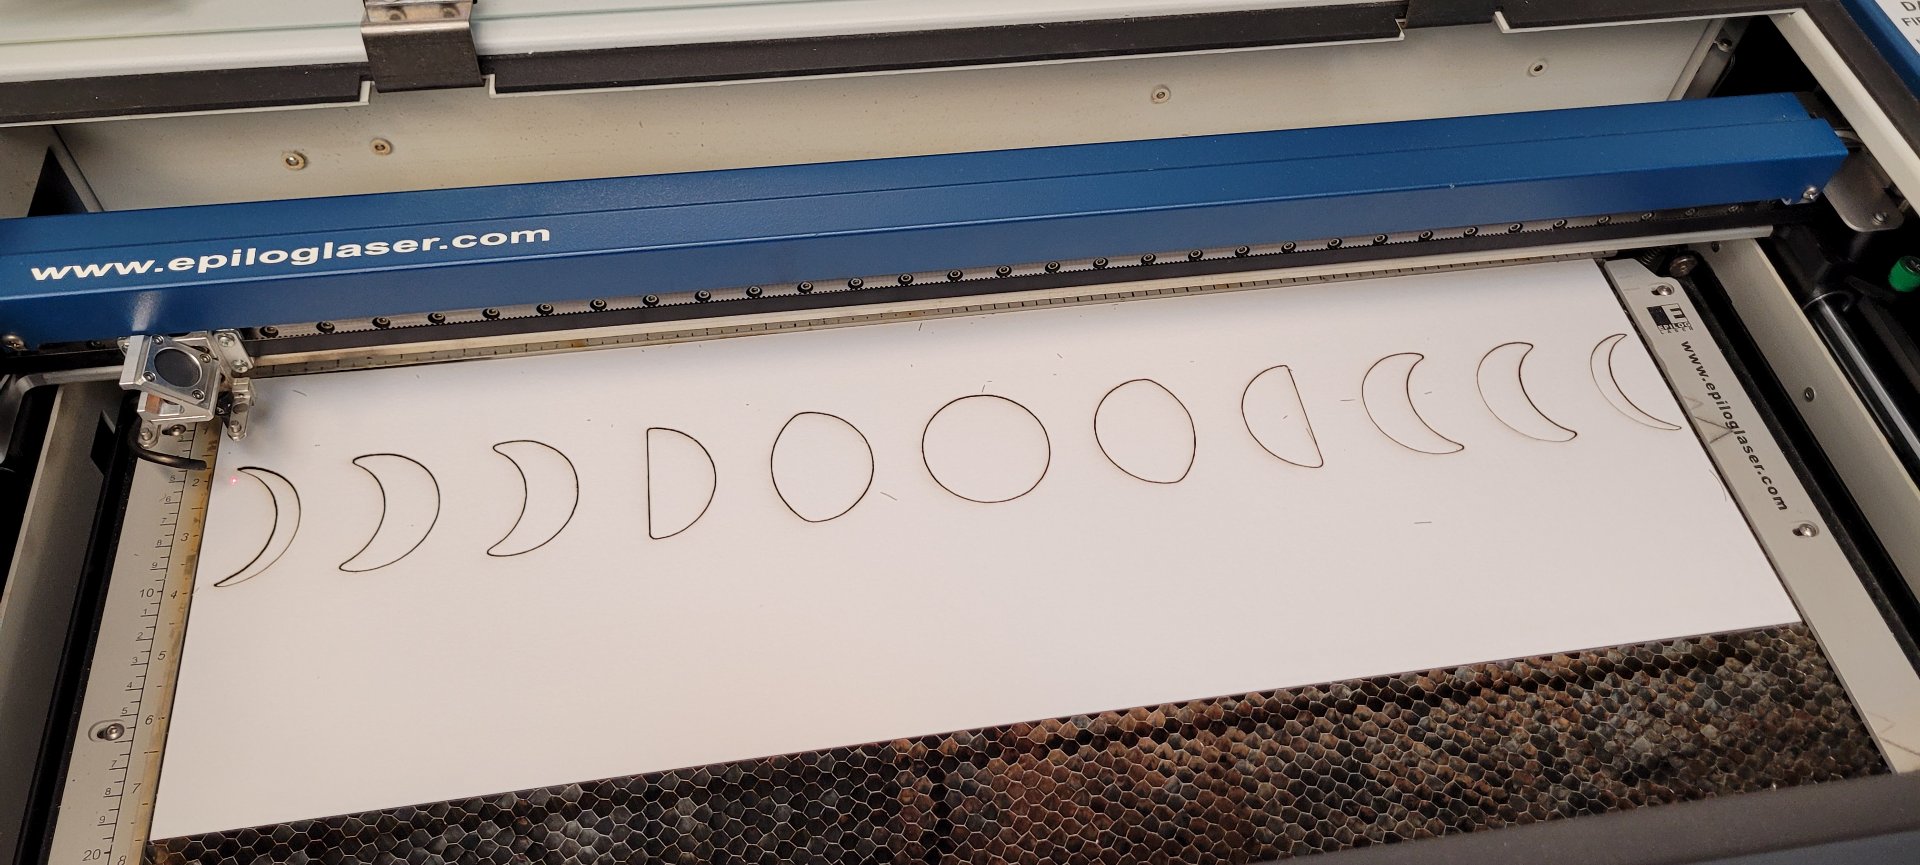
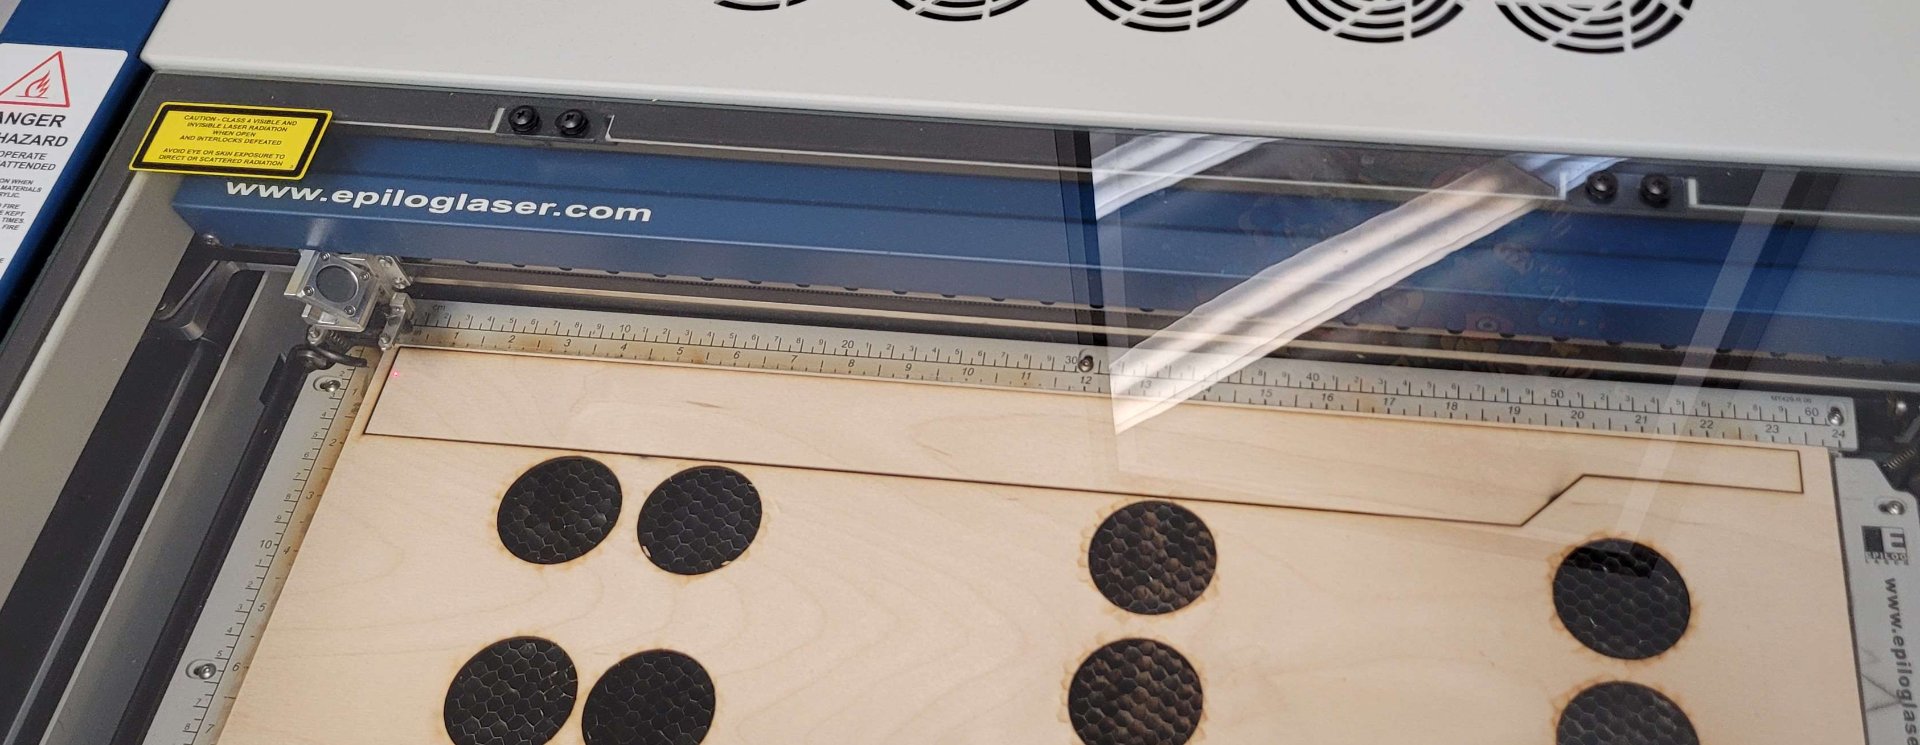
We made another trip to the makerspace and cut out a couple more things. The first was the very basic phases of the moon template I'd bashed together for the front marquee, the second was a [fake coin door and buttons](https://www.printables.com/model/246127-fake-arcade-coin-door-laser-cutter-project) I found online.
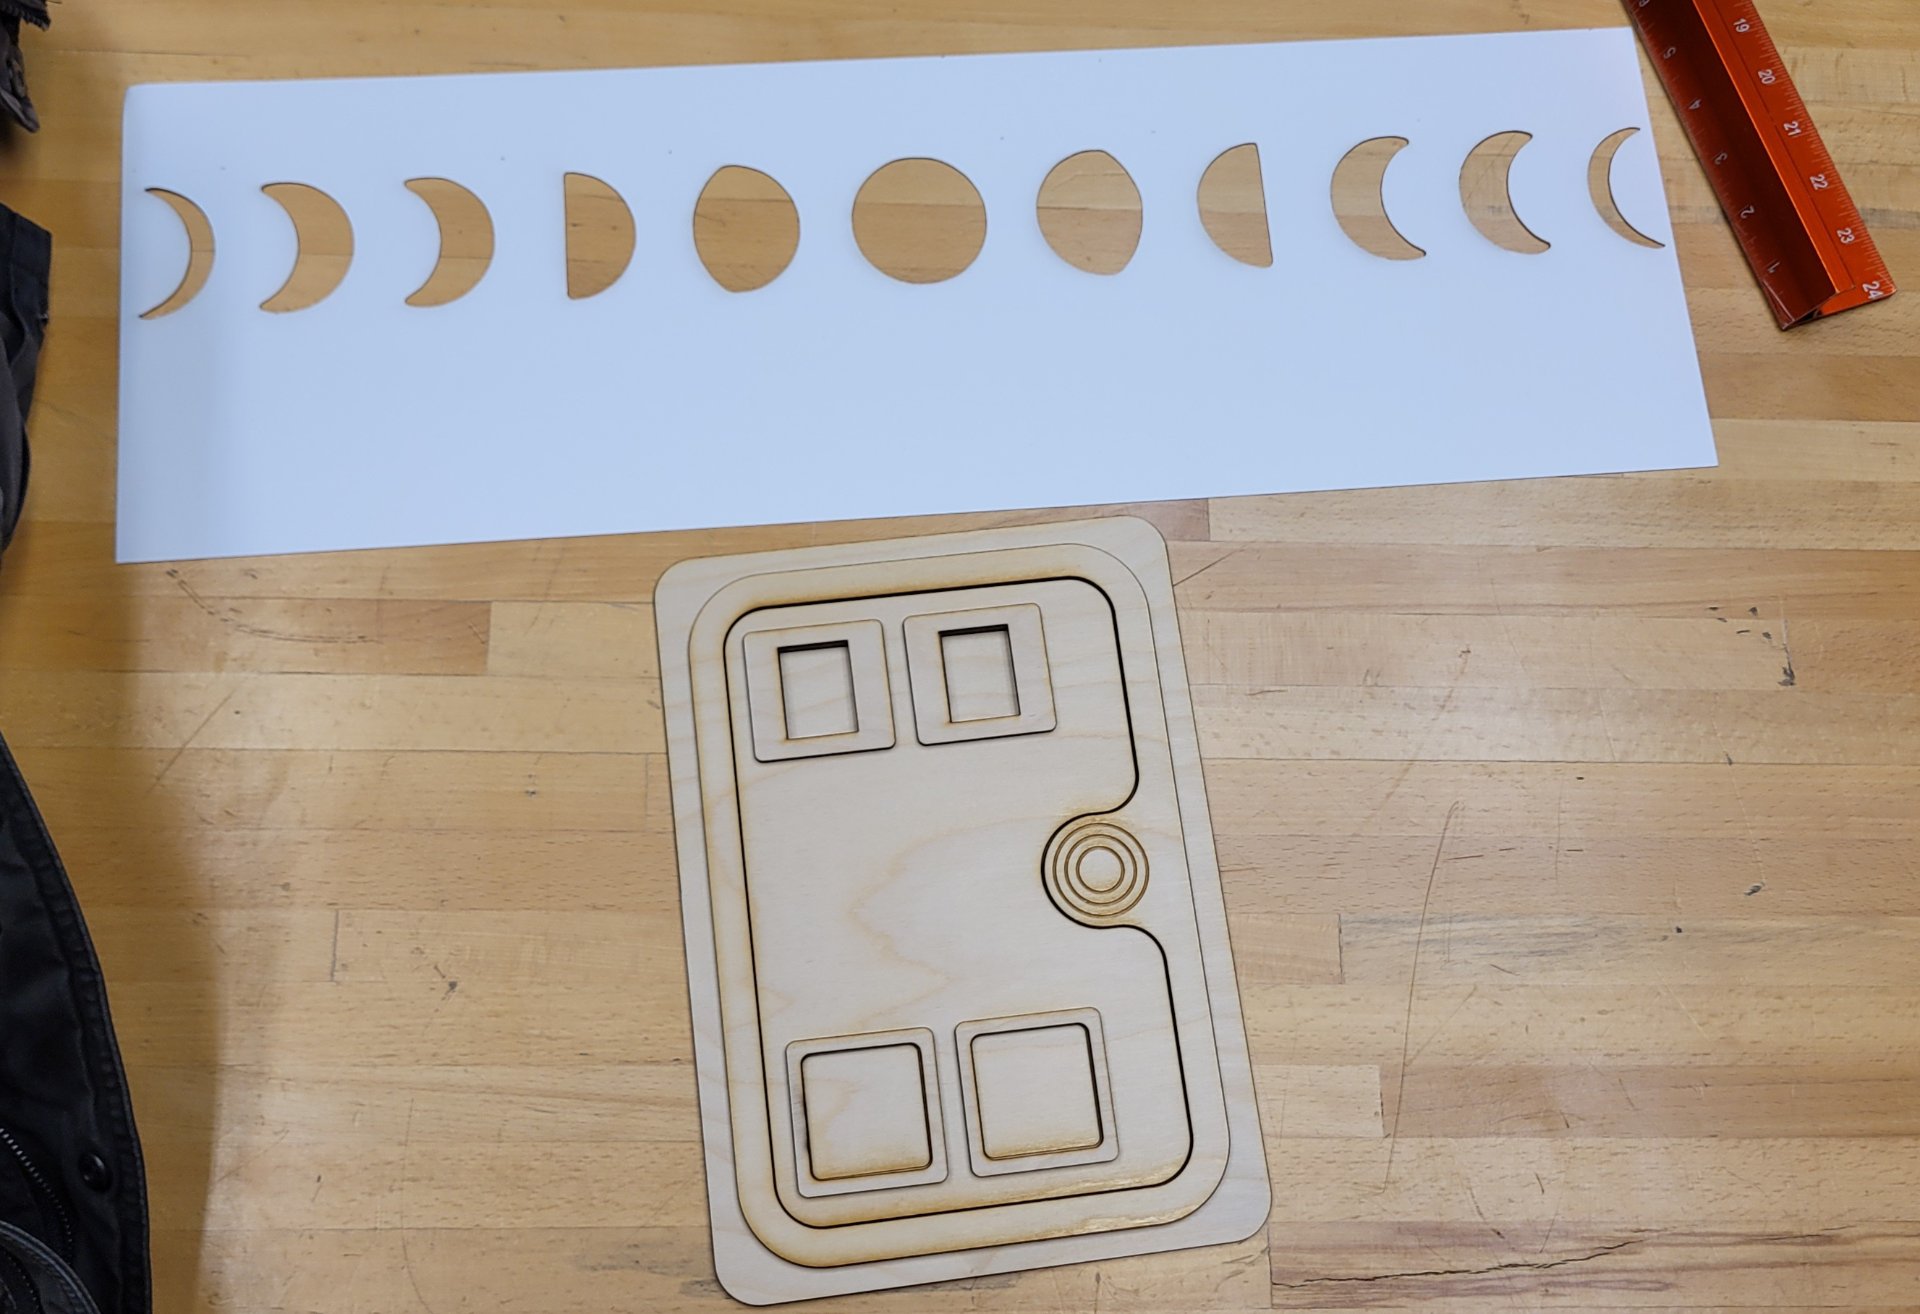
We thought about doing something fancy like getting a real coin door, wiring up buttons so you had to push them for the 'coin' button in the emulator, but it seemed like a wiring hassle and our plan was for the lower part of the cabinet to be storage, so it'd be better if there wasn't wiring hanging around in there.
Painting the stencil on wasn't hard because we didn't have to haul the whole cabinet outside, we just painted a thin strip of particleboard with veneer black and stenciled it, then attached it to the front above where the door would go.
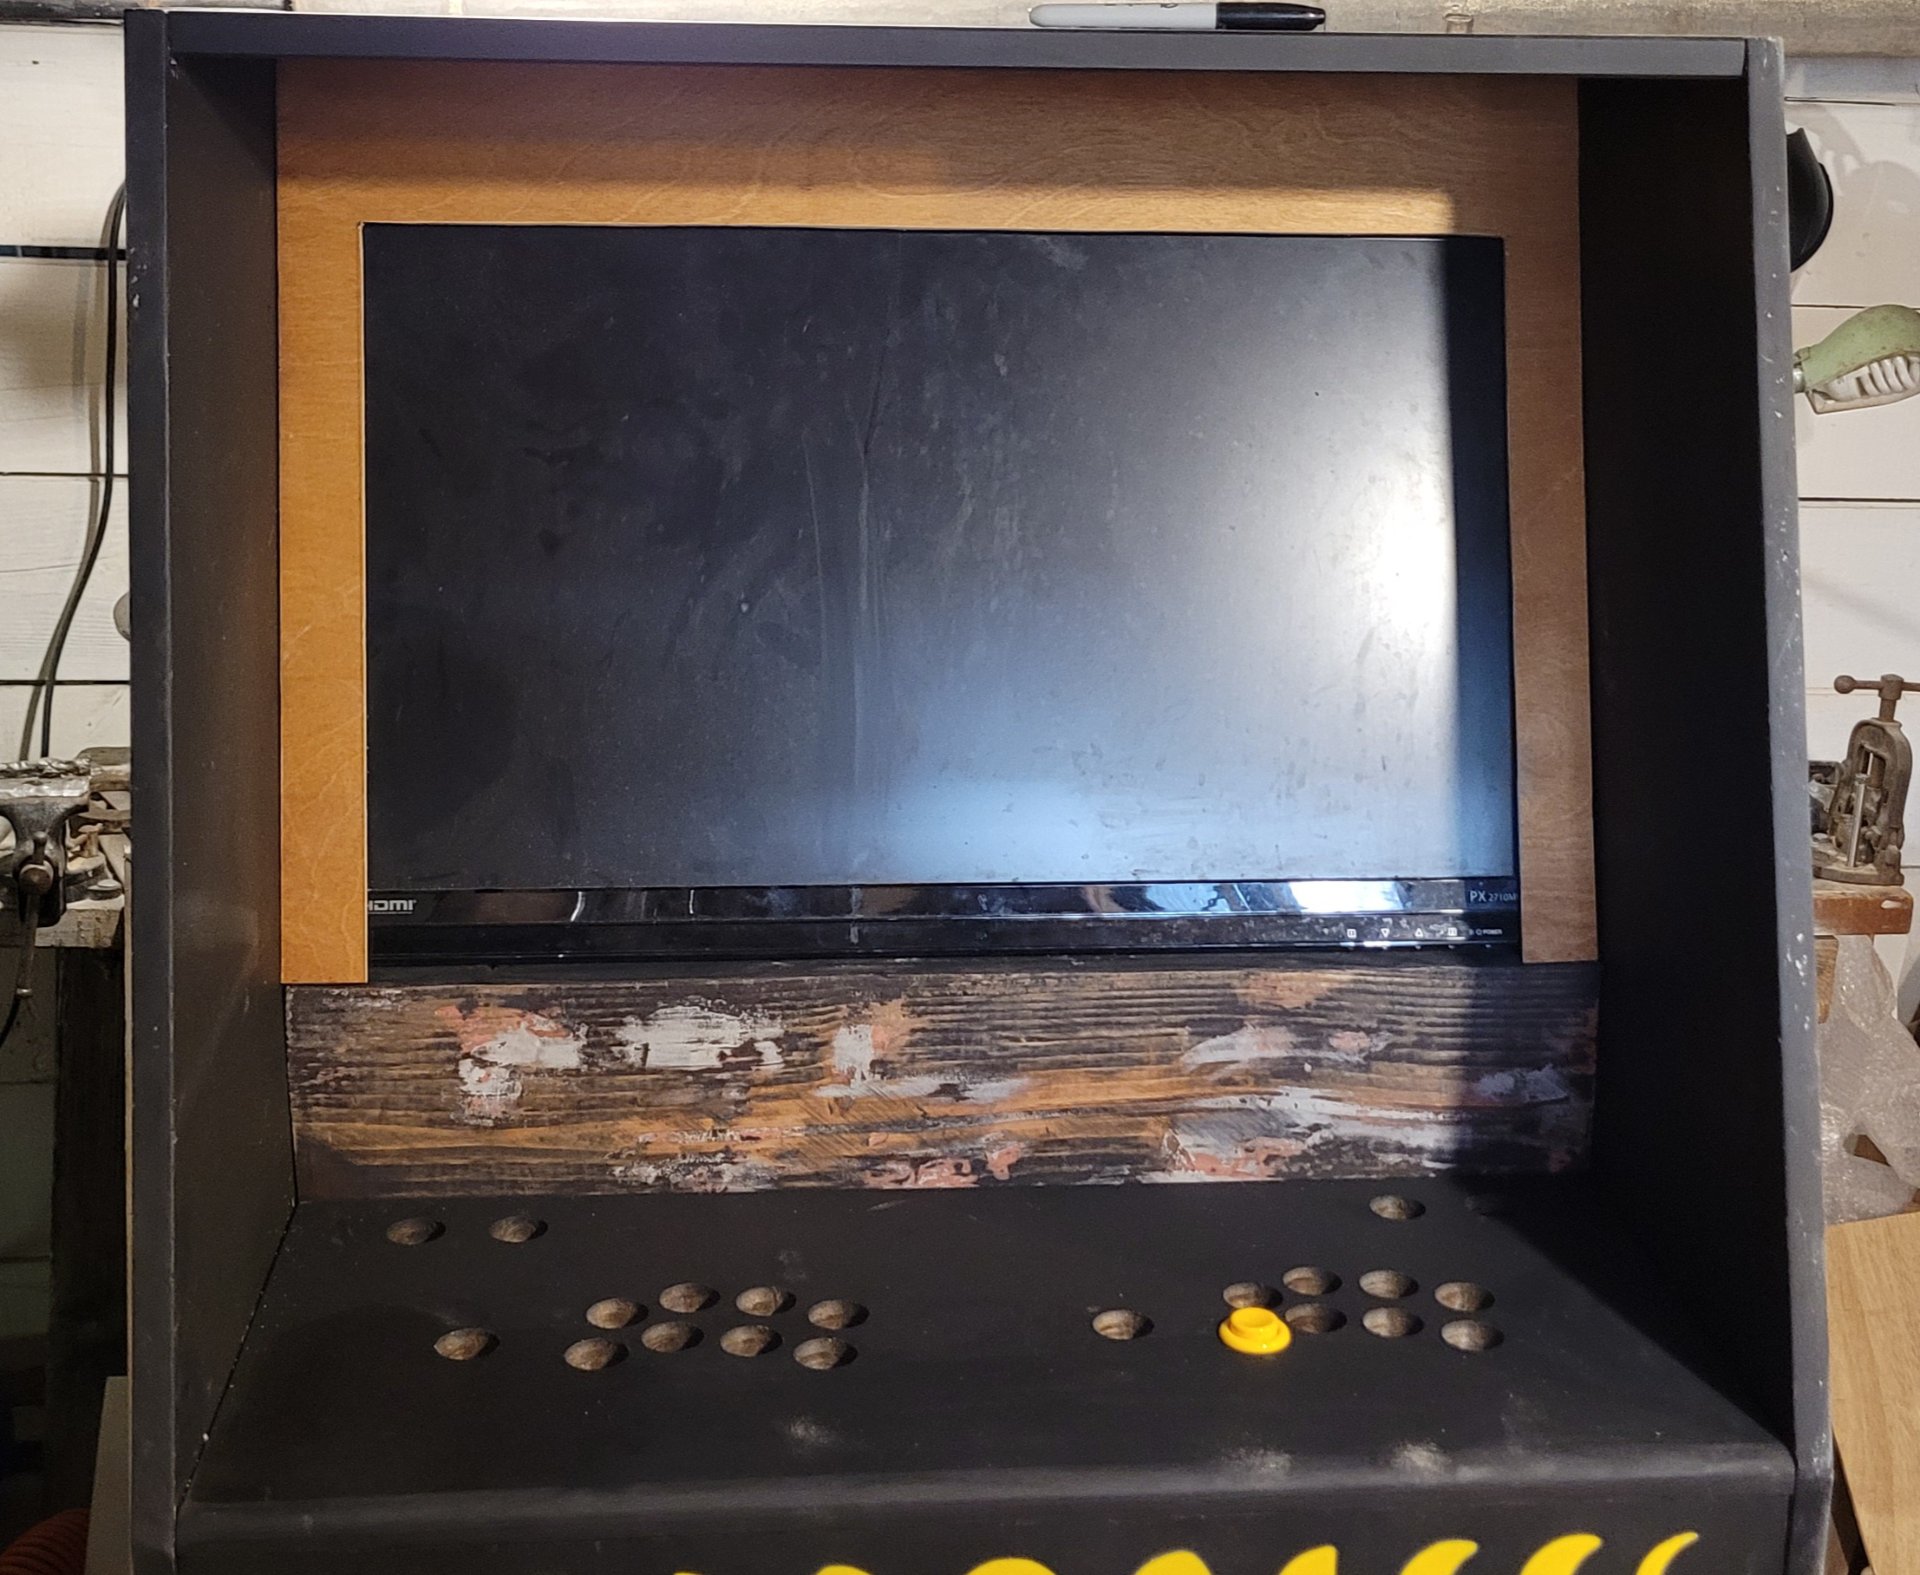
Now it was time for wiring. We got the TV in place and fabbed and test fit its bezel. (The bezel was too big for the laser cutter so we had to cut it by hand with a box cutter and a straight edge.)
I marked the mounting holes for the screws in the back of the TV by putting in some screws, daubing black paint on the heads, and settling the TV in place against the back board. That got close enough, though it was always a pain screwing the screws in through crooked holes in a pine board. I don't think we usually had all four attached, but it didn't seem to make much difference, the weight was on the board underneath, the screws were just to keep it from falling out when it was moved.
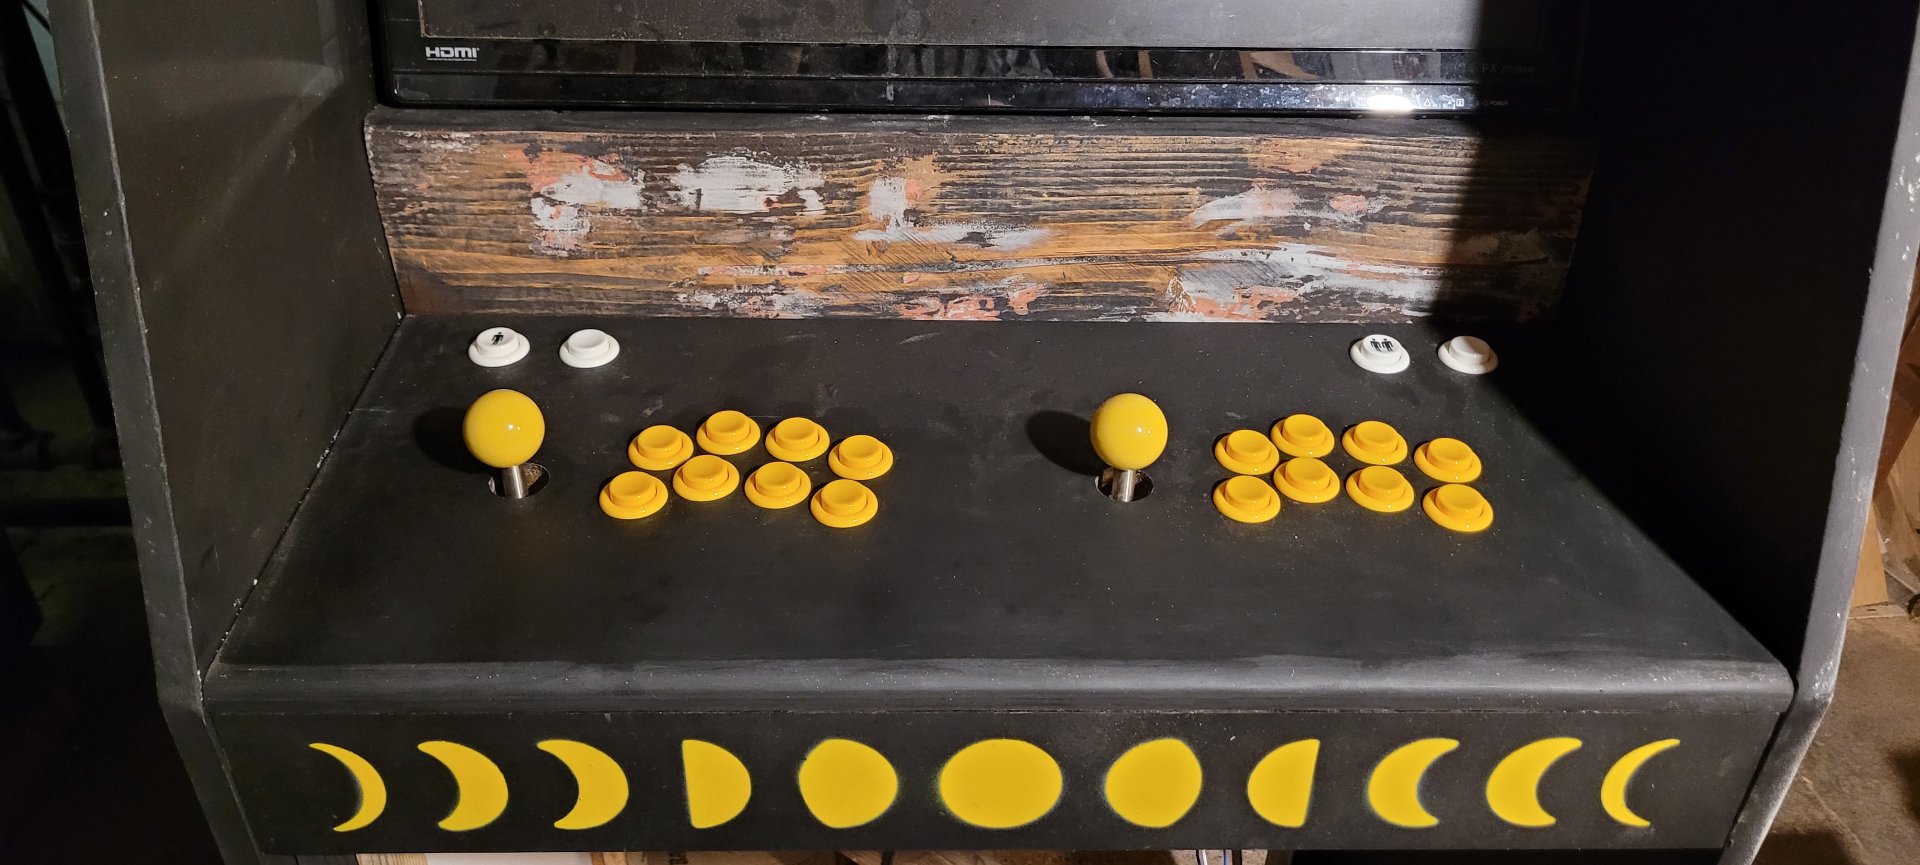
Then we added the buttons. Suddenly it was starting to look like something. I had to keep shooing my friend off the control panel (which wasn't currently doing anything) because they were so excited about trying out the joysticks and buttons. The verdict was good though, it was a comfortable height for them, even with shoes on. No carpel tunnel risk on this one.

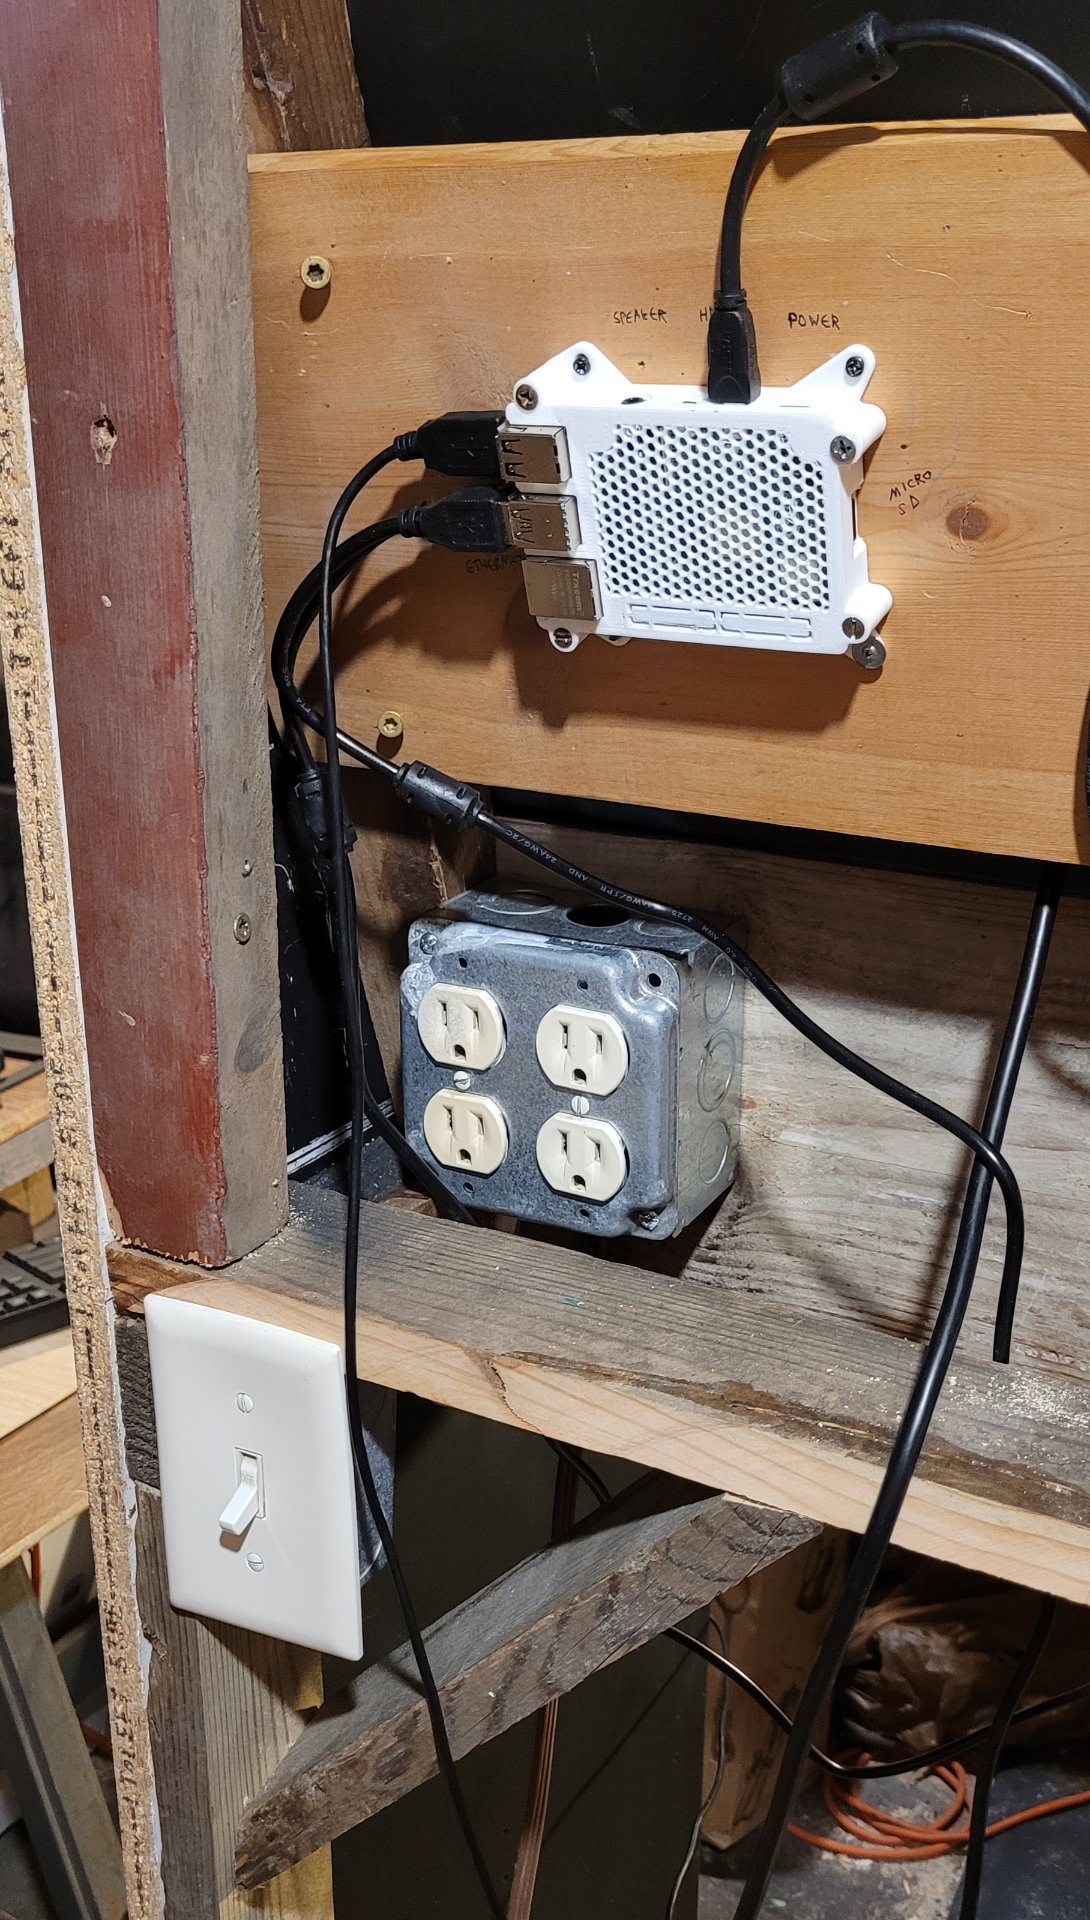
Oh yeah, cable management is my passion. I think my friend eventually redid it so they looked nice.
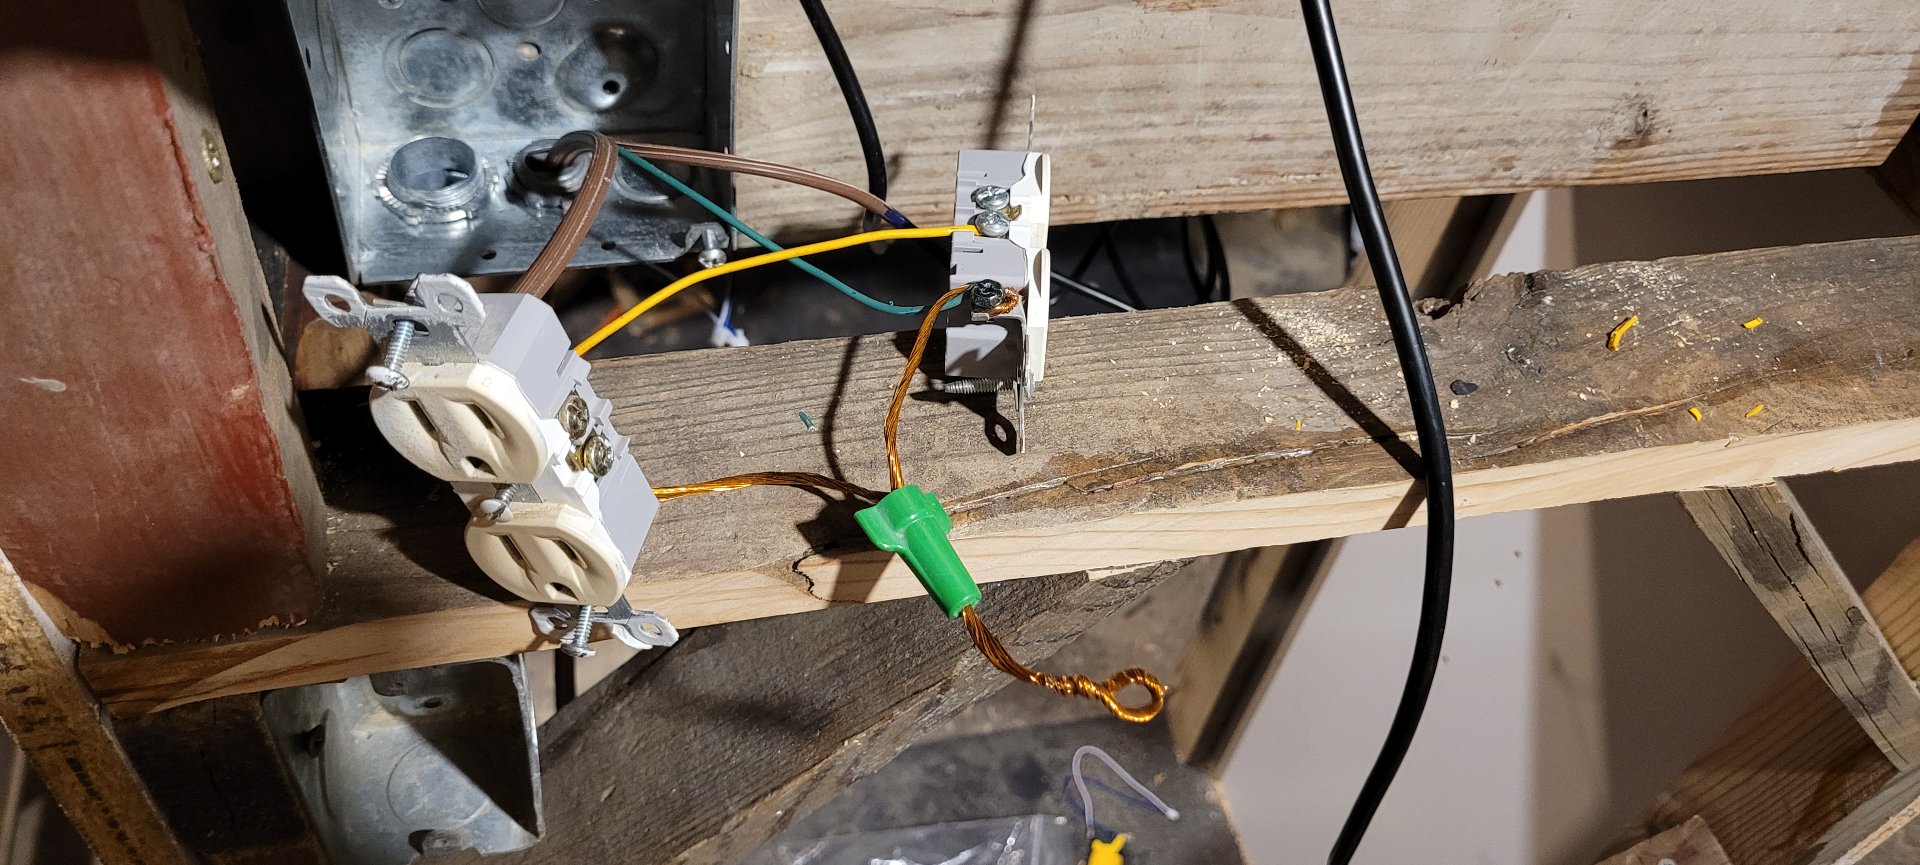
I wired the cab up for power using some outlets and a lightswitch I got from our Buy Nothing Group, some spare wire, and a power I cord I ripped off a refrigerator someone was throwing out. (Don't worry, they'd already taken the doors off and dumped it in a pile face down on the curb). Learning from last time, I set it up so two sockets were switched and two were on all the time (so the TV could be left on). It's a fairly simple circuit, but just in case I took a ton of pictures and ran it past an electrician I know, who said it looked fine, asked if it worked, asked if it caught fire, and gave me their blessing.
I printed the case for my friend's raspberry pi. I know we could have used a regular old junk PC and still even been able to run retropie if we wanted, but they were planning to leave it running most of the time, and the pi has comparatively low power requirements, so that seemed like a good long-term plan.
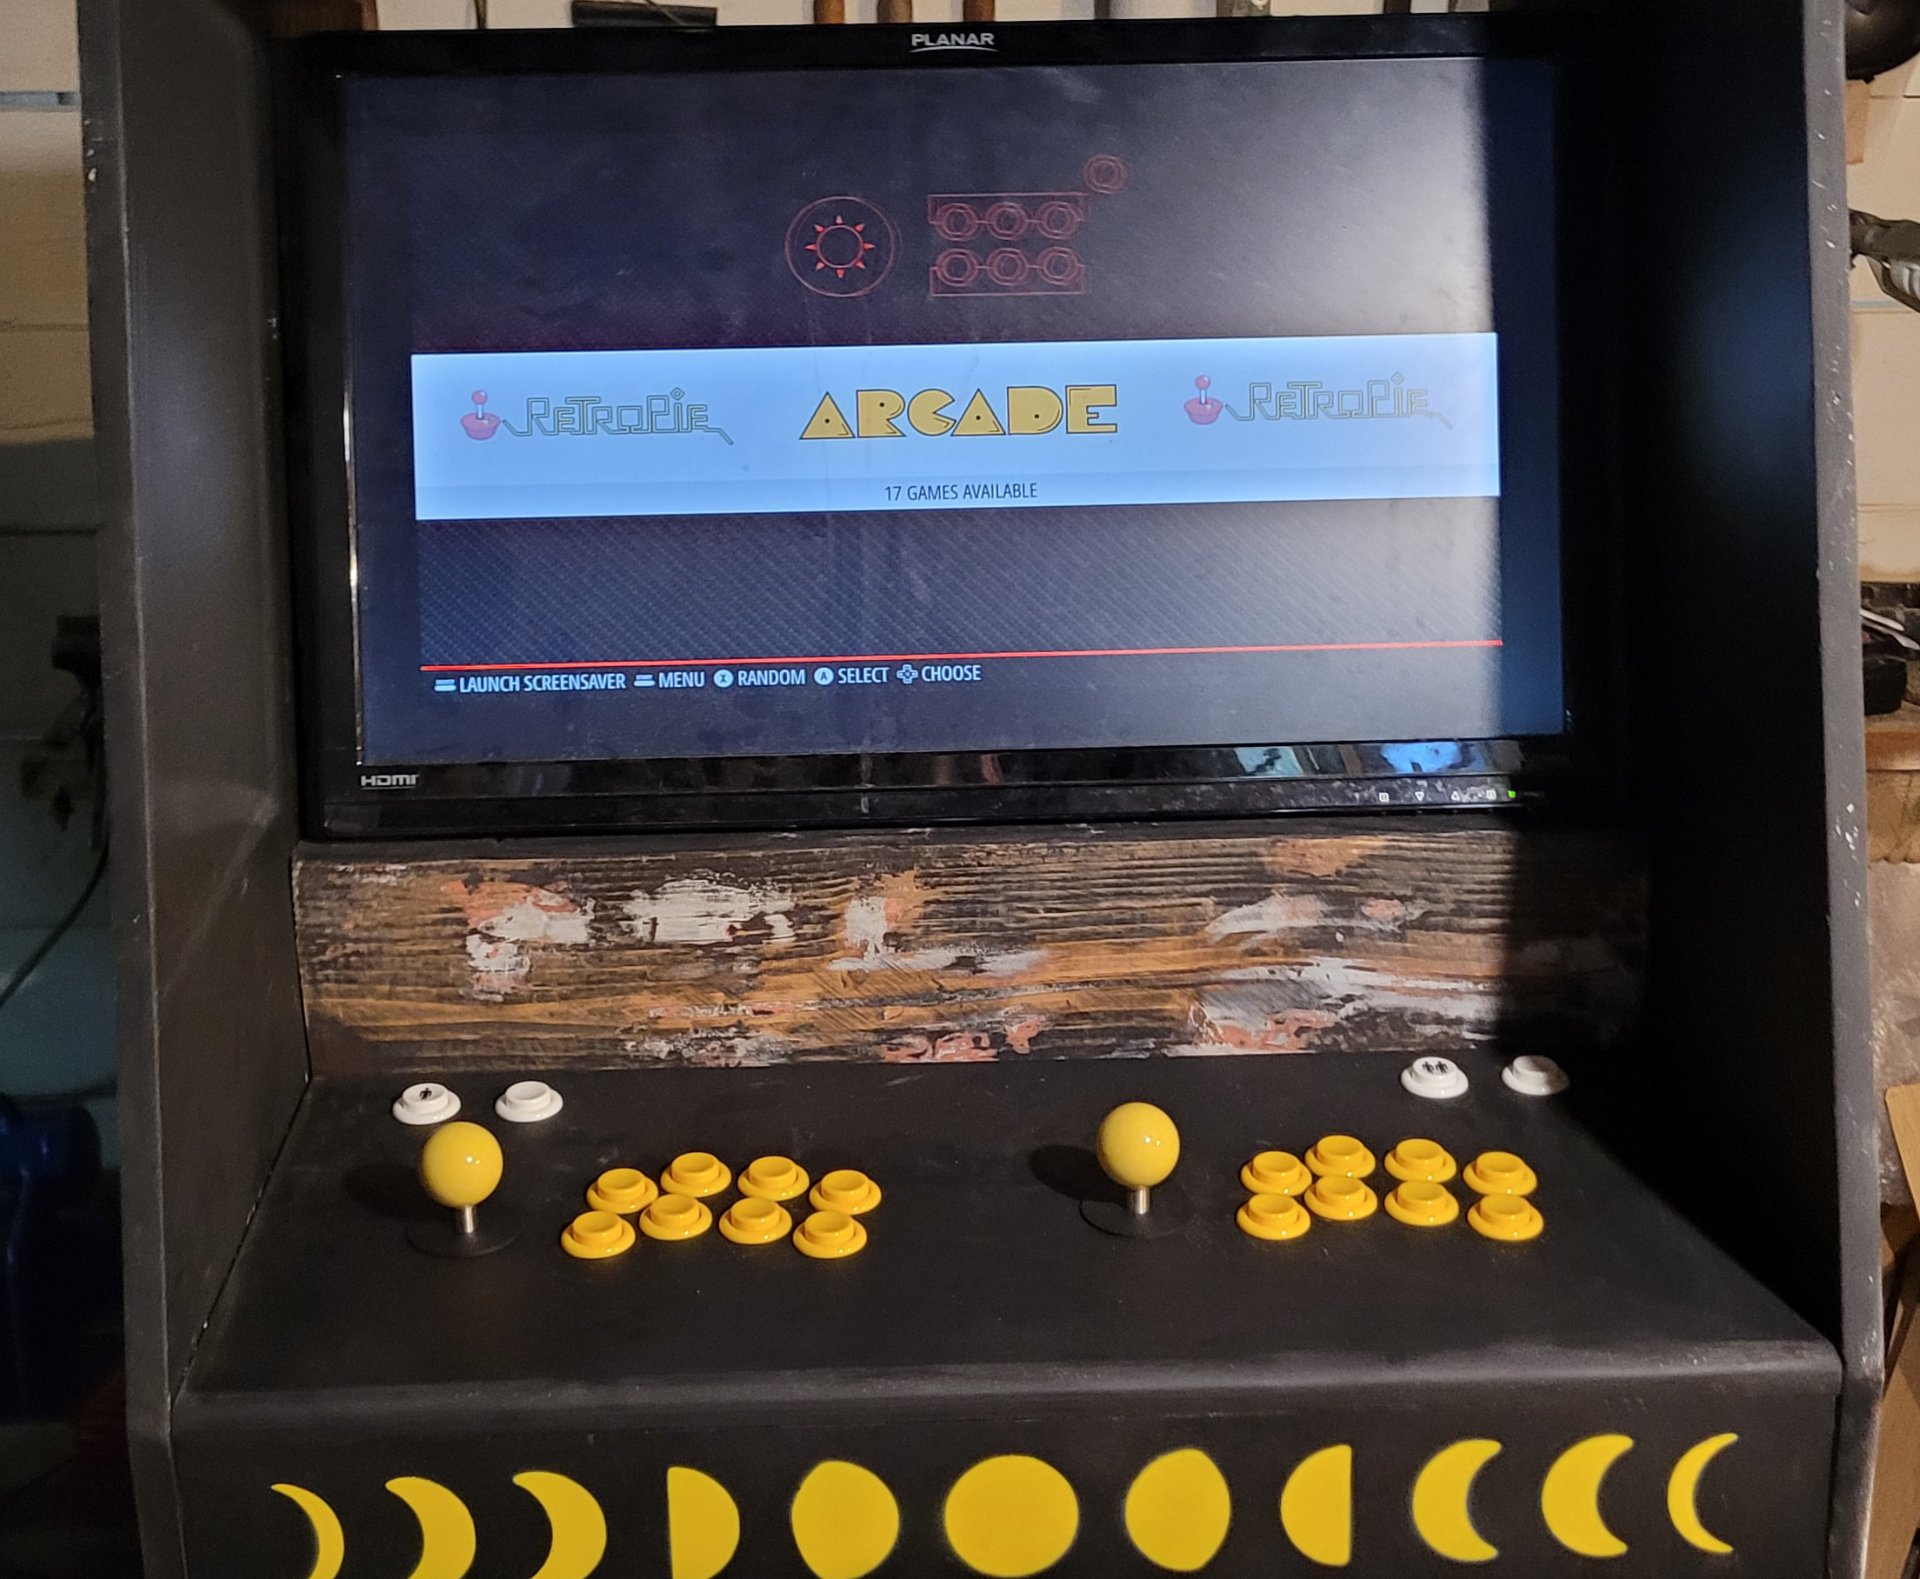
It lives!
You might have noticed that somewhere in here the design had changed. My friend was worried the 'shelf' area for your hands on the original design would be too crowded, and the screen was a bit close. Considering that it was a widescreen TV which would only be showing a square game in the center, the cabinet sides didn't actually hide much. And standing the TV here simplified construction even further.
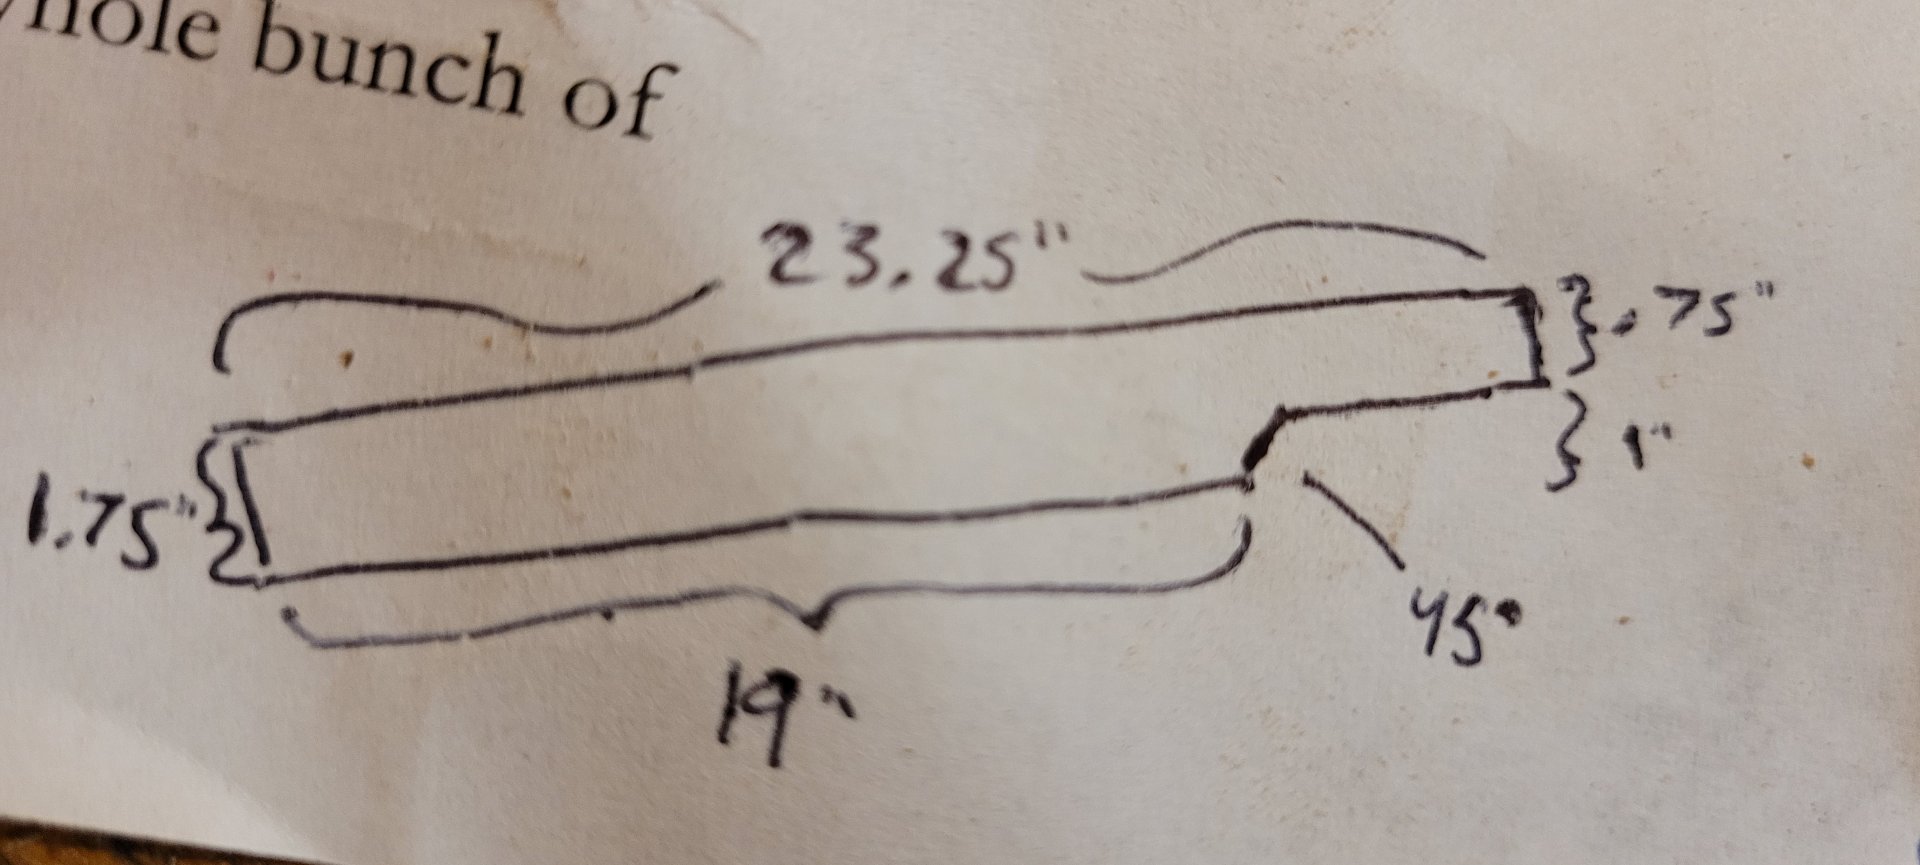
I cut a separate marquee piece for the bottom of the TV (I think because the design changed somewhere along the line?). It had a cutout at one end so the TV could see the IR light on the remote, and so the user could reach the buttons under the screen.
I glued the two pieces together, painted them, and worked out a way to attach it using hangers at the top. I remember it being difficult to attach it in a removable fashion, without anything showing on the front, and this is what I came up with.
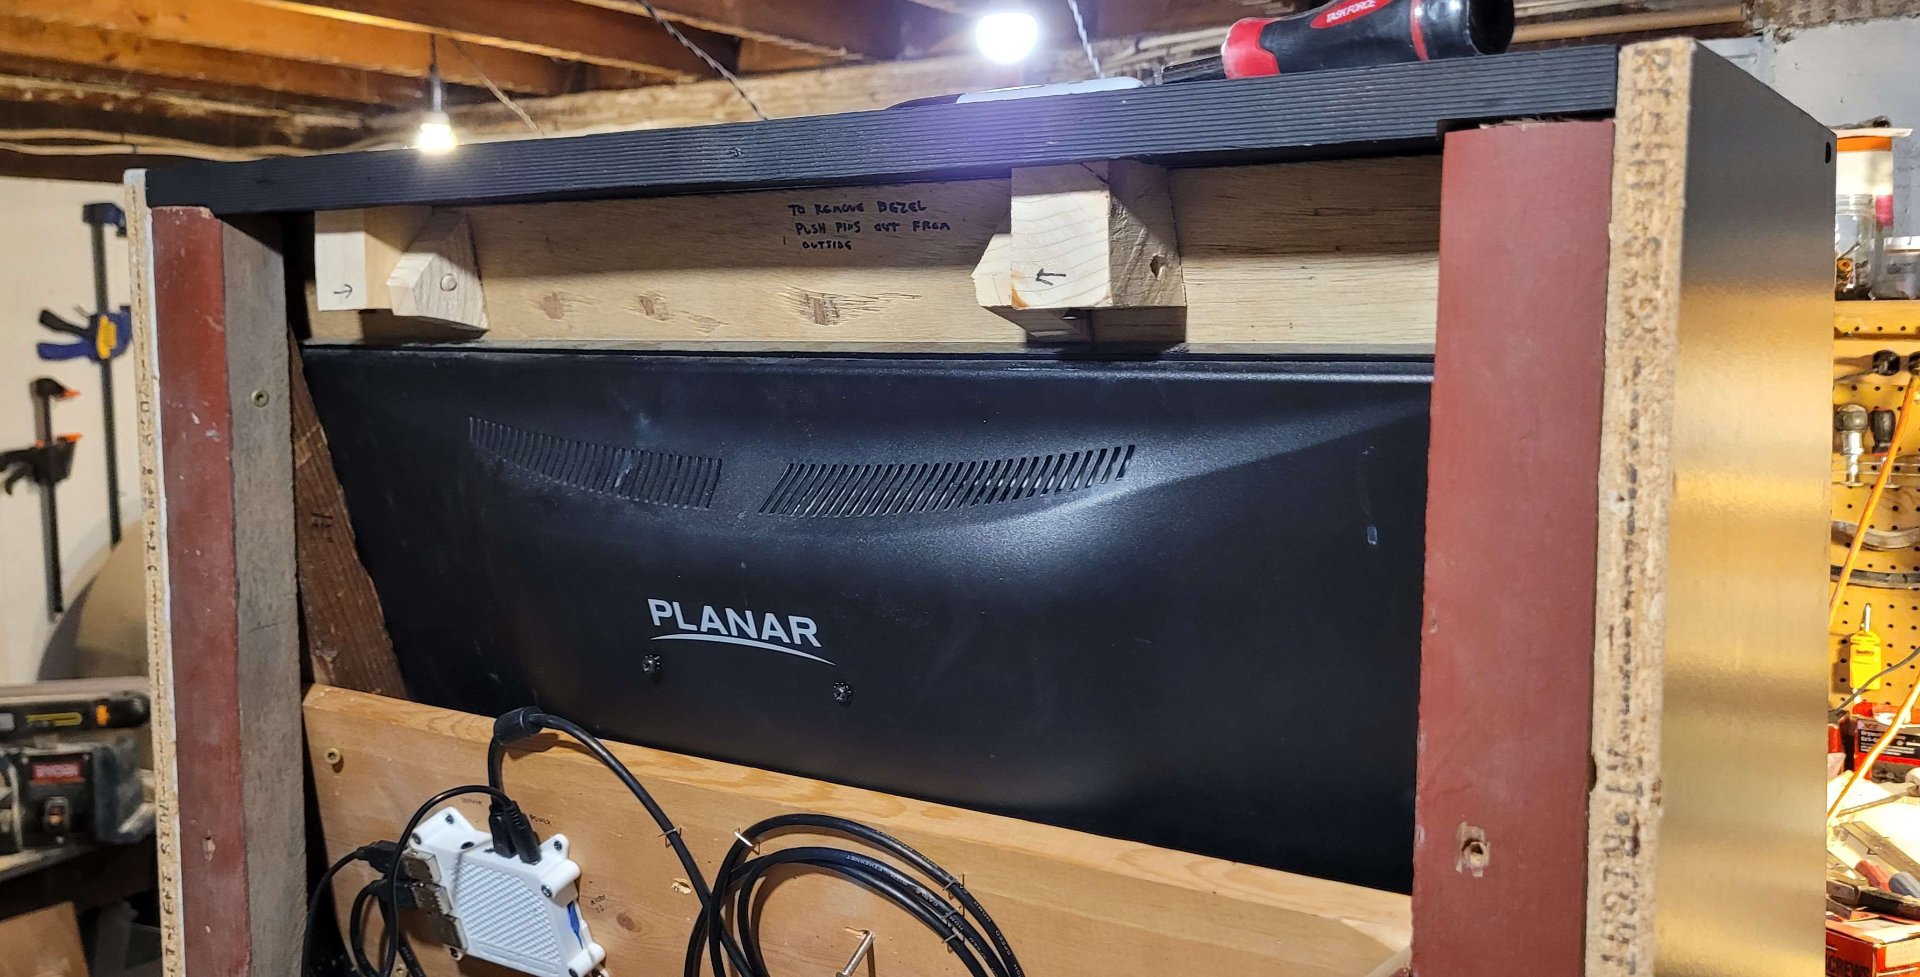
The final design used wooden pegs to fasten it together for some reason, and I remember you could push them back out using a pencil which was handy during all the test fitting. There was probably a better way but this has held up fine.
The next step was finding enough flat, single panel material for the front panel/cabinet door. I watched our Buy Nothing and Everything is Free groups, and scouted around on trash days for months, looking for something big and flat enough (tabletops etc) and had no luck. A few house doors came up but they were like an inch too thick for how we wanted to do the hinges. Finally I gave up and bought a slab of particleboard. The home depot I got it from was able to use their fancy saw to cut straighter edges than I could have with my skillsaw, which was great. When he was done, the guy asked if I wanted the rest. I said they could keep it to resell, I was happy to pay for the whole thing to get the piece I needed, and he said they'd just throw it away. That's how I ended up with a (I think) four-foot by eight-foot piece of particleboard cut into two door panels and one long piece. The spare door eventually became the top of [this table](https://movim.slrpnk.net/blog/jacobcoffinwrites%40slrpnk.net/629a3c96-3489-45d5-9b6f-2548022c8ba1). The long piece hasn't found a use yet but it'll probably end up being a shelf. I haven't gone back to those stores since.
The last piece was a bit of cladding glued/screwed to the board under the TV. I honestly cannot remember why I did it this way, but I painted it black, glued it in place, and we only decided after to add labels to the buttons on that piece.
I took a bunch of measurements of the buttons, lasercut a couple very simple START SELECT stencils with various spacings, found one that fit well, stuck it in place (probably with easy-tac), masked the area with tape and newspaper, and gave it a couple quick hits with rusto white.
Considering the circumstances, I'm pleased with how they came out.
The last big task was moving the thing. That was a challenge as making it sturdy made it pretty heavy, though not as heavy as the real thing with the big CRTs would have been. We rented a moving truck, and used ratchet straps to fasten it to the back inside wall, standing upright, wrapped in blankets. As a bonus, we also delivered some speakers my neighbor wanted to give away.
My friend was planning to replace an armchair in their apartment with this cab. Their plan was just to throw it away, but first thing when we got to their apartment, I posted the chair to our local Buy Nothing page with the promise we'd deliver it. Then we set about hauling the cabinet inside, rearranging furniture, getting everything hooked up, cleaning off months of sawdust, and finally testing it out.

Hanging out, finally playing games on the arcade cab, in the place where it was supposed to be, was awesome. It's since seen a lot of use at parties, and it gets a lot of attention from newcomers to their apartment. We still haven't gotten around to stickerbombing it yet.
By the time we were done and the celebratory snacks had been eaten, we had a taker on the chair. We drove it to their apartment and carried it upstairs on the way back to the rental place.
This is my second step-by-step post using our [local movim microblog platform](https://movim.slrpnk.net/login) rather than imgur. I've also done [an imgur post](https://imgur.com/gallery/S5J5knB) as a backup but I’m seriously impressed with movim, very glad to have a noncorporate place to centralize my projects. Let me know if there’s any issue with the link.
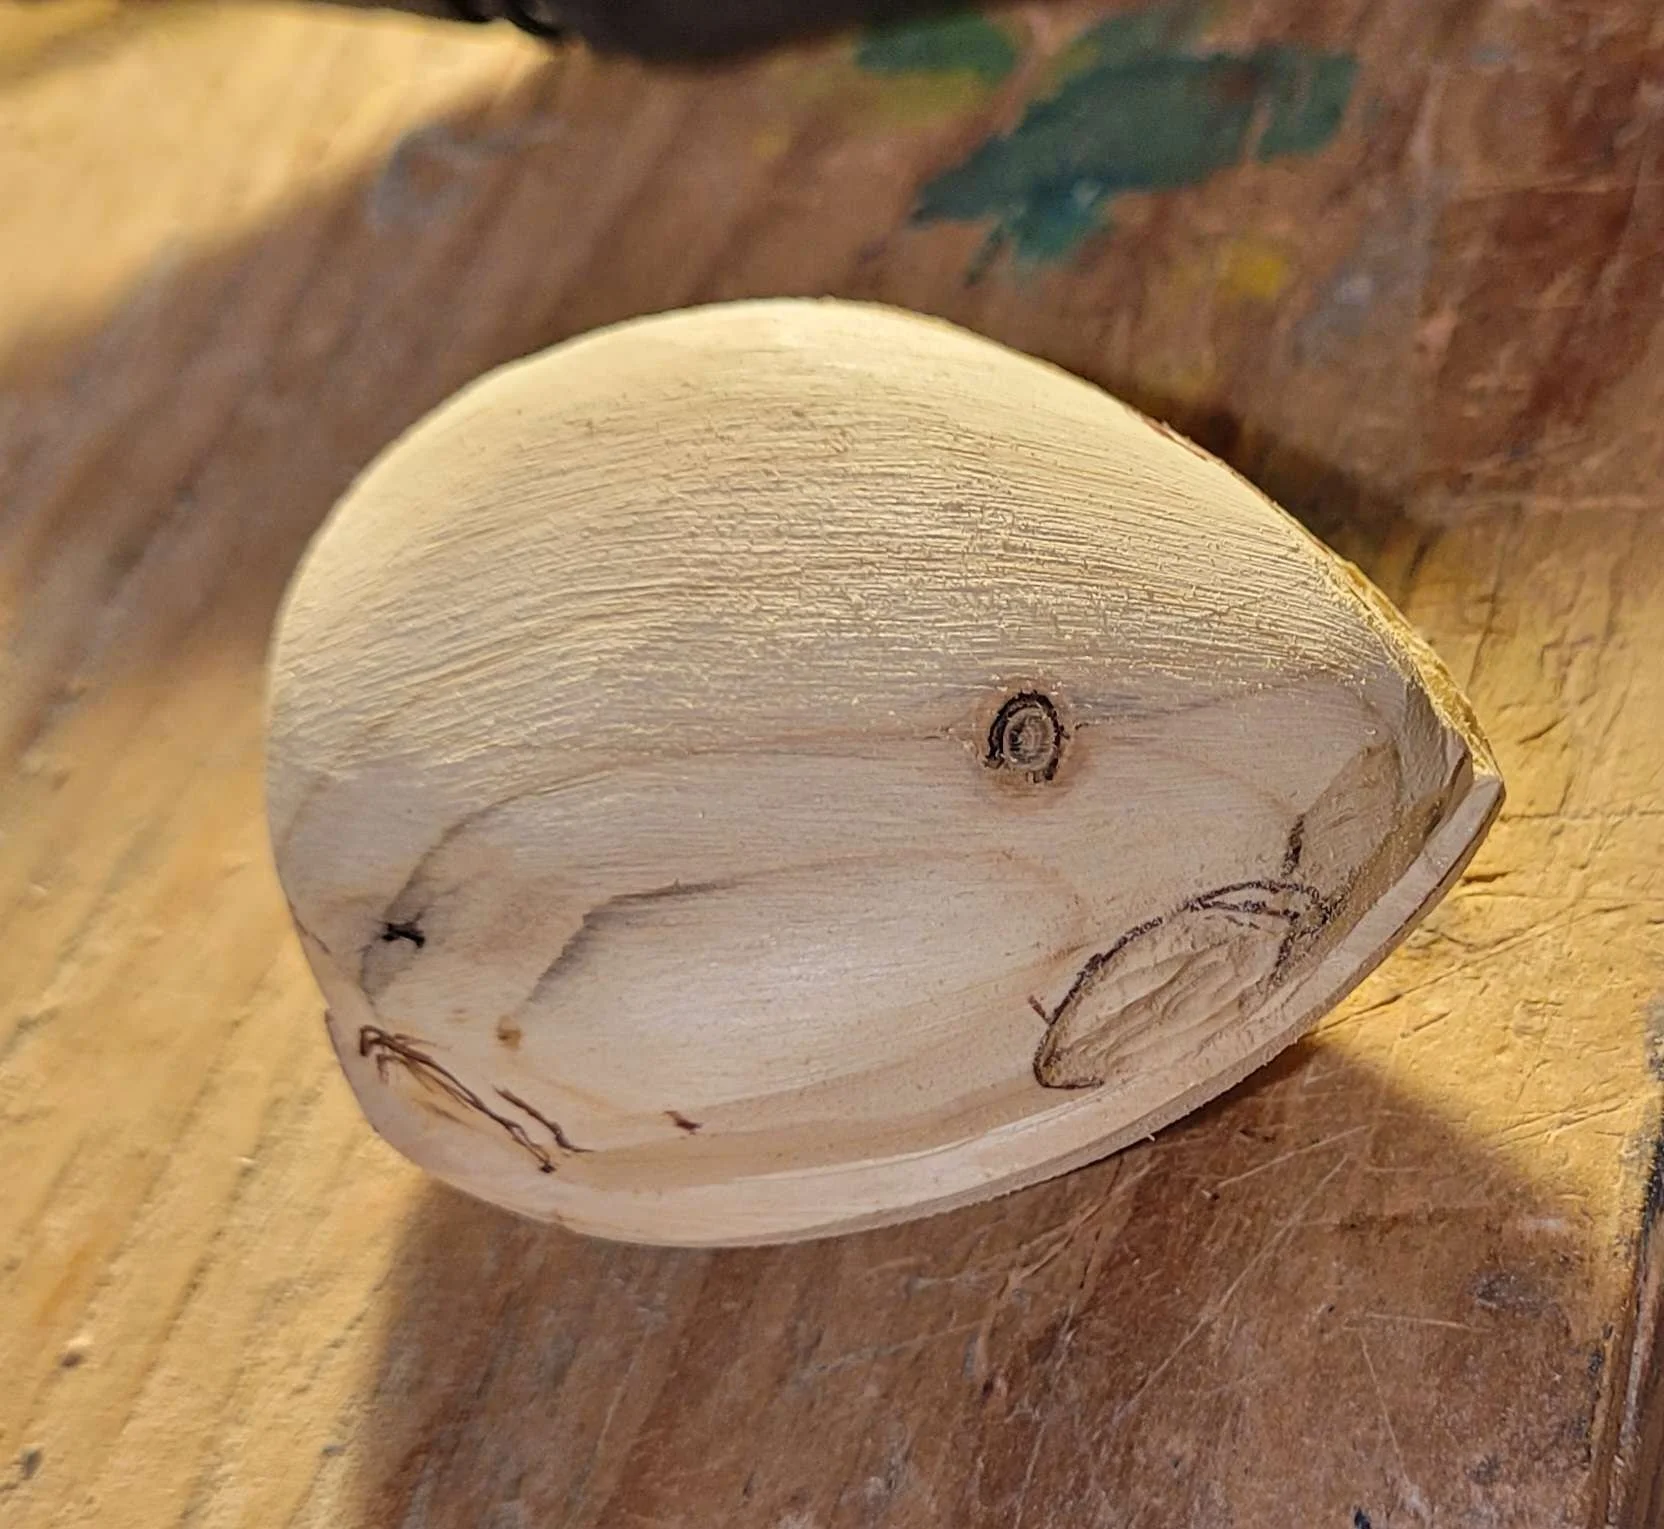
A few months ago I discovered the Shōwa era Gamera movies and I gotta say: I love this goofball. I love that he's a giant turtle who stomps around on two legs. I love that he eats fire and screams constantly, no matter what he's doing. I love that he dances when he defeats an enemy. I love that he is, canonically, a friend to all children. And I love that he flies through the sky by retracting his legs into his shell, shooting fire out the openings, and spinning through the air like a frisbee.
Every year I try to make a new Christmas ornament. We normally add a few as souvenirs from that year (keychain from a place that was significant that year etc), but I always like to add a little carving if there's time. This year's pick was Gamera (flying). Due to life stuff, it took longer than I'd expected, but here it is.
I started by looking for suitable models (in real life or printable) and quickly decided it'd be easier to just make it from scratch. I've made cravings of animals before so a turtle shell was doable, especially if I cheated and used power tools.
I sketched the shape using different movie stills and posters as references. His design, both in the art and even the costume, sometimes varies, so I picked whichever features I liked best or were easiest. Unfortunately, for as long as this ended up taking me, I took surprisingly few pictures along the way. So I guess I'll paraphrase my dad's favorite unhelpful carving advice: picture a turtle shell inside your block of wood, then remove everything that isn't part of the turtle shell.
I started by sketching the shape top-down onto a piece of scrap pine and cutting it out on the band saw. Then I used the belt sander to rough it down to a turtle shell-ish shape. It's important to oversize it, because if you're like me, you'll need room to correct mistakes. And you do that by removing everything else around the mistake until it's gone. Here's an early rough version of it
I kept sanding it down, consulting occasionally with images from the films to make sure the overall shape was correct (or at least not mutually exclusive with the material I had left).
Eventually I got it smoothed down and could start positioning legs, tail, and head holes in the shell. Unfortunately, this is apparently where I stopped taking pictures. I can tell you that I needed to make this much thinner, and took a lot of material away from his belly, and flattened the shape of the shell. I cut in a pattern of the underside armor, and then removed a bit between it and the upper shell to make it more distinct. I cut the holes into the sides, but left a sort of volcano shape inside for the four limbs, so it would look like the jets from one of the movie posters. I did a similar thing for his head and tail, but didn't add a hole in the middle for fire to come out of. I also carved his head kind of pointed, with the ridges which run from snout to eye (though the eyes are hidden) and removed some material around his tusks.
On his back, I drew a scale pattern, and the worked from the tail end to the head with a dremel, cutting away the 'top' end of each scale, just below the next one, so it would look like they're overlapping. On a big animal carving, I probably would have done this more carefully, but this is kinda just a silly ornament for the two of us, so I wasn't stressing getting the scales perfect.
Once that was all done, I drilled holes into the 'volcanoes' sticking up from the leg holes. I hadn't decided how I'd do the fire yet at this point, but I was thinking sprigs of painted wire.
The next step was painting. All the costumes and even in the art have Gamera looking pretty one-note, color-wise. Just sort of a blue-green-grey color. I started with flat black spray paint, getting it pretty thoroughly, but in many light coats (so as not to raise the grain from the wood), then hit it with with lighter coats of brite blue from an angle, to try to preserve some of the darker color in the nooks and crannies. Then I mixed some green and blue acrylic paint and did a sort of drybrush all over. I painted black into some of the nooks around the jets, and head and tail. I painted his tusks white.
Then I got some breadbag ties, the wire and paper kind. I was going to do a small bouquet of them sticking out of each jet, but the first test actually looked quite good on its own. I cut four of them (tapering it a little so it'd go into the hole better, and so it'd look more like flame on the other end) gave them each one twist, and painted them yellow-orange-red with a bit of flame pattern. They fit in tight without any glue.
Finally I drove a little eye-loop into the top of the shell and tied an old clothing tag string through it.
 English
- •
- www.youtube.com
- •
- 3M
- •
Interesting collection of videos about installing a solar PV system.
- @Brutticus@lemm.ee English
- •
- 3M
- •
Hello,
I have two interior doors to hang in my basement. One of my friend said he could cut/ hang them, but he suggested looking into hiring home depot's contractors install them, because I would still have to get them delivered anyway.
Okay, the problem: when I started this basement project, I hired some amateurs. They hung my walls. They eventually disappeared, and I had to finish them on my own. When they built my rough openings, they didn't even make them uniform with eachother. one of them is 38.25 by 76.75 in. One is 38.75 by 78 even.
I checked into pre hung doors, and they are all 80 inch tall, and they recommend another 2 in. Apparently interior door manufacture is controlled by a regional monopoly: anything a few inches shorter will double the price, or potentially more. And of course, add a month for the custom manufacture.
the rub is that I would have to wait an additional month for the contractors, and they want an exorbitant amount.
So I guess my question is, what are my options? Can I cut a pre-hung door and frame down to size? Is there something I should know about? Should I just get someone to hang a door cut to size? Or should i just give up and pay the money?
One of my hobbies is fixing up ewaste laptops and giving them away. I actually do lots of ewaste electronics, from TVs to space heaters, but the laptops are where I put in the most work. Some are new, intact, and ready to go with nothing more than a OS reset. Others have had parts removed or damaged, and need more work. Most of these computers I give to a local refugee resettlement organization, but some of them are old enough, or otherwise weird enough that I wouldn’t feel right about giving it to someone who already has a lot of problems to deal with. I try to make sure they get fast computers with familiar operating systems whenever possible. So far, I’ve always had enough decent machines to pass along that that hasn’t been an issue.
Through this project I made friends with a guy who works at the local recycling center. He does a similar thing with TVs, though covering even more organizations and moving more equipment than I do. He helped me up my game a lot. He provided some old Windows multi use keys, a ton of cables and USB hubs to give away with each laptop, an almost endless stream of power bricks for any model I needed, and recently he was able to get the management there to agree that he could take laptops too, if he caught the people who dropped them off and asked if they were okay with it. Otherwise the site policy says they need to be securely destroyed.
So suddenly I had two sources of hardware, which was a huge help in providing computers to everyone who needs one. Not all of them are great though – sometimes you get a laptop with a single DDR1 ram slot (can’t go above 1GB), or in this case, a couple chromebooks with expired, insecure OSs. He wasn’t sure I’d be able to do anything with them, and asked me a few times if I was sure I wanted them, but I didn’t feel it was a big risk. I’d try fixing them up and if there was an issue, I could always put them back in recycling. Neither one seemed like a great fit for the refugees, they only had 2 gigs of RAM and 16 gigs of on-board storage space. No hard drives. But the hardware was nice, lightweight, with a nice screen and keyboard, and the batteries were awesome. I hate to throw something like that away.
I started with reading about my options and settled on MrChromeBox’s script for replacing the ChromeOS and firmware with a proper BIOS. The website and instructions were thorough and worked perfectly for me.
Step 1 was removing the hardware write protection. All chrombooks have some kind of write protection that prevents you from paving over their firmware. In some it’s a jumper wire connecting two contacts. On others its a lack of a jumper. Sometimes they use a screw to bridge those contacts, and on some, the battery itself acts as the bridge and you can only reinstall the BIOS when the battery has been disconnected and the laptop is plugged in.
Mine was an easy one, enabled with a screw. The website didn’t have a photo for this model, but it wasn’t hard to find since it looked different than all the rest. (I’ve since sent this photo to MrChromeBox in case he’d like to use it.)
Once that was out of the way, I followed their instructions to get to the correct command line interface and entered the commands to run their script. Very satisfying. A great ratio of ‘feeling like a hacker’ to actual effort involved.
Once the script completed, I had basically a regular laptop. Probably closer to an old netbook in terms of hardware. I could install Linux Mint but it would take up most of the storage space. I received a bunch of microSD cards as a gift, so I bought a super low profile microSD to SD adapter and stuffed a 512GB microSD into the SD slot. That’s going to be a pain to get out some day.
The BIOS is happy to boot to the SD slot, so I installed Linux Mint there. Suddenly I had a regular laptop with plenty of storage space, a bit light on RAM, but it’s a perfect little computer for carrying around the city and going to write-ins, etc. Light weight, good keyboard and touchpad, awesome battery.
I know I could have used a lighter weight OS, but Mint is sort of my default, its super convenient, has wonderful compatibility, good community support, and just works well when I want a computer that isn’t itself, a project. Between the web browsers, the preinstalled Libre Office, and the writing tool Wavemaker Cards, I have everything I need for most of my projects.
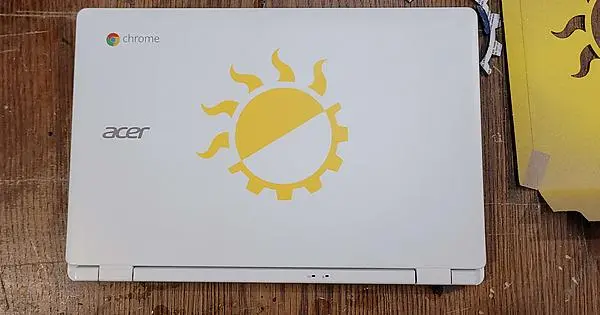
A few days into using it we had a makerspace night, and since I had access to the laser cutter, I put together a quick solarpunk stencil. I love using the laser cutter to cut stencils. It turns hours of work into minutes, and it can do intricate designs with narrow bridges that I’d often have to glue back together after tearing or accidentally cutting. Plus, it works best when cutting thick cardstock paper or thin cardboard, which makes for better stencils, but is a pain to cut by hand. To reduce waste, I used an old cracker box for my stencil.
Once it was cut out I saved the bits and pieces in case I wanted to do this design as a reverse stencil sometime.
To make sure the size was good I laid out the bits and pieces on the center of the laptop. Eventually I corrected the tilt so it followed a line from the top right to the bottom left corners. Once I had it in the right place, I lightly taped the gear part in place so I could use it to position the actual stencil later on.
With this one there wasn’t any reason not to use some temporary spray adhesive, so I spritzed the cardstock with that, let it dry enough not to leave residue, stuck it down, and peeled up the gear. I usually use old return address stickers, the kind charities send you forever after you donate once, to cover up any gaps on the stencil, and to keep the other masking stuff in place. The stickers are great whenever you need tape but don’t care how it looks.
I used the same yellow graff paint I had from years ago and recently used on another project. I tried to hit it straight down, mostly to avoid anything slipping in under the edge of the stencil and because I hadn’t masked the rest too well. With such a simple stencil it wasn’t really a big deal.
Once it was done I had my traditional moment of panic as I realized I hadn’t really checked that I’d applied the whole thing right-side-up, but it worked out this time, saving me a lot of hassle. As paranoid as I am about other measure-twice-cut-once preparation tasks, you’d think I’d be better at this one.
And that’s about it. The laptop’s working well, I’m actually writing this post up on it at the moment. Overall it’s a good little writing laptop, and I’ll probably set its sibling up the same way soon enough.
cross-posted from: https://slrpnk.net/post/6072301
> Once you get access to a laser cutter, you start to see all kinds of places you can use it in a project. Our local makerspace has one, and the more I use it, the more I find new applications, whether that’s in fabrication of flat parts, or just adding flair to smaller panels of a large project.
>
> Around Christmas, I decided I was going to fix up my dad’s miter saw. It was an older, discontinued Delta 36250. The guard was missing(my grandfather didn’t believe in tools having guards) and the plastic insert in the table, where the saw blade came down, had been shattered for years.
>
> The guard was an easy fix, bought a replacement part from ereplacementparts. But the plastic inserts were out of stock. In fact, even the scam parts websites that all look identical weren’t bold enough to lie and claim to have any of these things. Having examined what was left of the original, here’s my theory for why:
>
> They’re junk. The space they fill is 5mm deep, but they were made to be cast out of plastic about 2mm thick with a lip around the edge to fill in the space. That plastic was super brittle. And then,just to make things better, the slot in the plastic, where the saw blade would go when it cut through the wood, wasn’t wide enough to accommodate the blade when it was rotated to do cuts at a 45 degree angle. Which it was designed to do. So the blade would come down through the wood, hit the brittle plastic at the wrong speed and blade type for cutting plastic, and shatter it. The inventories were out of stock because everyone broke theirs and ordered new ones, and they weren’t worth making in the first place
>
> The obvious answer was to cut something close enough out of plywood and call it a day, but I wanted to get fancy with it. So I took some pictures, removed all the screws, claimed all the shards of plastic, measured the space, and brought the pieces home. Luckily enough pieces of the insert remained to get every measurement except overall length (which I measured while I was there). I used my calipers to get the original slot width, positions of the screw holes, etc. I drew up a vector image with my best guess at the final dimensions, and widened the slot until it slightly exceeded the damage marks from when the saw cut into it at a 45.
>
> To get the curve at the corners I scanned in one of the shards, pasted it into the schematic in inkscape, and adjusted the rounded corners setting on the rectangle until it matched the scan.
>
> On our makerspace night I cut a few cardstock templates, chased the screw holes around the design until they lined up with my plastic shards. And because I like adding some decorative aspect to practical items, I also drew up and cut a stencil of the name of his old military unit surrounded by a hawser rope.
>
> This is one of the places the laser cutter really shines. When I was doing spray paint stencils in the past, I always cut them by hand with a scalpel blade(ironically cheaper than xacto knife blades). But this is tedious, takes forever, and certain designs really don’t lend themselves to it, so you find yourself spending lots of time gluing your bridges back together as they tear or bend. With the laser cutter, I had a template literally in minutes, and at least as precise as I could have done it. Some folks feel the art looses something when you make it easy that way, I’m personally more about results, especially when I’m on a timeline.
>
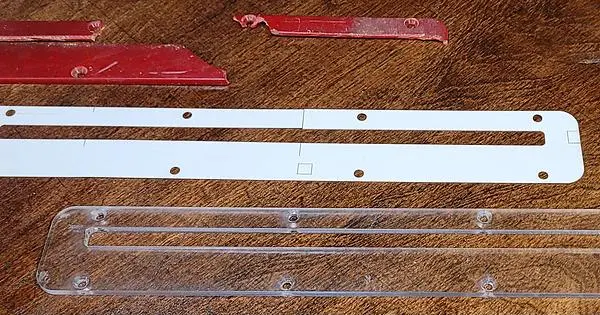
> The makerspace didn’t have any plexi in the thickness I needed for the insert, so I reached out to TAP plastics for a recommendation. They had 4.5mm High Impact Modified plexiglass which they’d ship in custom dimensions, so I could get something small enough to fit inside the cutter. I went ahead and ordered that, and about a week later I had it. Enough material for four tries.
>
> We ran the first cut slow in order to cut the thicker-than-usual plexi. That ended up melting it a bit along the edges and at the holes, so we did the second in two passes. I also redesigned the vector with smaller holes, and sent it again. This one came out better dimensionally, but the cutting fogged the plexiglass (it was the kind protected by sheets of plastic rather than paper, so we had to remove the stuff before running it in the laser). This wouldn’t be a problem except that I was planning to stencil the art onto the back of the plexiglass, so it would look deep and glossy, and would be protected by the plastic itself.
>
> I covered the remaining material in painter’s tape and ran it again. The third one came out great, and I took them home for finishing.
>
> The next step was to chamfer the screw holes on the drill press.This would let the heads of the screws sink down into the plastic where they’d be out of the way of boards sliding across the worktable.
>
> Once I had that done, I peeled the painter’s tape off the back,and for once managed to remember to double check that it was actually the back and oriented correctly and everything. Then I attached the stencil so it was mirrored. I normally use temporary spray adhesive where I can to fasten the stencil down, to minimize the underspray. But a reverse stencil means any glue residue would end up between the plastic and the next coat of paint, so I had to skip it and just use stencil spiders (little metal weights, usually nuts, with paperclip/wire legs, which help you pin down high points).
>
> I got very lucky, the paint went on well and didn’t leave me with any spots I had a problem with. I gave it a couple days to dry before messing with the stencil (this was good graff artist paint, but I’ve had the cheap stuff dry tacky, then when you try to lift the stencil, the paint stretches, snaps, falls onto the work and bonds there. I didn’t think that would happen with this stuff but I wanted to be really sure). Waiting to find out if it came out okay is the worst part, for me.
>
> When that was dry I checked it over, and painted on the background color.
>
> By that point, I was out of time to check it for fit, so I wrapped it and waited until Christmas to find out if it would fit. Later that day, we tested it, and it was overall pretty good - I had to chamfer the holes a bit deeper on his drill press, and used a thin round file to adjust a couple of them just a touch outwards from the center. But it fit and looked quite nice overall. My vector file isn’t perfect, but I’m providing it on my website just in case anyone out there has a compatible saw and also access to a laser cutter, and for some reason wants to follow me down his road.
>
> The saw file is available here as a pdf: [https://jacobcoffinwrites.files.wordpress.com/2024/01/saw-insert-great.pdf](https://jacobcoffinwrites.files.wordpress.com/2024/01/saw-insert-great.pdf) (apparently wordpress won't host SVG files.)
>
> And here as both pdf and svg: [https://mega.nz/folder/CdMwVDQa#yiHp5k_WbOxrNcYCRwWyiA](https://mega.nz/folder/CdMwVDQa#yiHp5k_WbOxrNcYCRwWyiA)
>
> (Sorry not to show the stencil, I realized partway through writing this that my dad wouldn't appreciate it if I did, but I still like talking about the stencil art process.)
 English
- •
- 4M
- •
Hello, comrades! What kind of stuff are you up to these days? Anything cool, anything you want to share about?

cross-posted from: https://lemmy.dbzer0.com/post/8959162
> I had a rod that was threaded on one half and smooth on the other half. I needed the smooth half to be installed into brick.
>
> **method 1: chemical anchor**
>
> The normal way to do this (I think) would be to cut some grooves into the rod using an angle grinder, drill a hole that has a diameter that’s ~2mm bigger than the rod, and use chemical anchoring. But that stuff is pricey and only lasts ~1 year on the shelf. Thus cost ineffective for 1 use.
>
> **method 2: ad hoc chemical anchor substitute**
>
> Similar to the above, I wonder if general 2-component household epoxy would work as a substitute in the above method since people are more likely to have that on-hand. I suspect the issue is that it’s too thin and gravity would do its thing and the topmost area would not get filled with epoxy. Hence why I did not attempt it.
>
> **method 3: (What I did)**
>
> The rod measured at ø=8.8mm. I had no 9mm drill bit for masonry (and that would be too loose anyway). So I used a nominal 8mm masonry bit on a hammer drill. I’m not sure what the actual diameter of that hole was, but it was too tight to push in the 8.8mm rod in by hand. So I tapped it in, dry (no oil or glues). It worked! It feels really solid. Feels like I got away with murder.
>
> **Questions**
>
> (method 2) Is there something could be mixed with common 2-component household epoxy to thicken it so it acts more like chemical anchor epoxy?
>
> (method 3) Did I take bad risk with fracturing the brick? Is there perhaps a guide somewhere that safely maps brick hole diameter to metal rod diameter? Or is this something is never done and should never be done?

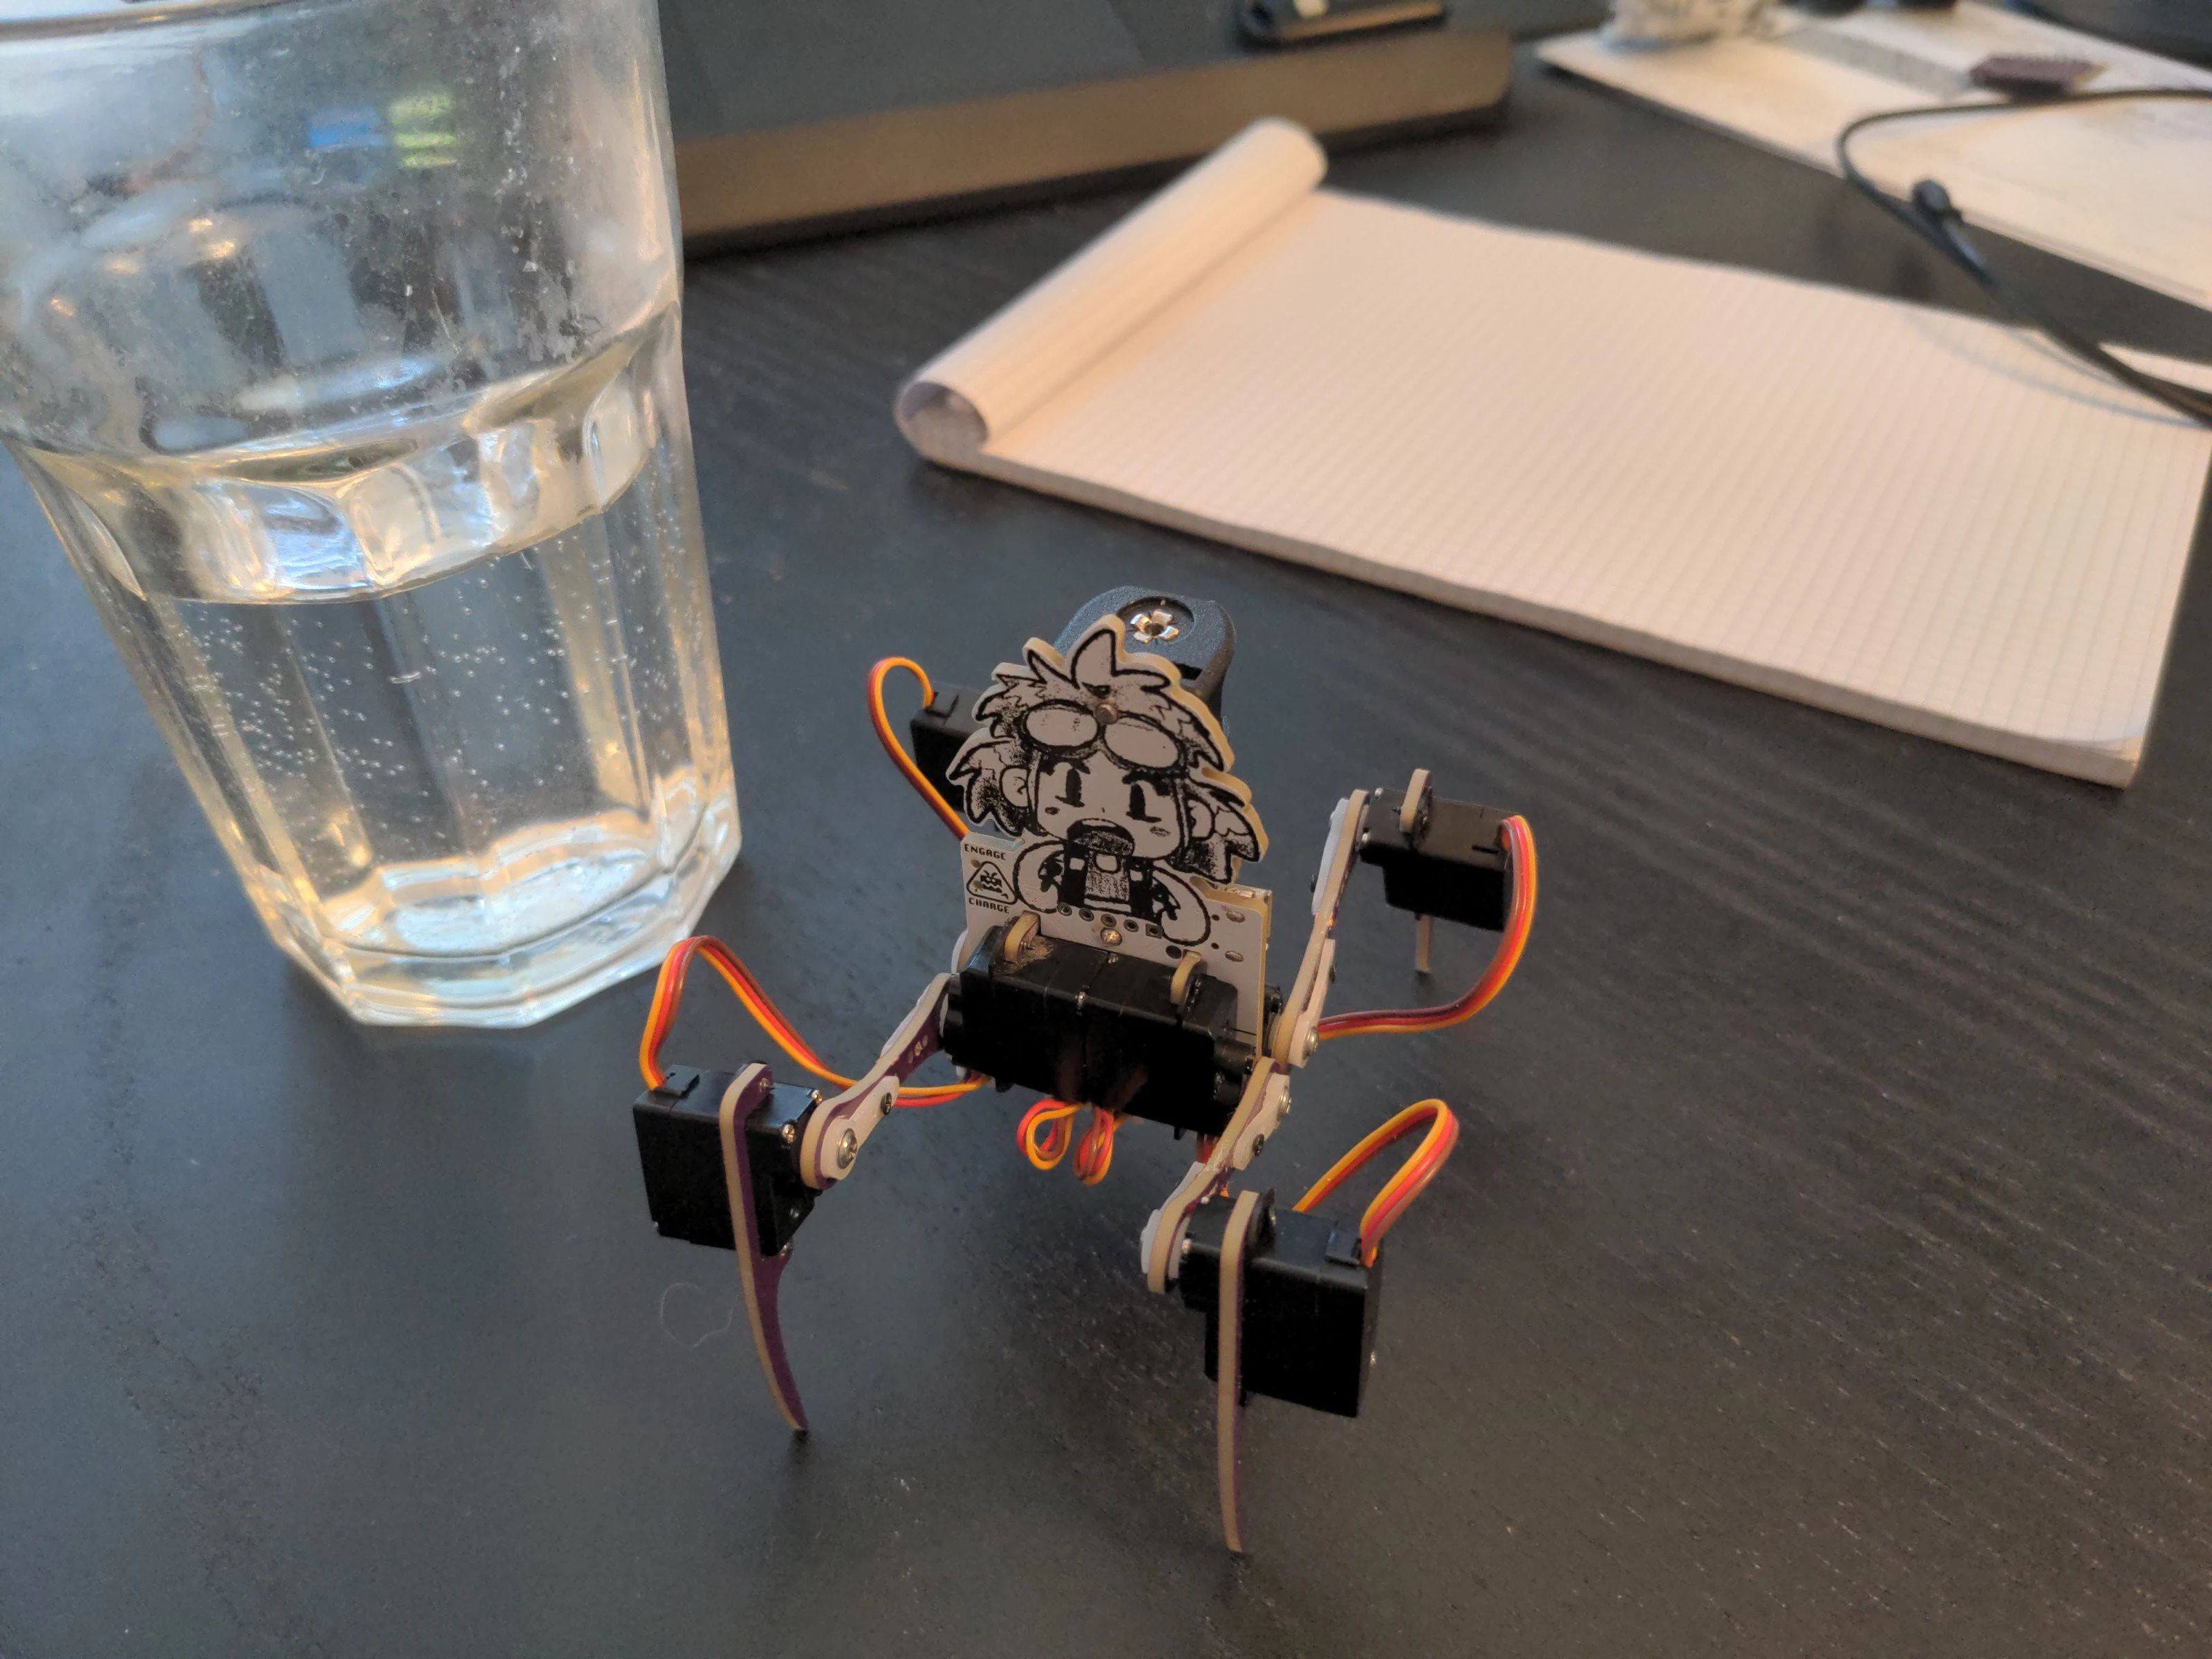
So I was finally able to get back to work on [the sound recorder](https://slrpnk.net/post/3586855). The general gist is that this is meant to be an audio recorder with transcription and email capabilities, which is also ruthlessly simple to use. There's one button. You push it, a recording says "recording" and it starts recording. You push the button again and it stops recording and says "stop". It now runs the audio file through a speech recognition program, and then creates and sends an email with the transcription in the body and the wav file as an attachment. Relatives can figure out what to do with the content from there.
Progress so far:
I'd planned to follow step 3 of the Pi Spy tutorial but found that DeepSpeech was no longer supported(?) and hadn't really been made with anything less than a Pi4 in mind (I'm using a 3b). Luckily, a bunch of other speech recognition options are available, and I settled on [spchcat](https://github.com/petewarden/spchcat/blob/main/README.md) mostly because it was the first one I found that fit my use case.
If you're going to install it on a raspberry pi, I very much recommend their [issues page](https://github.com/petewarden/spchcat/issues) for getting through dependency hell. Especially if you put a 64bit OS on your pi. (Remember to get the :armhf version of whatever library it needs.) Pulseaudio also seems to help.
This is a pretty short post, I mostly just wanted to make my updated code available. It's... not great. I'm not a programmer by trade, and I'm a strong believer in 'finished not perfect' even when I know what I'm doing. It seems to be functional, that's about all I can promise. Maybe don't let anyone shout bash commands around it. There's also still no error catching around the length of the recording, or the transcription, though that at least doesn't seem to cause any issues when it fails.
This is definitely more of a jumping off point than a proper finished product, but hopefully it'll be useful to someone who's trying to make the same thing or something similar. Even if it's not perfect, maybe it'll save you from repeating some of the work I've done so far.
We're going to do another trial run, see what her feedback is, and update from there.
The updated code is here: https://mega.nz/file/LQlz1BjQ#3R6E9_k1jfmjzFUcBXq_Qi3IGf46iuYtZ95fQlAO-HI
There are several DiY communities in the fedi but if we ignore the big centralized instances, there is:
* !diy@slrpnk.net
* !diy@beehaw.org
Perhaps each would consider mentioning the other sister community in the sidebar?
cross-posted from: https://lemmy.dbzer0.com/post/8721869
> Parts like sprockets, chains, hubs, BBs, etc are quite useful for projects to build tools, furniture, art. I get them at no cost by dumpster diving. Cleaning them is quite a pain though. These are some of the options I’ve considered:
>
> * dishwashing machine— if normal dishwasher detergent is used, I would expect it to corrode aluminum parts (correct? Can someone confirm or deny that?) Chains and /some/ sprockets are steel, right? Would they do well in the dishwasher? I wonder if there is some kind of alternative detergent that won’t harm aluminum since I always have to hand-wash an aluminum pot cover.
>
> * ultrasonic bath— this method strikes me as the most convenient and what I would expect someone who needs to clean lots parts to use. But there is a [risk of de-anodization if you use degreaser](https://invidious.no-logs.com/watch?v=ljsai1RpAo0). Some jewelers use ultrasonic cleaners with a cocktail of Mr. Clean and ammonia. Would that work well on bicycle parts, non-destructively?
>
> * Enzyme-based oven cleaner— I tested this on sprockets and it seemed to work quite well but doesn’t get into the nooks and crannies and dissolve any of the mud.
>
> * Enzyme-based drain cleaner— instructions say wait 6 hours, so i did not test it. Is that time perhaps just because it takes that long to spread down the drain and munch on large volumes of gunk? Perhaps it would work in less time on bicycle parts.
>
> * boiling water with dish soap— I hoped it would melt the greasy grime. The water was quite dirty afterwards but did not make much noticeable progress.
>
> * degreaser spray— did not test this. I just have degreaser for kitchen surfaces so maybe not the right stuff.
>
> * bicycle cleaning spray— kind of strange that this exists. Bicycles have many different materials and different kinds of grime. It did not do too well on greasy sprockets as far as I could tell.
>
> Question on the enzyme-based cleaners: enzymes are a bit pricey by volume compared to other cleaners. Is there a way to store and reuse them? Ideally I would like to pour a bottle of enzyme-based drain cleaner into a bucket and just always soak parts in that same bucket. Do those little guys multiply when you feed them? If the water is always dirty, will the enzymes always be too full to chow down on parts being added?
I'm thinking about my next photobash. I've seen photos of projects turning old, likely nonfunctional swimming pools into walipinis, but conventional wisdom has that there's a big difference between an empty concrete swimming pool and a proper foundation. That the sides will collapse without the support of the pool water, or the water table in the ground will lift the thing like a concrete boat and break it. Just the same, it's not uncommon to see abandoned swimming pools laying empty, looking more or less foundation-shaped. It seems like a very solarpunk thing, to turn an expensive-to-maintain luxury into something practical, a greenhouse that takes less energy to keep it warm.
So my question is: can it be done, especially if the pool is already nonfunctional and you're not worried about returning it to its original use? What steps/precautions should you take to make it last and safe? Reinforce the sides? Cut away part of the bottom? Add drainage around it?
Thanks for any thoughts
- •
- 6M
- •
'sup, comrades? i meant to do this thread weekly, but oops! forgot for a month. oh well - what do you have going on, what are you working on?
cross-posted from: https://beehaw.org/post/9211466
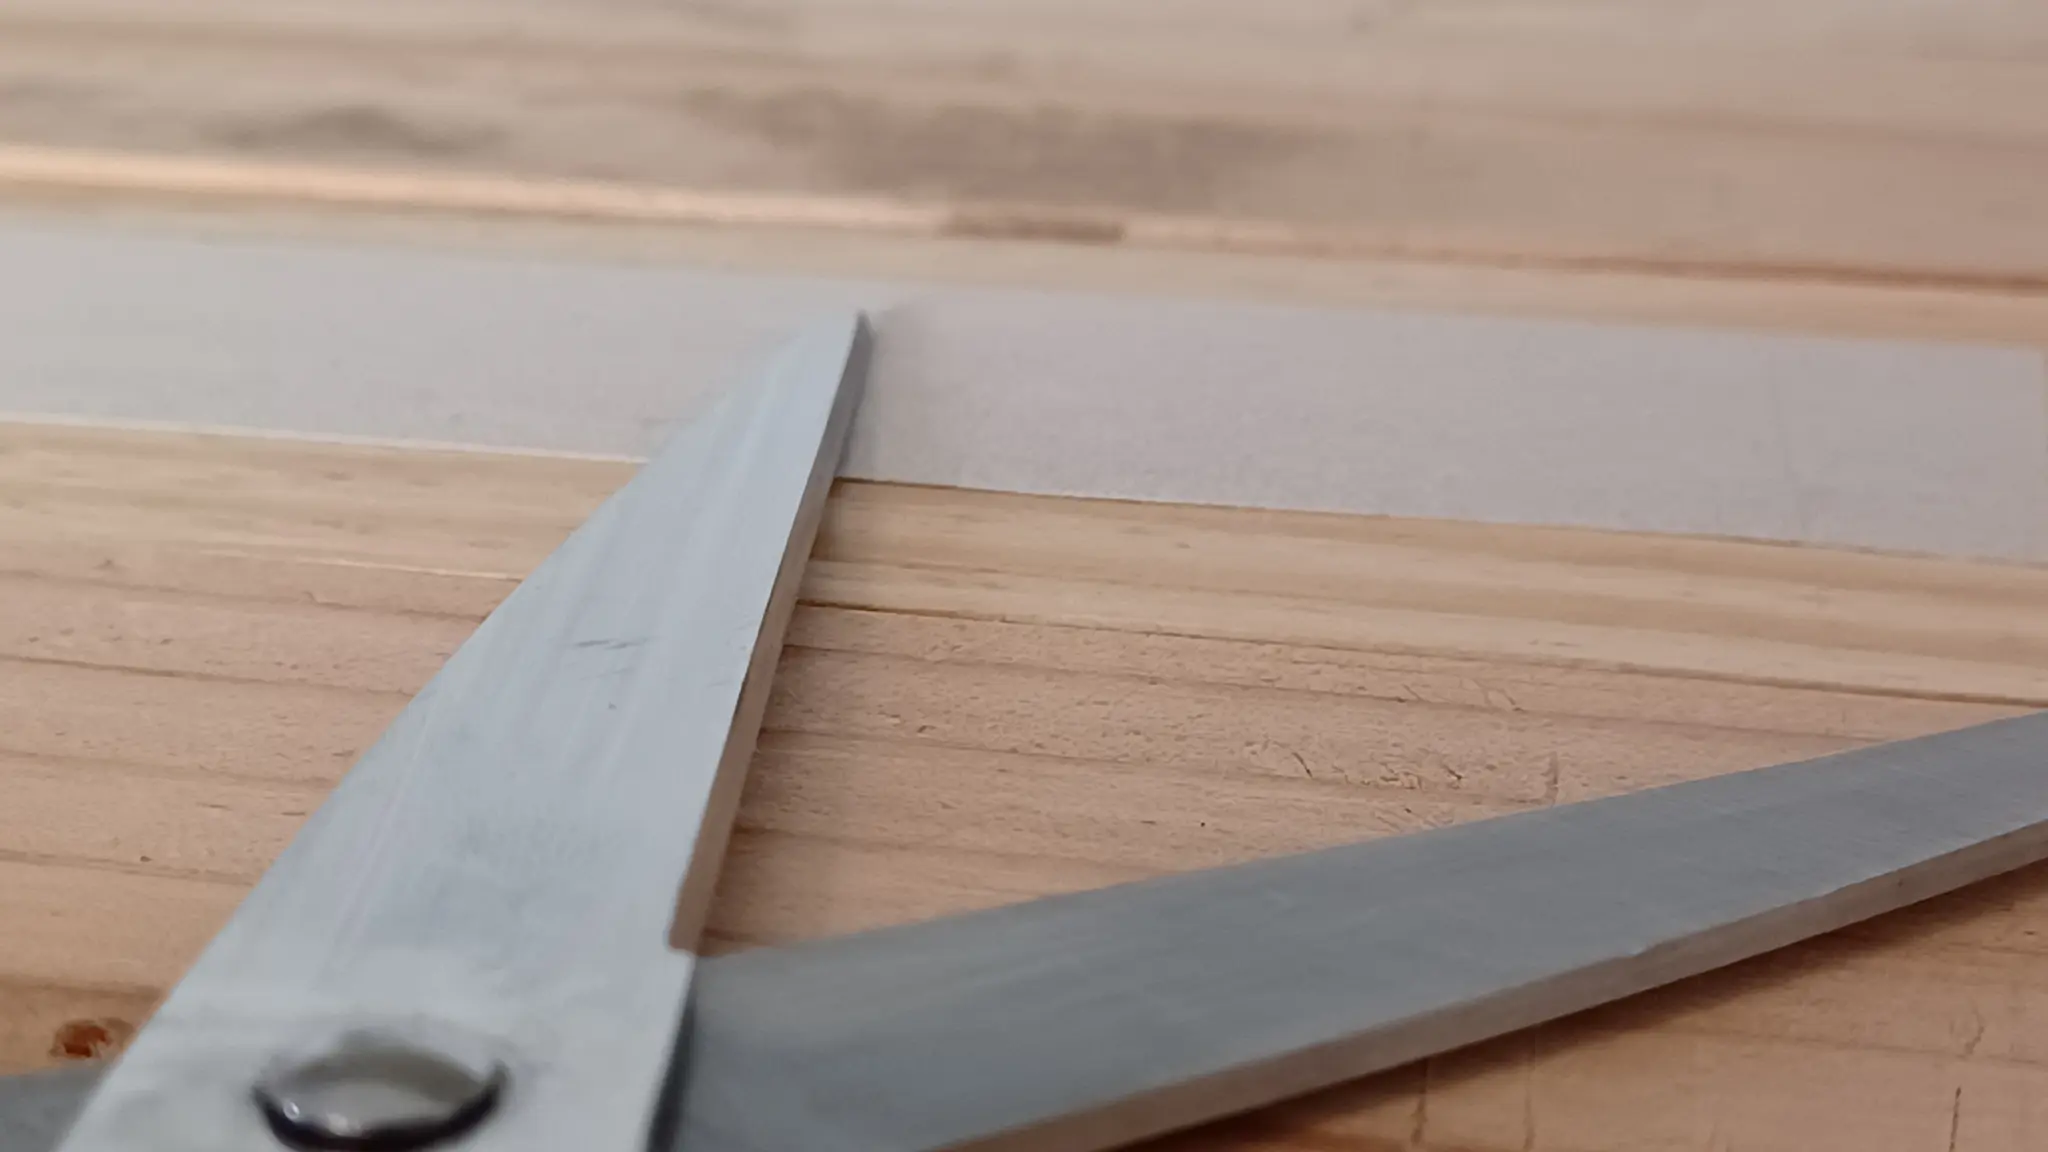
> I'm trying to learn how to sharpen scissors. I'm using a draw-filing technique. I'm not sure where I'm doing right or wrong. Anyone has any input? It's a little better than it was but it's definitely not as sharp as it could be. Gonna try attach some pics.
> 
My grandmother recently lost her vision. She wanted a sound recorder so she could continue writing/recording her stories, but she's never been comfortable with computers or small electronics, even when she could see them. One of the features she really wanted was automatic transcription voice to text. But all the voice recorders I could find online, even simple ones, seemed like they'd be hard for her to use. They had small buttons, recessed into the case (she has trouble feeling stuff like that), switches on the sides, multiple modes, screens she couldn't see, etc. After the last year of trying to find various devices for her, and of being frustrated at how overly complicated devices supposedly intended for the elderly and vision-impaired still are, I decided to just build something that would actually fit her needs. Unfortunately, I had just a week to do it in before I was heading up to visit.
The goals:
- It had to be aggressively simple to use. No modes, no settings, no buttons combos to remember.
- It had to support advanced features (transcription was one she really wanted, but just being able to get the voice files out to relatives easily was big)
- Sturdy design
I googled around and found [this tutorial](https://community.element14.com/challenges-projects/project14/spynerd/b/blog/posts/pi-spy-audio-recorder---part-1) for making a spy device from a raspberry pi. It was pretty much perfect - when it detected motion, the device was meant to record audio, transcribe it, and then send the transcription out to the 'spy' as an email. That was perfect - email is a robust system all my other relatives are familiar with, figuring out what to do with the files, renaming them, forwarding them as necessary is well within their abilities. Plus the email account could act as a backup.
I started with setting up a button. I used [this tutorial](https://raspberrypihq.com/use-a-push-button-with-raspberry-pi-gpio/) as my guide, and used an old arcade button left over from helping a friend build an arcade cab. I soldered a 220 resistor in line with the button per the tutorial. The arcade button was a good fit - it's designed for this kind of project and mounts easily to a hole drilled through a board, it's big and raised up, meaning its easy to find.
Then it was on to the python code:
The changes I had to make were mostly around the motion sensor. We were going to replace that with a single button. Push it once, it plays my voice saying 'recording' and starts recording. Push it again, it stops recording and says 'stop'.
It's been years since I wrote python code, but all I really had to do with identify the parts relevant to my requirements and make changes. I ended up using [this code](https://gist.github.com/D4koon/cf6b16a32bd278876286e74c1301202c) for preventing button bounce, since the built-in GPIO features failed to prevent it. The only change was a minor adjustment to the end of look_for_triggers() (which will show up in my code,) because it was preventing the second button press from being detected. I basically just stitched the button_callback() function to start_recording() and replaced the for loop in audioRecording() with a while loop to support variable-length recordings based on the button press. And I used pygame to play my voice audio.
The other change I added was to the email feature. I added some try and except error catching, so failing to send an email (like if her wifi goes down) won't crash the program. I won't be around to start it up again so I wanted it to be robust, and to degrade gracefully. I explained that if it says 'email error' after 'stop' that just means it couldn't send an email, but the file is still saved and the program still works.
After getting email to work, the next job was to make sure the program ran as soon as the raspberry pi booted up. My grandmother has lots of friends who love to help, which often means unplugging things, moving them around, losing them, finding them, reorganizing her house, and mailing back audiobooks she hasn't listened to yet. I needed this thing to be able to survive power loss and general curious fiddling. And if it crashed, power cycling would be an ugly but functional way to restart the program.
I used [this guide](https://www.dexterindustries.com/howto/auto-run-python-programs-on-the-raspberry-pi/) and modified the line to say @reboot python3 /home/audio/sound_recorder_good.py
Once that was done, I found I had to replace the 'input("Press enter to quit")' line at the end of the main function with an endless while loop, because the program was no longer running from the terminal and couldn't use input.
You can find my code here: https://mega.nz/file/OJV1hZJB#pVeddKWKu6EwC6yxiMMsSVSCQdoTUkhtcfWM6ryAYIw
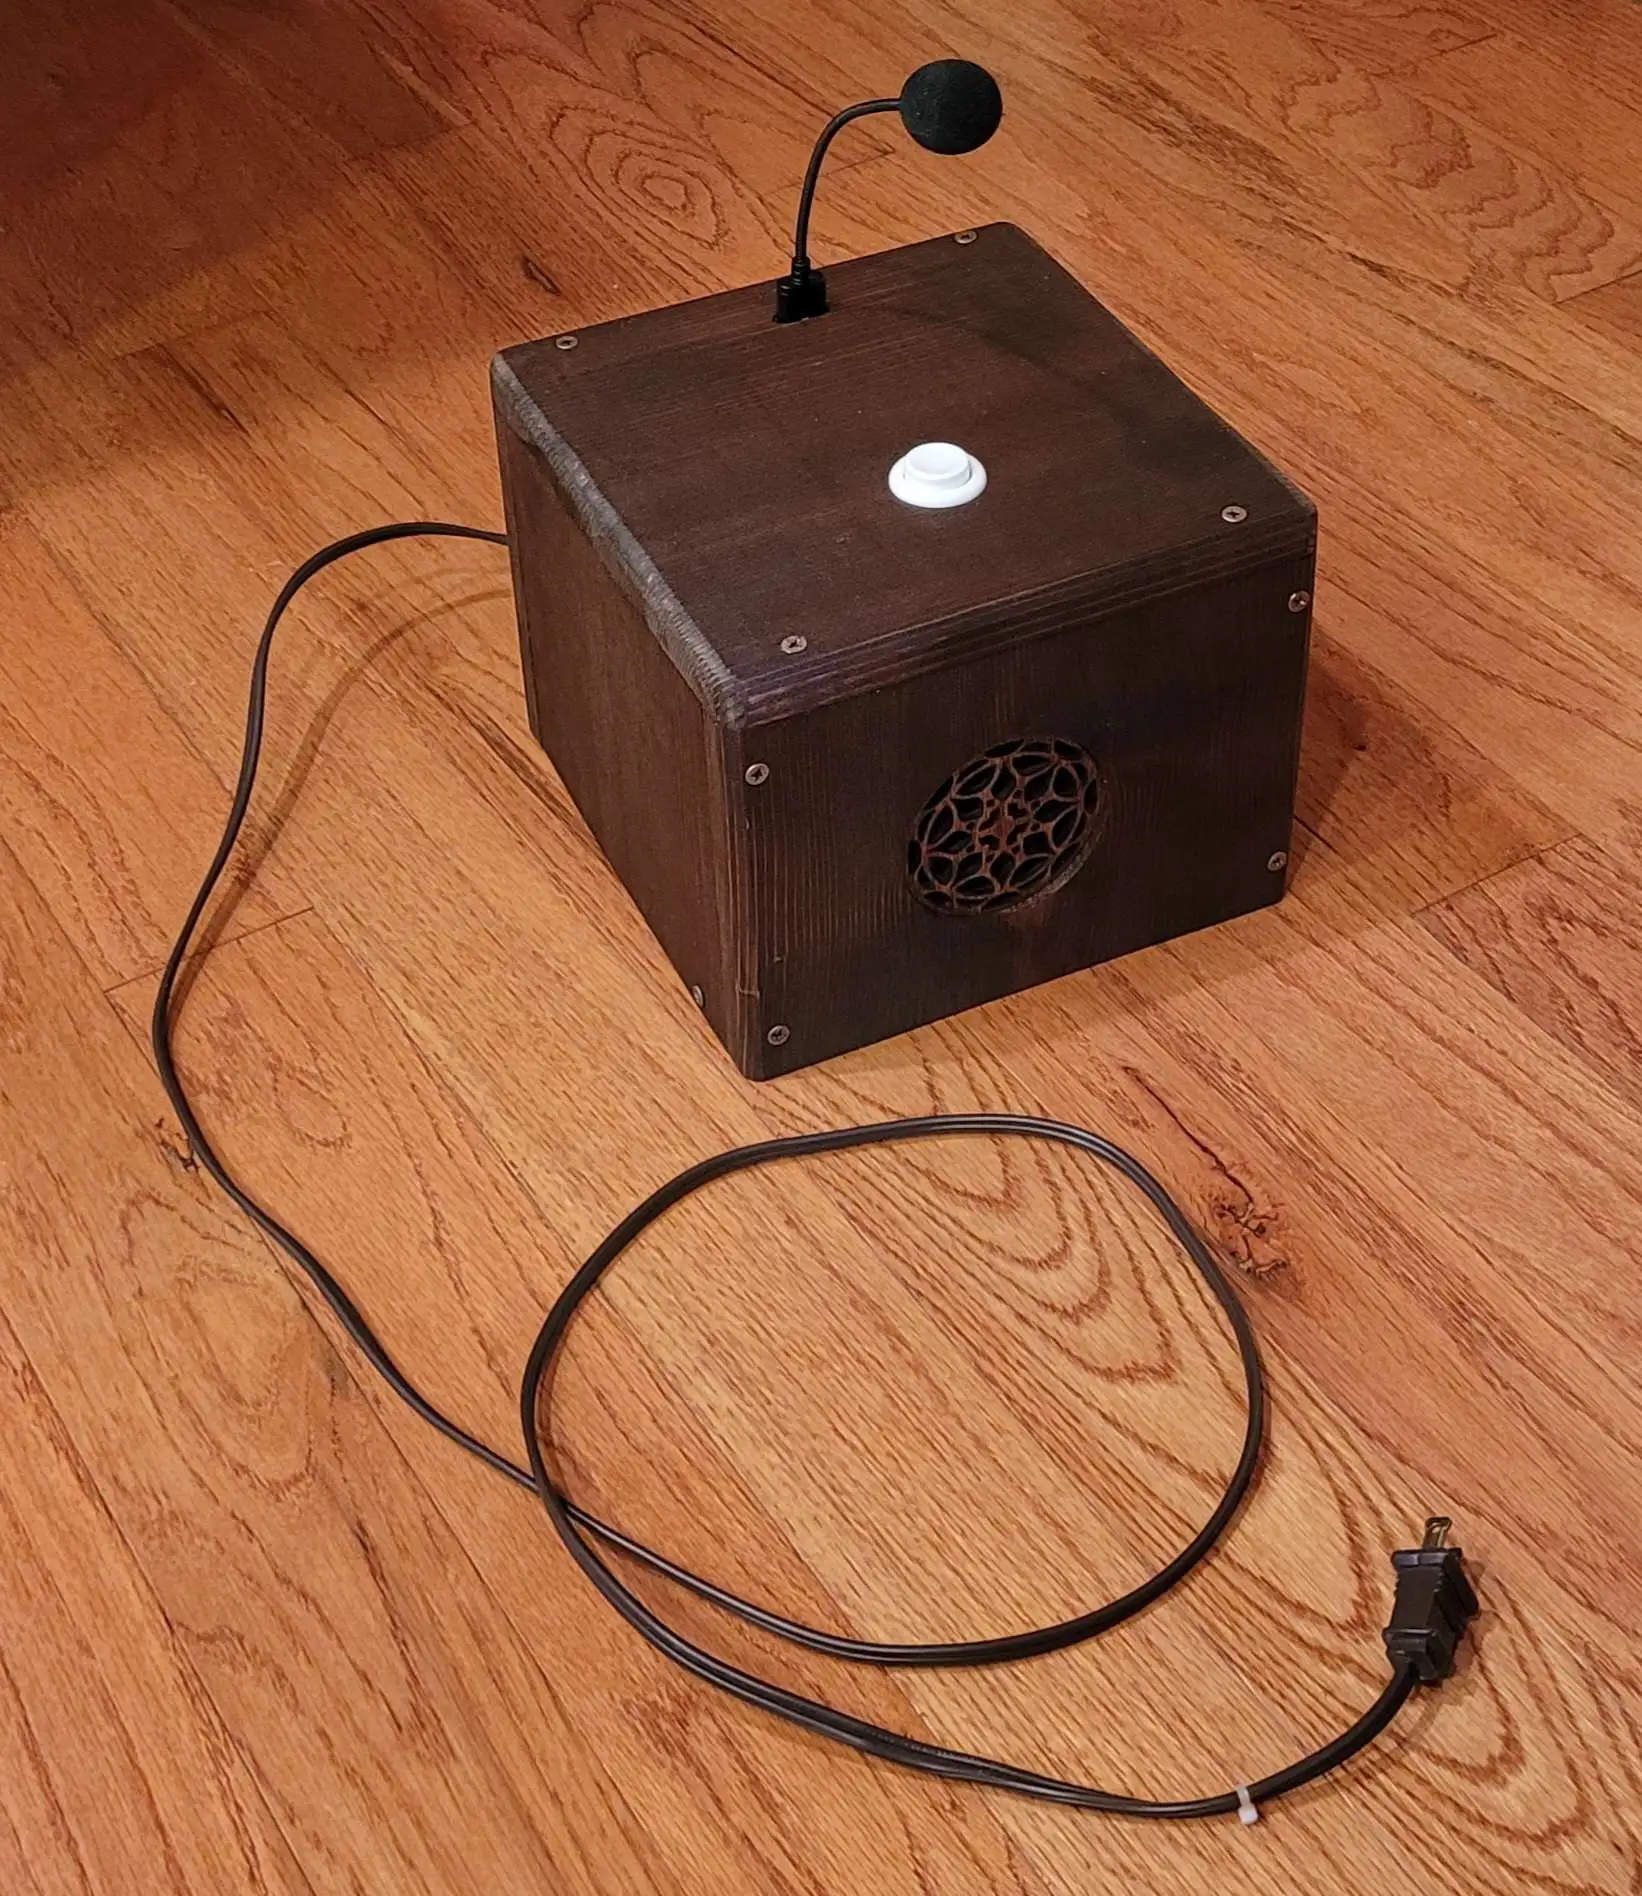
At this point, it was pretty reliable, so I started work on the physical case. It's basically just a wooden box containing the pi, a button, a speaker, the microphone, and built to keep people from opening it up, unplugging components, or fiddling with the speaker settings.
I wrote the woodworking part up with pictures here: https://imgur.com/a/xiVjvdQ
The last of the setup was just connecting it to my grandmother's wifi, packing it all into the case, and making sure it still worked before showing her how to use it. She was very pleased with the overall design, she's going to test it for a couple weeks while I'm away, and if she wants, I'll add transcription and urethane the case when I get back.
Hello, everyone. For the past few months, I have been renovating my father's basement, building an apartment for myself. The water, electrical, subfloors, and walls are in. All that really remains are the Kitchen Sink, the kitchen floor, and the doors. (And the bathroom, but thats another can of worms. And the ceiling.
I have been going back and forth on the ceiling for a while. I have been resisting drywall, and my dad is dead set against it; there is a lot of infrastructure down there that would both make it difficult to install, and needs to remain accessible. Furthermore, its only 8feet to the joists, so losing half an inch is kind of a problem. I had considered leaving it alone. I really liked the exposed look, and was even looking into Joist Shelving.
The last few weeks have proven to me though, that I really need to soundproof the ceiling. There is an entire cottage industry on youtube based around recommending soundproofing products. I had one handyman recommend streamer foam, which is different from accoustic foam (apparently!?), Ive seen people recommend Green Glue, and then someone else say, you get the same results with carpet glue. I see some people say Mass Loaded Vinyl could be useful, and then some one else say its expensive and supplemental (but might still be handy for pipes and HVAC). I was looking at sound proof blankets, and the big blocks of Styrofoam insulation they sell at home depot. I was considering hiring someone to install a drop ceiling.
Does anyone have any insight that might help me? I have nothing up in the ceiling currently. I have no real issue mixing and matching solutions, although I am somewhat still resistant to drywall ceilings.
- Rolivers English
- •
- 7M
- •
This type of battery seems quite easy to DIY. Cheap materials, relatively safe, not flammable.
You can either maken individual cells or make a flow battery which is theoretically infinitely scalable. You'd be limited by the size of the electrode in how much power this battery can deliver.
Has anyone here tried to make a flow battery? And did you have any success with powering something large and energy consuming?
I guess it would also be possible to make a battery out of old buckets, carbon fiber mesh and separator material such as glass fiber.
Hi all
I have an electric kettle I use to boil water often. I bought is because it is stainless steel, except for the indicator to see the water level. Of course this plastic part is now leaking...
Does anyone have an idea how to fix it? My idea would be to fill it with silicone, but not sure if that is safe for use with foods
- •
- 8M
- •
'sup, comrades? i figured we could maybe do with a weekly DIY thread on what we're working on, inspired by the rad "Show & Tell" thread from two weeks ago.
what do you have going on, what are you working on?
- @Kayel@aussie.zone English
- •
- retr0.id
- •
- 8M
- •
Hi all, I'm reaching out to the community to help with the design of a hex clock.
I'm honestly very lost on where to start. My current plan is to buy some gears and make a large monstrosity which is unlikely to fit on a wall. Does anyone have a more elegant suggestion?
It's following the general design of a clock with two main differences:
1. There are 256 seconds in the second hands rotation.
2. There are 4 hands, the 4th of which measures ~136 years in a rotation.


- •
- mastodon.social
- •
- 8M
- •

Seems interesting as a YT alternative for show-casing DIY projects.
Most of this sub is links to youtube tutorials. Lets flip that! post something you completed, is a WIP or tell us about something thats a Dream DIY of yours.

- •
- www.youtube.com
- •
- 8M
- •
#arduinoprojects #arduino #diy In this video, i am going to show you how to make your own game console using the Ardunio, 3d printer and wrote games for it(...

- •
- i.imgur.com
- •
- 8M
- •

*x-posted from [/r/DIY](https://old.reddit.com/r/DIY/comments/169gtcp) by [/u/jndb](https://old.reddit.com/u/jndb)*


**Hi DIY punks!** I need a little help with something. I've been trying all sorts of ways to home carbonate things as sustainably as possible. Most have not really worked out as intended, but I'm really really close on this latest attempt. This version is to connect a CO2 tank to a whipped cream dispenser.
Basically, the path from the *tank* looks like this:
- 5 lb CO2 tank → dual gauge primary regulator.
- Regulator → 5/16" hose.
- 5/16" hose → [5/16" barb to 1/8"NPT male](https://www.amazon.com/dp/B087Q8ZFY4).
- 1/8"NPT male → [1/8"NPT female to 8mm female quick disconnect](https://www.amazon.com/dp/B09YQ3CYFQ).
- [8mm female quick disconnect → 8mm male quick disconnect to 3/8"-24UNF female](https://www.aliexpress.us/item/3256804642965636.html).
...and the path from the *dispenser* looks like this:
- [1Qrt ISI Gourmet Whip](https://www.amazon.com/dp/B002NY6PVO) M22 Male → M22 Female.
- M22 Female → "mystery hose".
- ["Mystery hose" → "Mystery connection" male](https://www.ebay.com/itm/404349729638).
So, I need an adapter to hook up the 3/8"-24UNF female to the mystery connection. It seems to start screwing in for a couple turns, but then won't go any further, so my guess is that it's the same diameter with different threading? Note that, in the link for the mystery hookup, I removed the TR21-4 at the end, because that's for directly hooking up to a small tank. The mystery connection I'm talking about is the male threaded part you can see screwing into the TR21-4 connector.
It doesn't seem like many people are doing this, or know what most of the industry standard connections actually are. See this thread [here](https://engineering.stackexchange.com/questions/52673/what-is-the-standard-connector-on-reusable-whip-cream-dispensers) for example. Consequently, I have no idea if the mystery eBay hookup I bought even *works*, despite that being its entire purpose. The interior of the CO2 cartridge puncturing mechanism is a black box to me, so I'm just trusting this M22 connection is all that's required. There's definitely some kind of one-way valve in there, but hopefully it doesn't somehow require being "pushed" by the cartridge itself.

cross-posted from: https://slrpnk.net/post/1581214
I posted this to [zerowaste](https://slrpnk.net/c/zerowaste) since it's all made of old lumber I found on trash day or got from my local Everything is Free page, but I know the DIY community is a bit more active so I thought I'd share it here too. If you like this sort of thing, I've got more posted over there.
> There are bats living around my parent's house. I wanted to build them a house of their own. They seem to like the barn - we think the scratches on the wall below the eaves might be from bats landing and climbing their way up into shelter. They only seem to exist below the eaves, so I'm hoping that's a good sign that they'll notice their new house quickly.
>
> If you've seen my other posts here, you'll know I try to make everything I build out of old materials, stuff I find on trash day, pull from construction debris, or get from my local Everything is Free page, so that was part of the challenge of building this one. I pretty much managed it - the only thing I bought new was the caulking I used to seal the joints, everything else, wood, stains, screws, bituthene, etc was all old stuff.
>
> I started with a kind of motley collection of materials but I like the challenge of finding secondhand stuff that'll work. On the uphand, I didn't have to cut up bigger lumber just to make the spacers, they were all small scraps from other projects. I don't remember where I got the nice piece of half-inch cabinet plywood. The 3/8" plywood came from a fellow I met through Everything is Free, and the pine boards were found on trash day.
>
> I followed [this guide from the state of Massachusetts](https://www.mass.gov/doc/build-a-four-chamber-bat-house/download) as closely as I could since we're in a similar region, though I had to make it slightly narrower than the specified 17.5 inches because of the dimensions of the 1/2" plywood. I also made the roof slightly wider, because the board was already that length and it seemed like it would offer additional protection, so no need to shorten it.
>
> We had access to a laser cutter through a local makerspace, so my SO and I decided to burn a paisley pattern into the smaller panels just as a quick flourish. I'm actually very pleased with how that little detail looked on the finished version, and it's something I'll play with in future furniture building projects. The sides were slightly longer than the laser cutter's working space, so I had to carve a little of the pattern by hand, but once it was stained they blended in pretty well.
>
> The instructions tell you to cut groves into the interior surfaces to make it easier for the bats to climb. For most of them I did regular horizontal lines, 1/4" to 1/2" apart, but I got bored a couple times and cut climbable murals instead. I tried to emphasize lots of horizontal handholds, and I made sure that each compartment got at least one regular 'ladder' too. Given that they seem to already be climbing the wooden siding of the barn, I think they'll still find this pretty usable.
>
> The instructions all said to stain it with water based stain so the fumes/smell wouldn't bother the bats. I did all the interior surfaces with a can of expresso water-based stain and the outside surfaces with two coats of oil-based stain for improved water resistance (and because I ran out of the water-based stuff). I left all the panels leaning upright on our porch for several weeks so they could offgas with good ventilation, prior to assembly. All the stains came from Everything is Free.
>
> I decided to stain the paisley panels with red mahogany stain and the rest with two coats of ebony to give them a little more contrast. This left the roof and front stained black for maximum sun-warming. On the front paisley panel, which had a frame around the pattern, I did my best to do the inside in red and the frame in black, to match the sides. It was all pretty much hidden by the very distinct grain that piece of plywood happened to have. A prestain might have helped, though I mostly wish I'd had more of the cabinet plywood I used for the upper front and back.
>
> I started assembly by attaching the back to the sides, and started that by caulking the joint. The silicone caulking was the only thing I bought new for this project. I could probably have kept asking around until I found some, but I settled for giving the rest of the tube away on Everything is Free because I didn't think I'd use it for anything before it expired. The directions emphasized that you really want a good seal everywhere except the specified vents, because the bats need to be warm and dry, so I made sure to seal all the exterior joints well.
>
> Once it was all assembled, I added a coat of oil-based urethane to the top and sides of the roof to help with water resistance. If it warped, that could allow drafts and additional moisture intrusion. I also added little bits of trim to the sides under the roof, after sealing that joint a second time.
>
> We hung it partly using some metal strips my dad had from past projects, for attaching chimneys to the roofing around them. They were galvanized and a kind of corrugated pattern. I found two sets of two where the existing holes lined up, and drilled two new ones in each set so they all had four. Then I painted them and attached them to the back.
>
> Another relative provided a scrap of bituthene which we stuck/stapled to the roof for additional waterproofing.
>
> Once it was ready, I pushed it to the top of a tall ladder leveled it against the wall, and put two screws through each metal bracket, then two screws through the landing strip at the bottom, and two toenailed in through the vents on the sides. I'm told that was overkill but I really didn't want any bats we housed to fall off the wall someday. At this point, if it goes, it'll take the siding with it.
You are not logged in. However you can subscribe from another Fediverse account, for example Lemmy or Mastodon. To do this, paste the following into the search field of your instance: !diy@slrpnk.net
Share your self-made stuff and half-baked projects here.
Also check out !diy@beehaw.org
There is also a related XMPP chat.
- 1 user online
- 1 user / day
- 4 users / week
- 25 users / month
- 85 users / 6 months
- 1 subscriber
- 116 Posts
- 385 Comments
- Modlog
- mods:
SLRPNK

Solarpunk imagines a world in which today’s existential threat - the climate crisis - is being approached with camaraderie and adaptive ingenuity.
Basic Rules:
- be constructive: there is no need of another internet space full of competition, negativity, rage etc.;
- no bigotry, including racism, sexism, ableism, transphobia, homophobia or xenophobia;
- be empathic: empathy is more rebellious than a middle finger;
- no porn and no gore: let’s keep this place easy to manage;
- no ads / spamming / flooding, we don’t want to buy/consume your commodified ideas;
- occasional self-promotion by active members is fine.
For any community related question or to just test some function: !meta@slrpnk.net
Try our Photon & Alexandrite frontends.
We also host a lightweight frontend.
All accounts also work with XMPP chat automatically incl. our Movim client.